Getting Started:
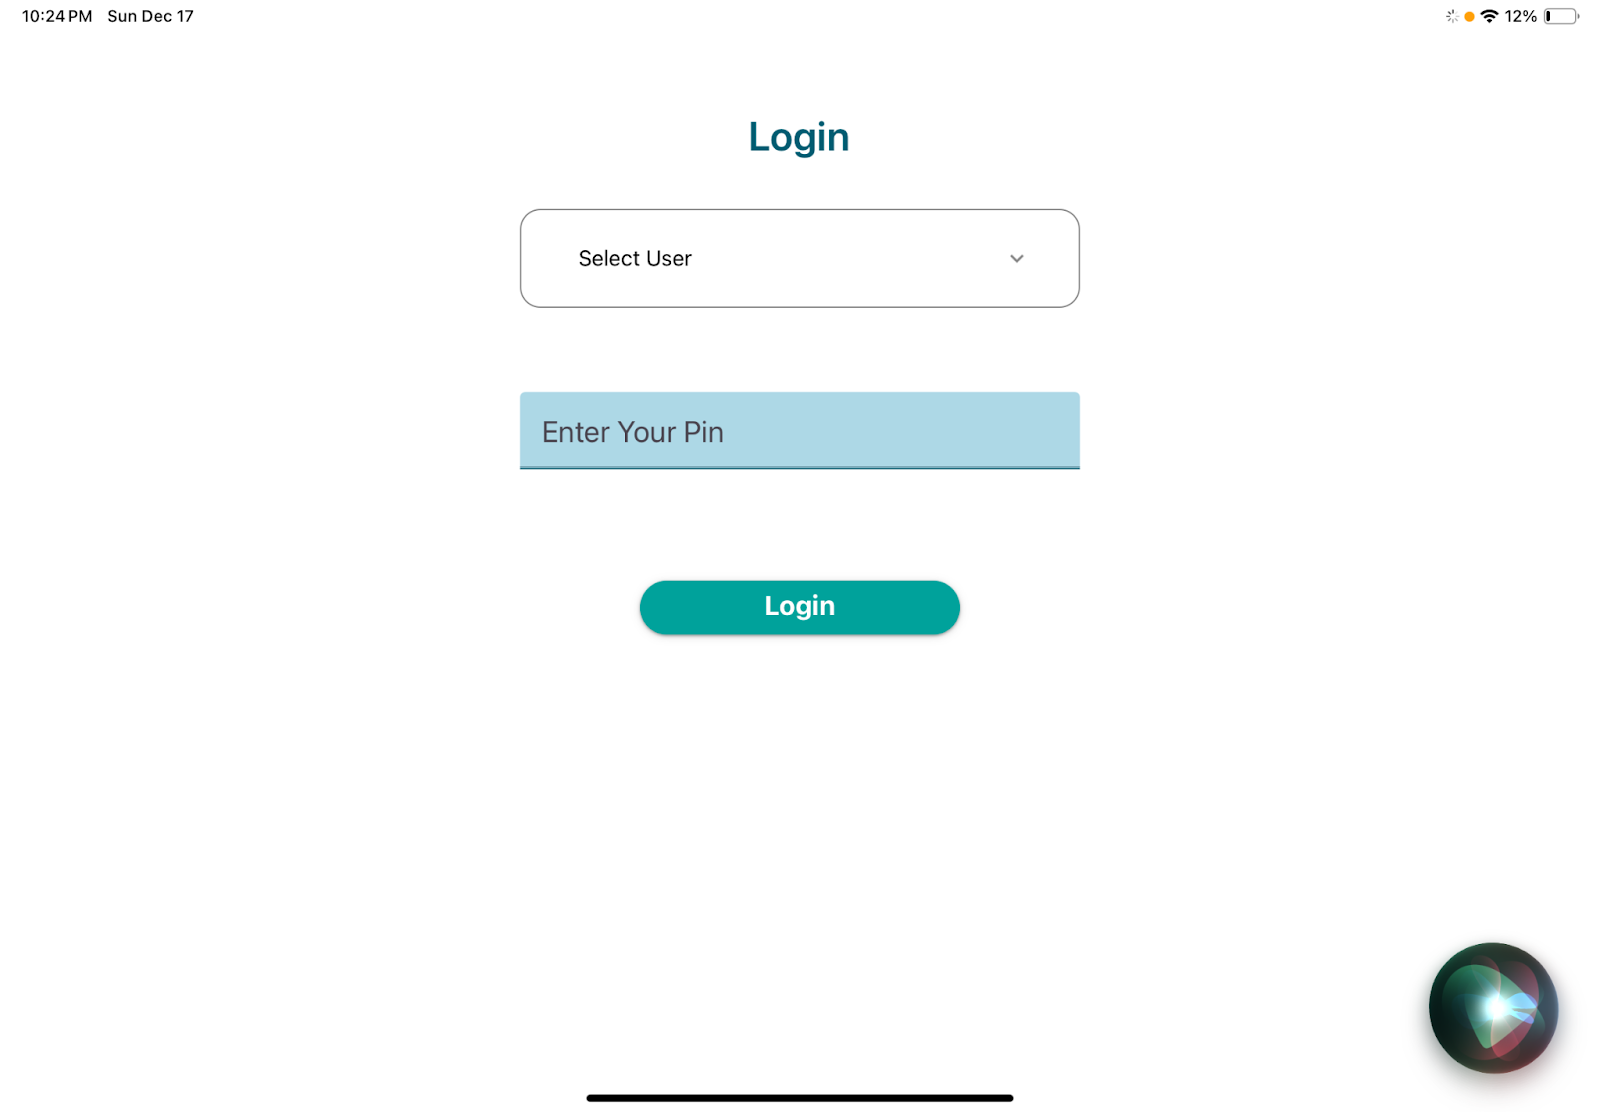
Log-In to the PathSpot SafetySuite App on your iPad
- Open the app titled: SafetySuite
- Select your User from the drop down list

- Enter the specified pin and you will be logged in. If no pin has been set, you will be able to create a new pin at this point.
Printing Labels:
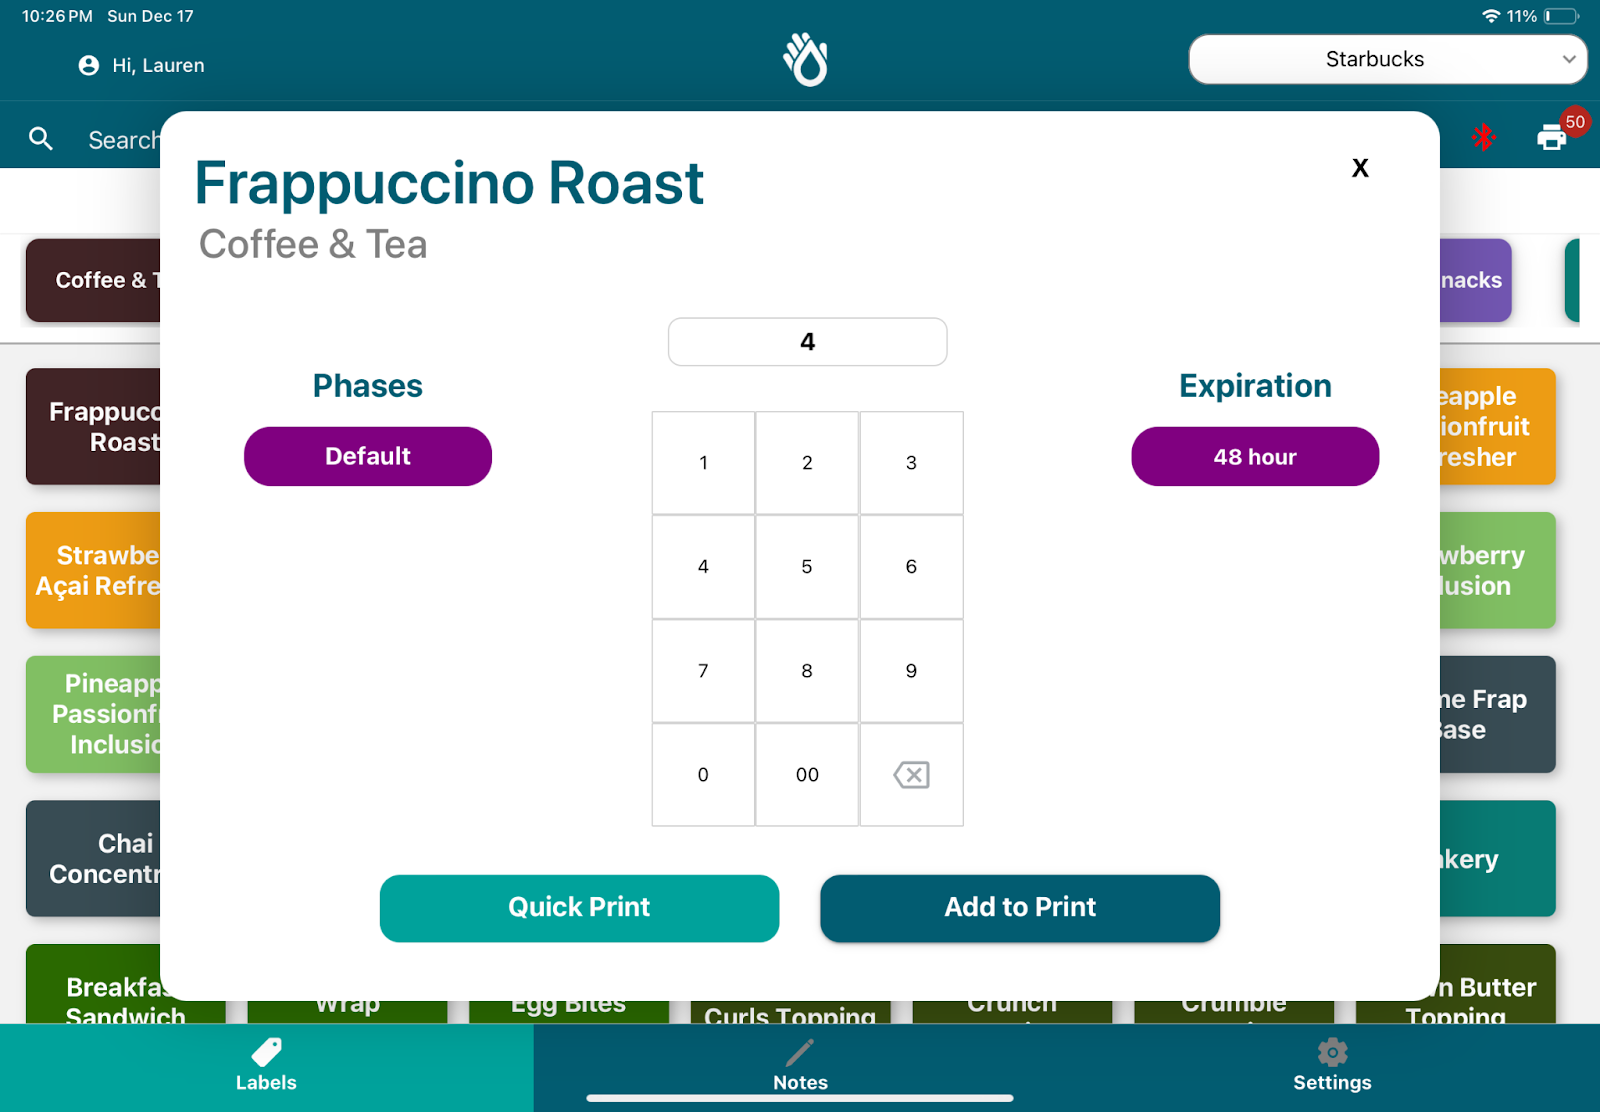
How do I print labels?
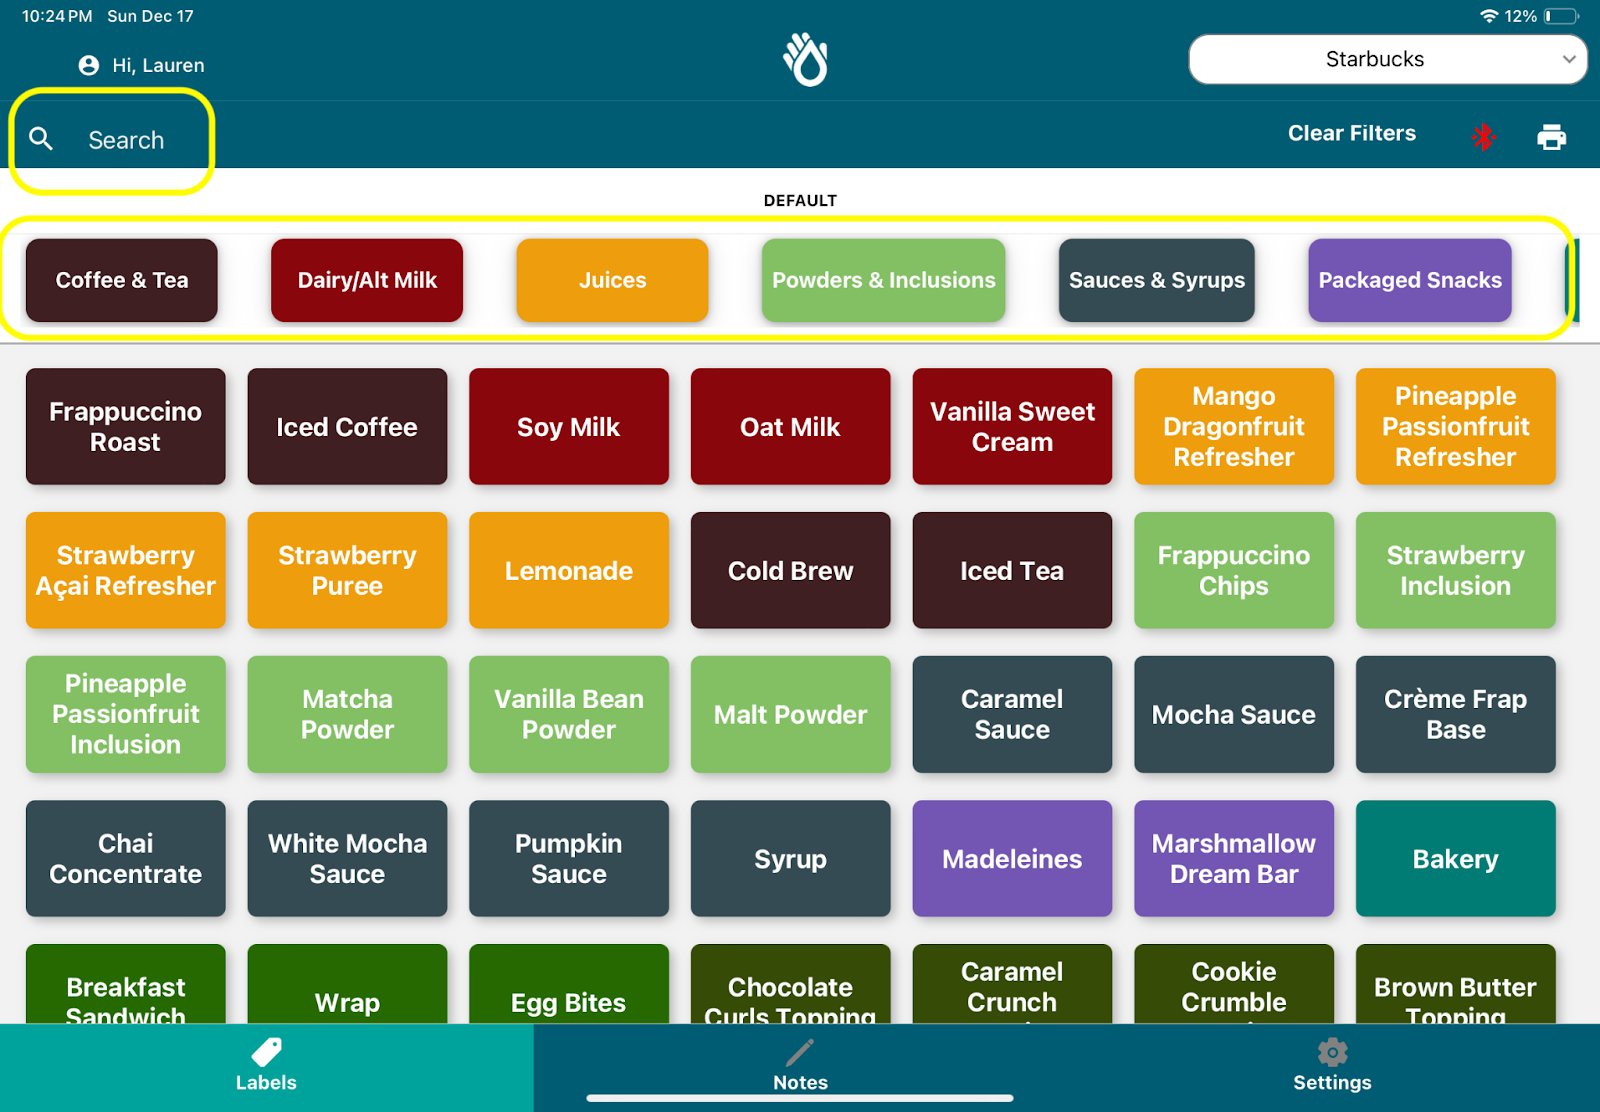
- Navigate to the Labels tab, located at the bottom of the screen on your in-store tablet.
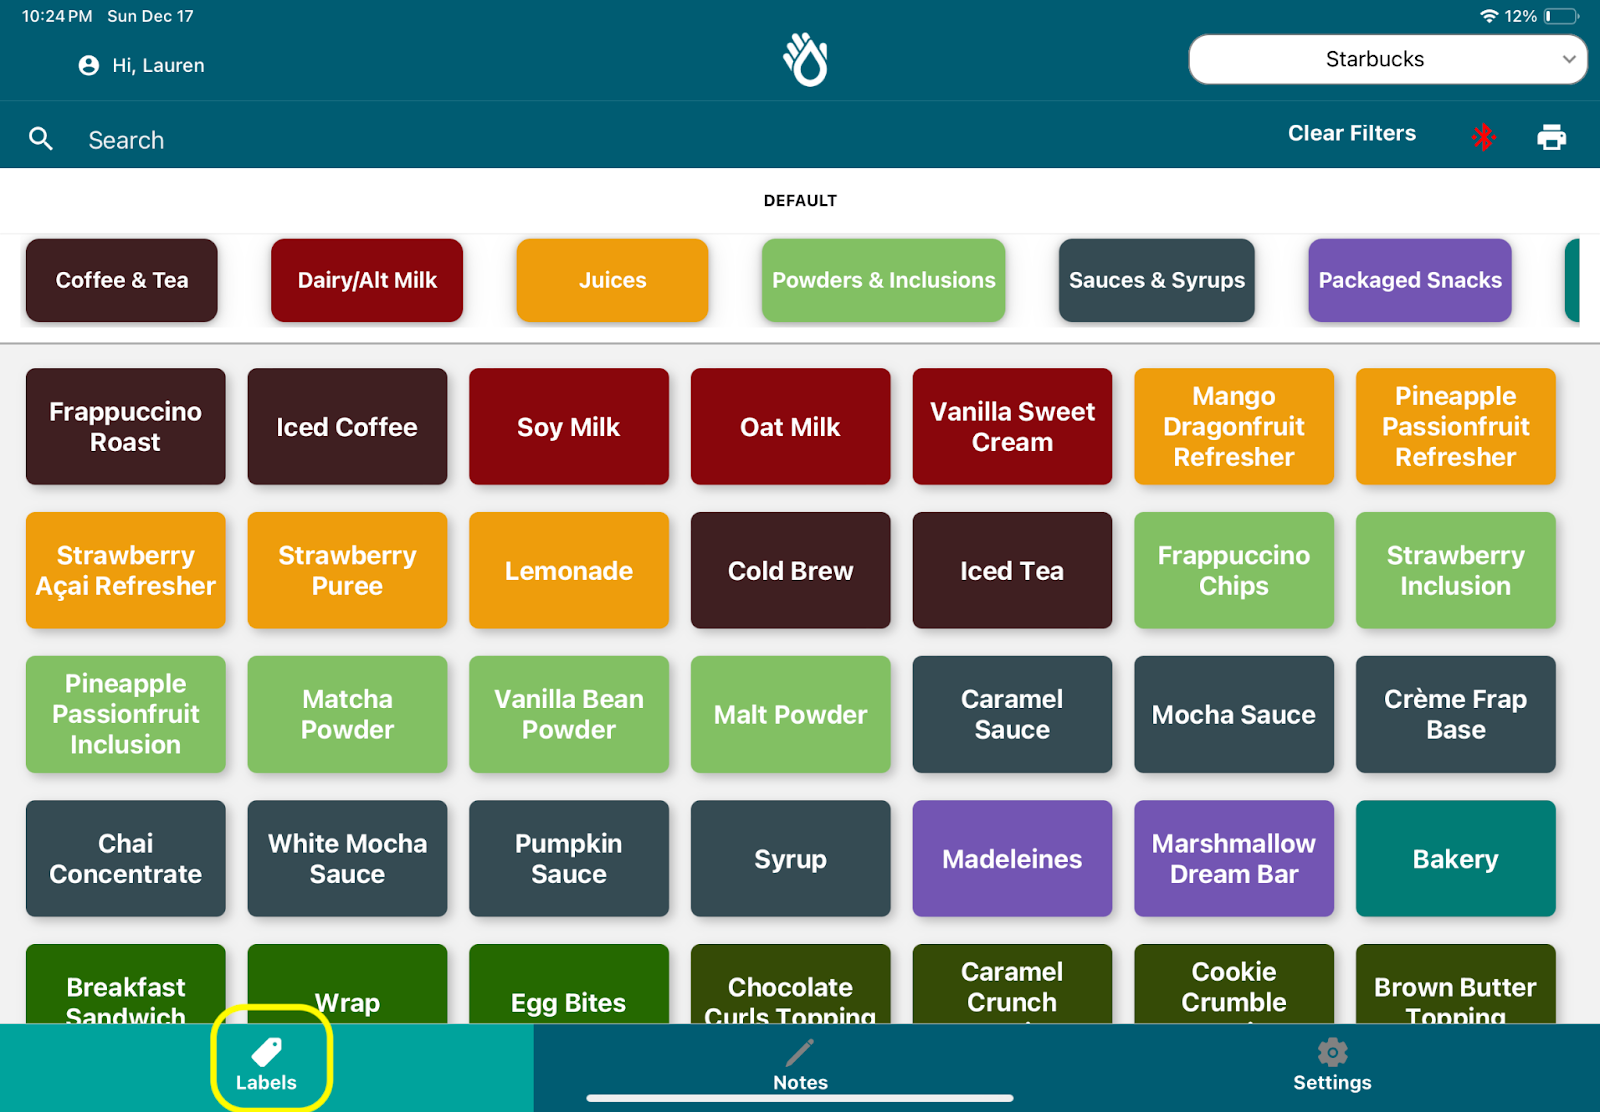
- Use the search bar to search for the item name or the quick category filters available right under the search bar to limit your options.
- Click on the item you want to print out.
- Here you will be able to select:
- The quantity of labels you would like to print
- Refrigerated/non-refrigerated (if applicable)
- The option to ‘Quick Print’ the label or add to a print queue to print later
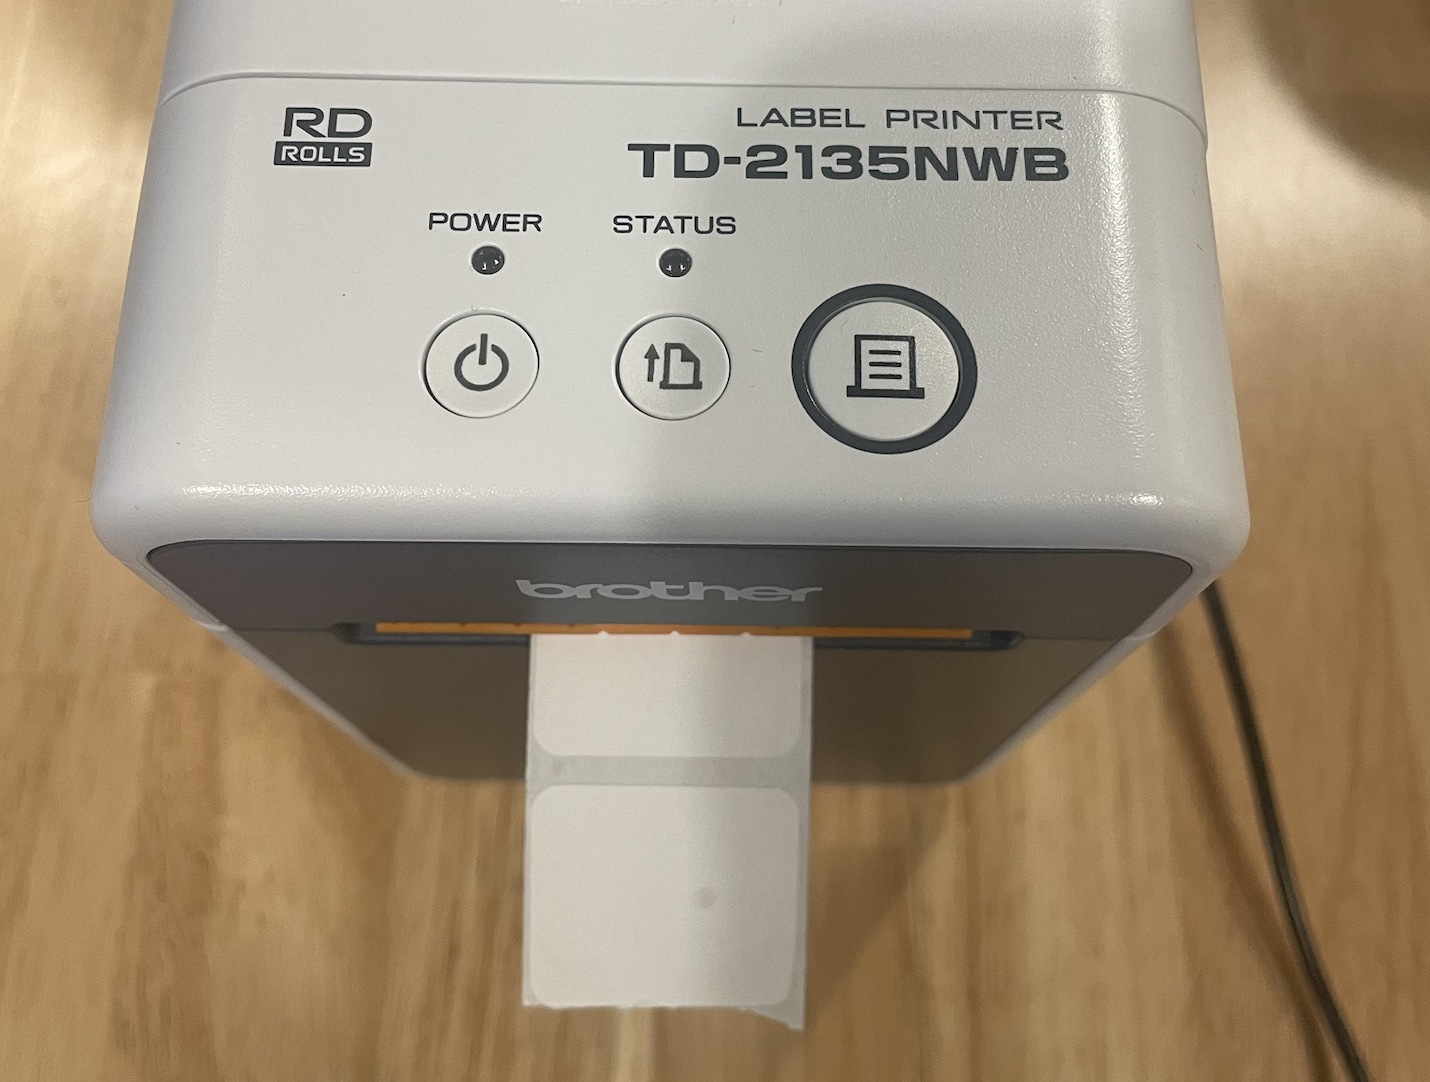
Replacing Label Rolls in the Printers:
Each roll has approximately 2,500 labels on it. Once used up, the roll will need to be removed and replaced to allow continued printing. Follow the steps below to replace the label roll in a printer:
- Open the printer, using the cover release levers on the left and right side of the printer (towards the front).
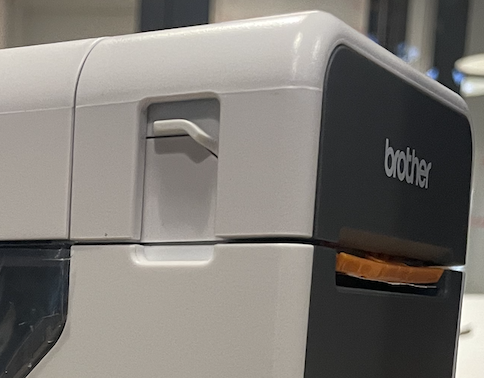
- Select a new label roll of the type that is appropriate for this printer. The printers are labeled with either “Dissolvable” or “Removable” to specify which label type it should be filled with.
- Remove the old label roll from the printer and discard the core and any remaining bits.
- Insert the new label roll so that the labels are facing up.
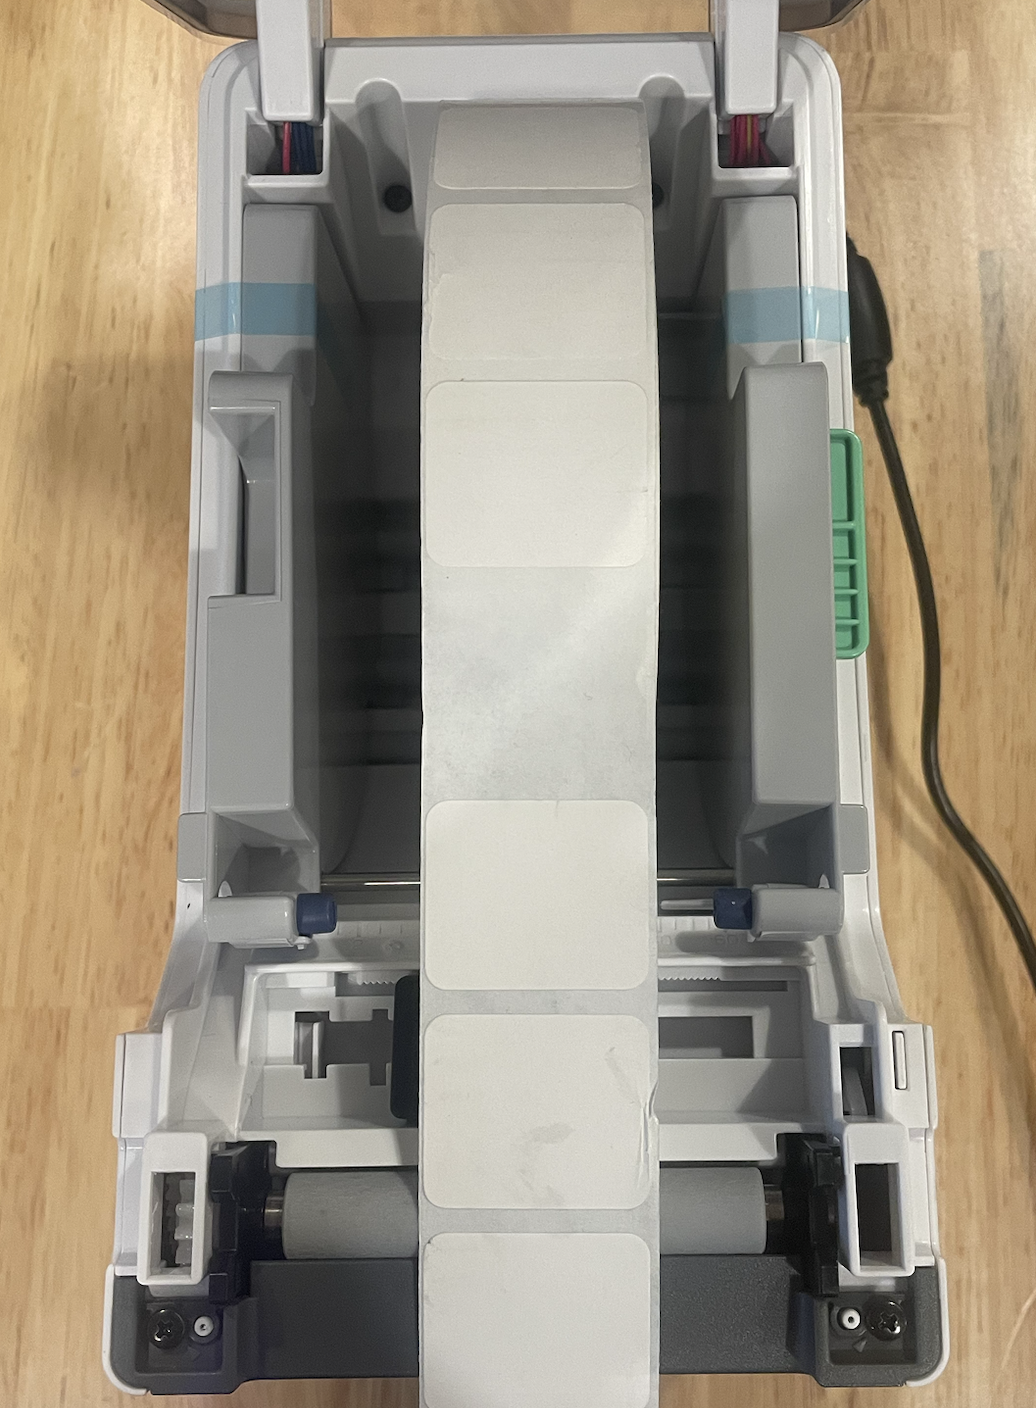
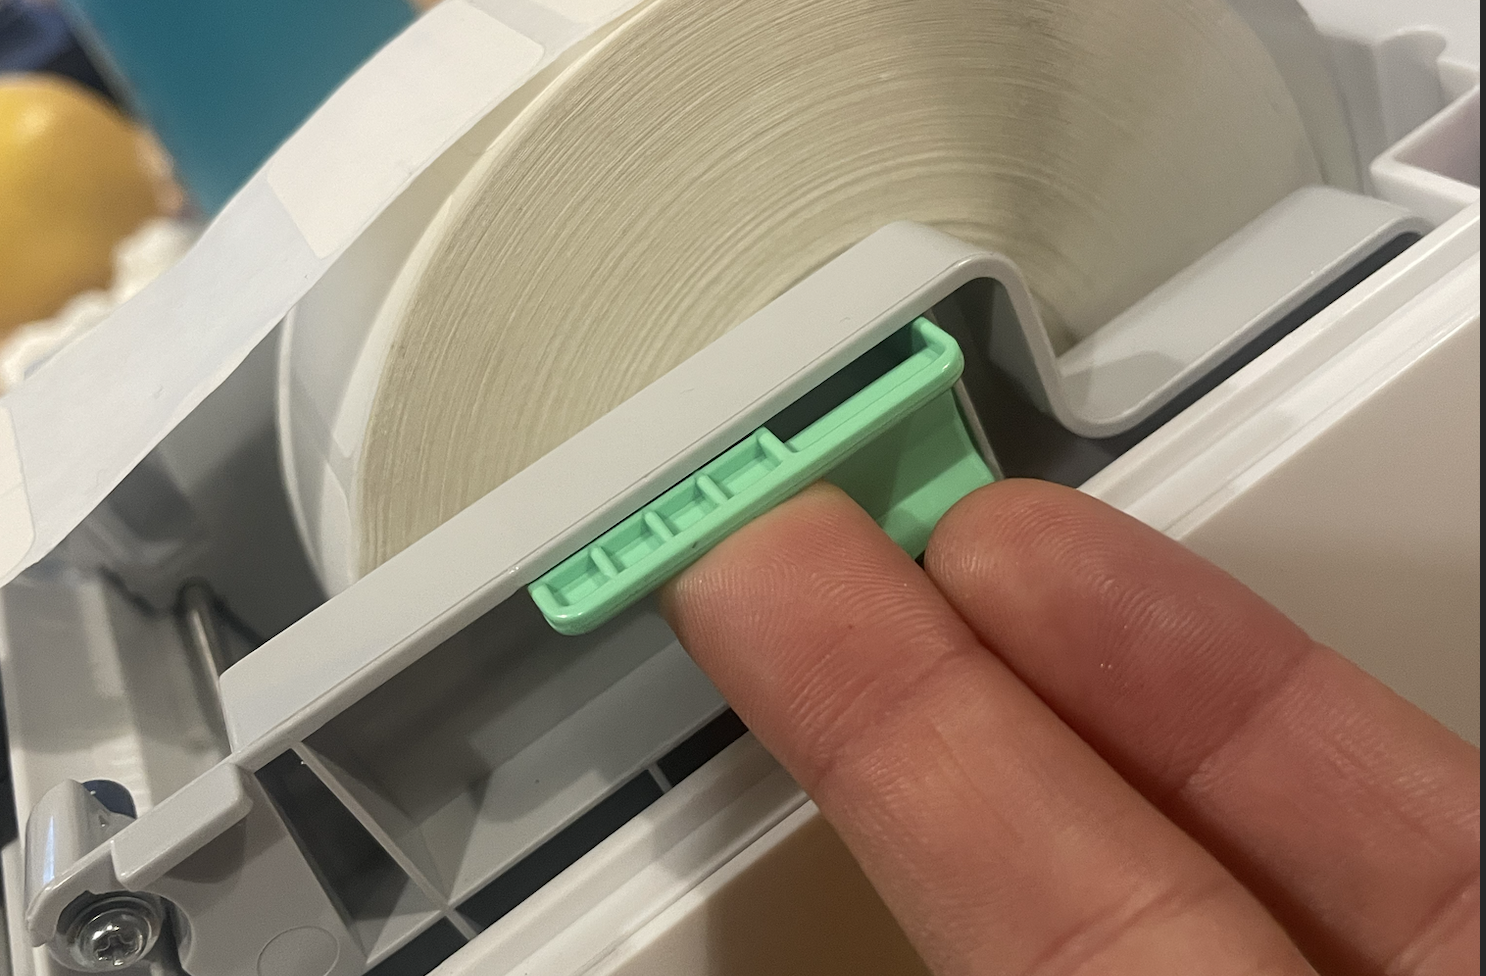
- Lift the green lever on the right side of the printer and push the gray media guide until they are flush against the roll.
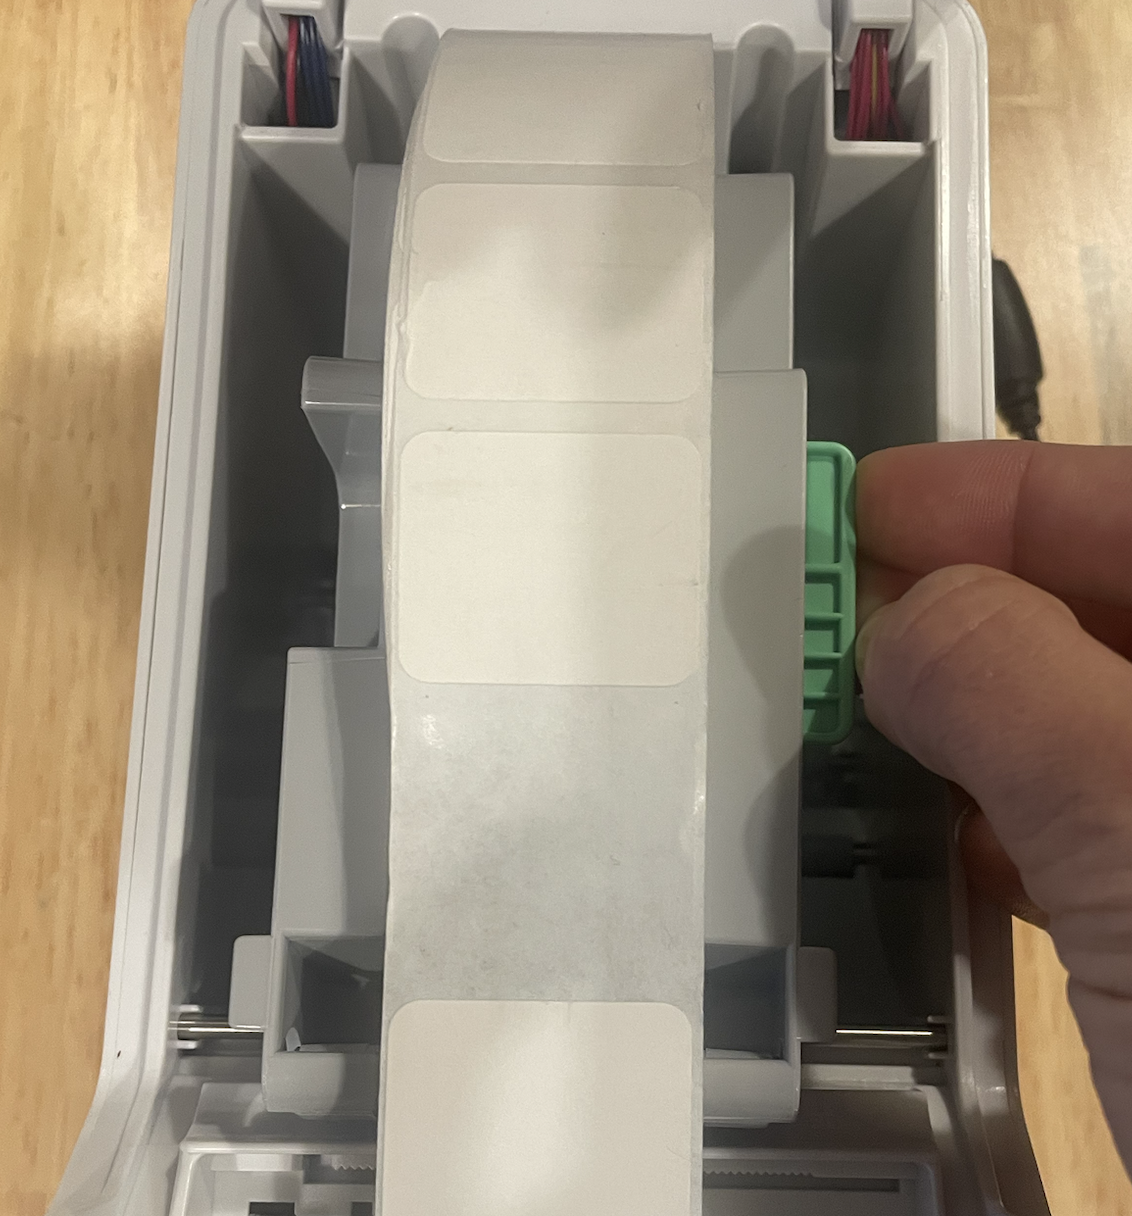
- Feed the roll paper under the media guides and pull the paper so that some of the labels are outside of the printer.
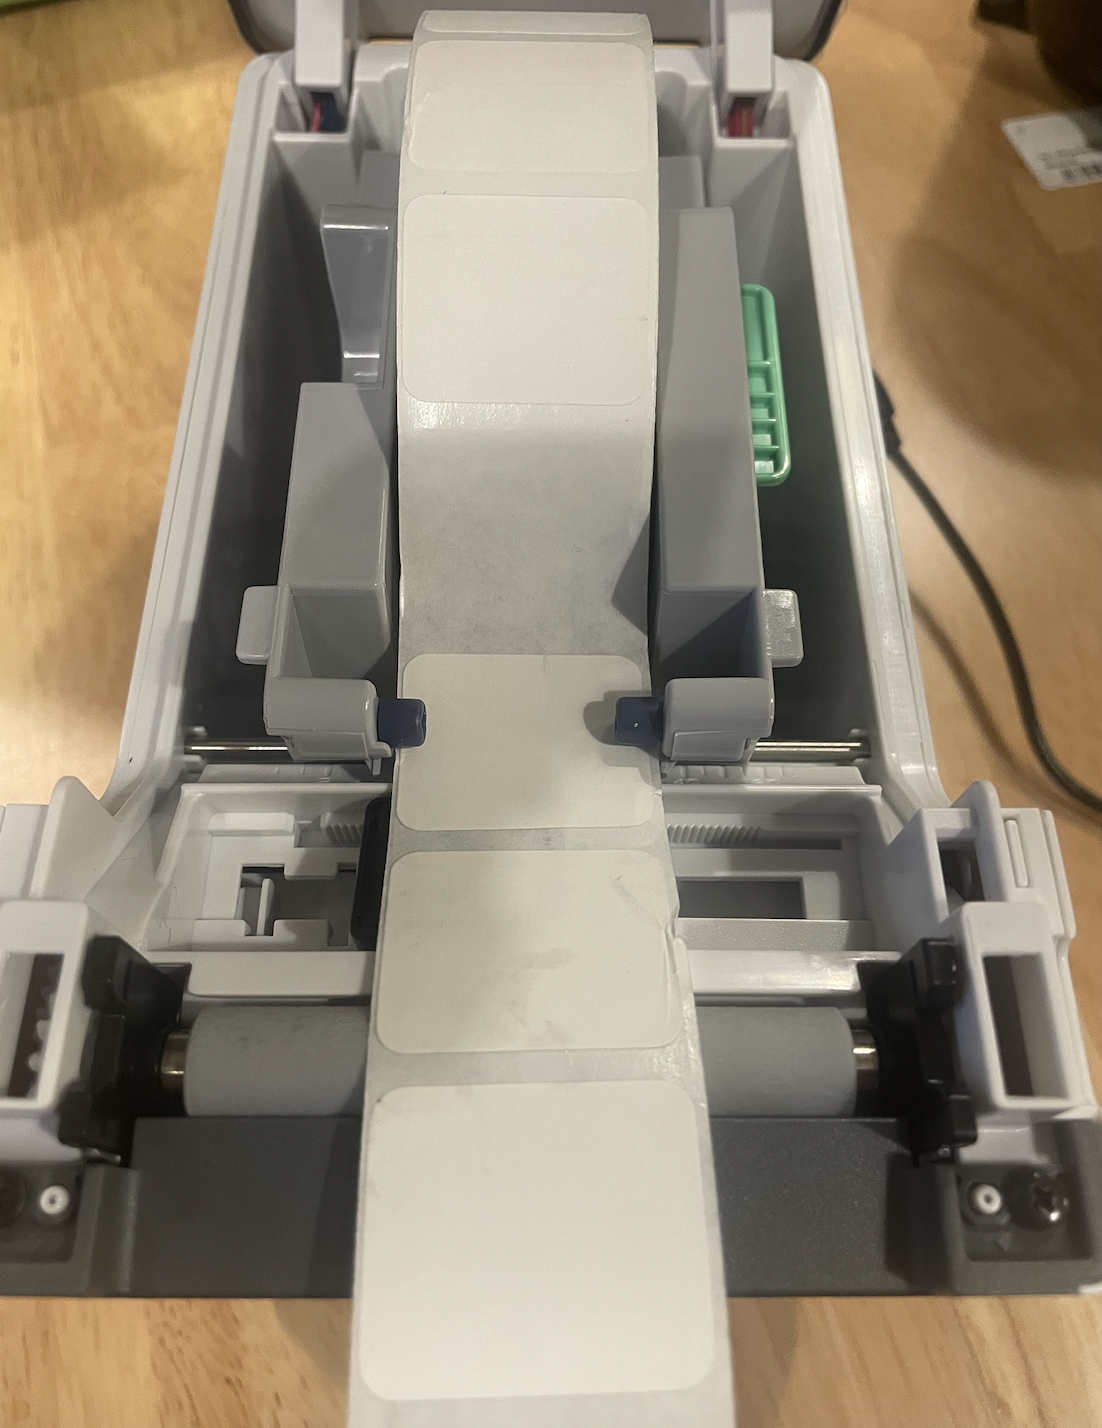
- Close the Compartment.
Bulk Printing and Accessing a Queue:
With the PathSpot SafetySuite you can create a Print Queue to batch print your labels or select a Print Queue that was previously created and saved.
Bulk Printing from the Print Queue:
Once labels have been placed in your Print Queue, click on the printer icon at the top right. A pop-up will appear displaying all of the labels you have added to the Print Queue.
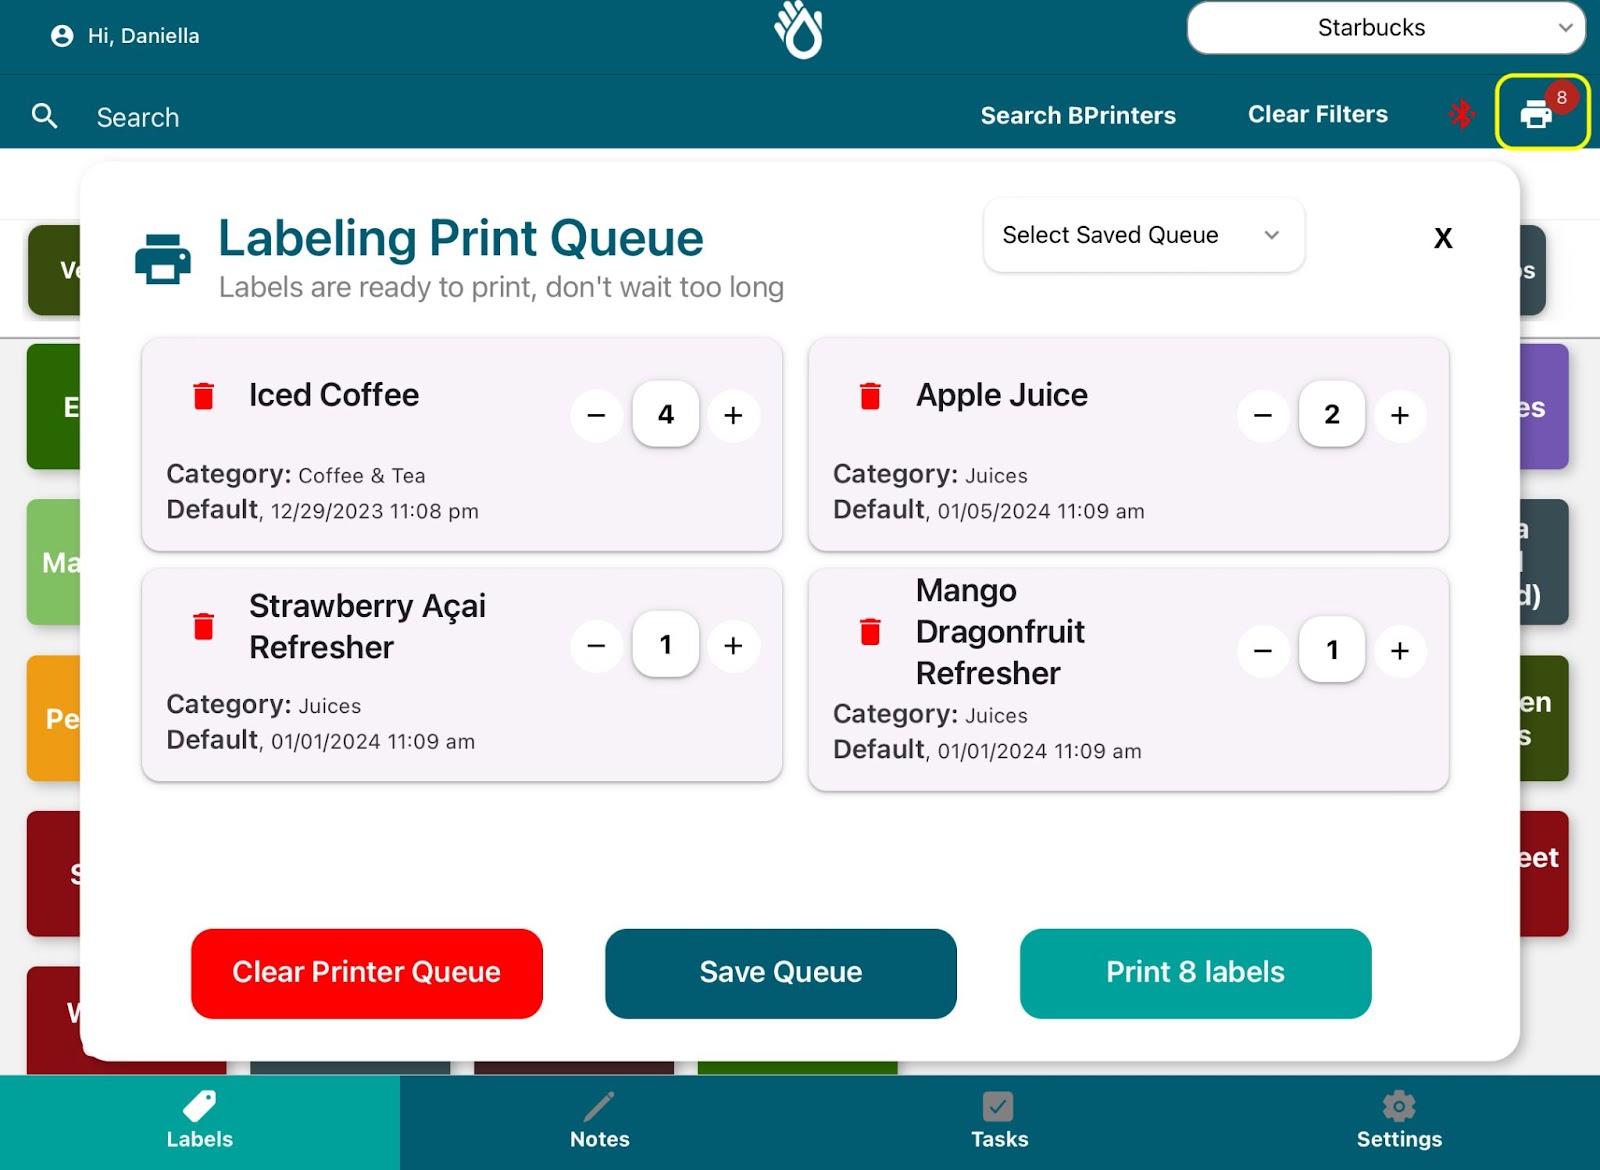
You can adjust item quantities in the Print Queue by clicking the minus/plus buttons on each item, remove an item type with the red trash icon, or clear all items with the red “Clear Printer Queue” button.
When you’re ready to print all items in the Print Queue, click the “Print X Labels” button in the bottom right.
Creating a Queue:
Once you have placed the desired labels in your Print Queue, click on the printer icon at the top right. A pop-up will appear displaying all of the labels you have added to the Print Queue, and minus/plus sign buttons to allow you to modify the quantities. Once you finish the desired items and quantities, you can click Print All to send to the printer, or Save Queue to continue to use this set up in the future. Note: If you click Print All the Print Queue will clear as your labels immediately print.
At any point, you will also be able to click Clear Printer Queue, to empty all labels from the current Print Queue.

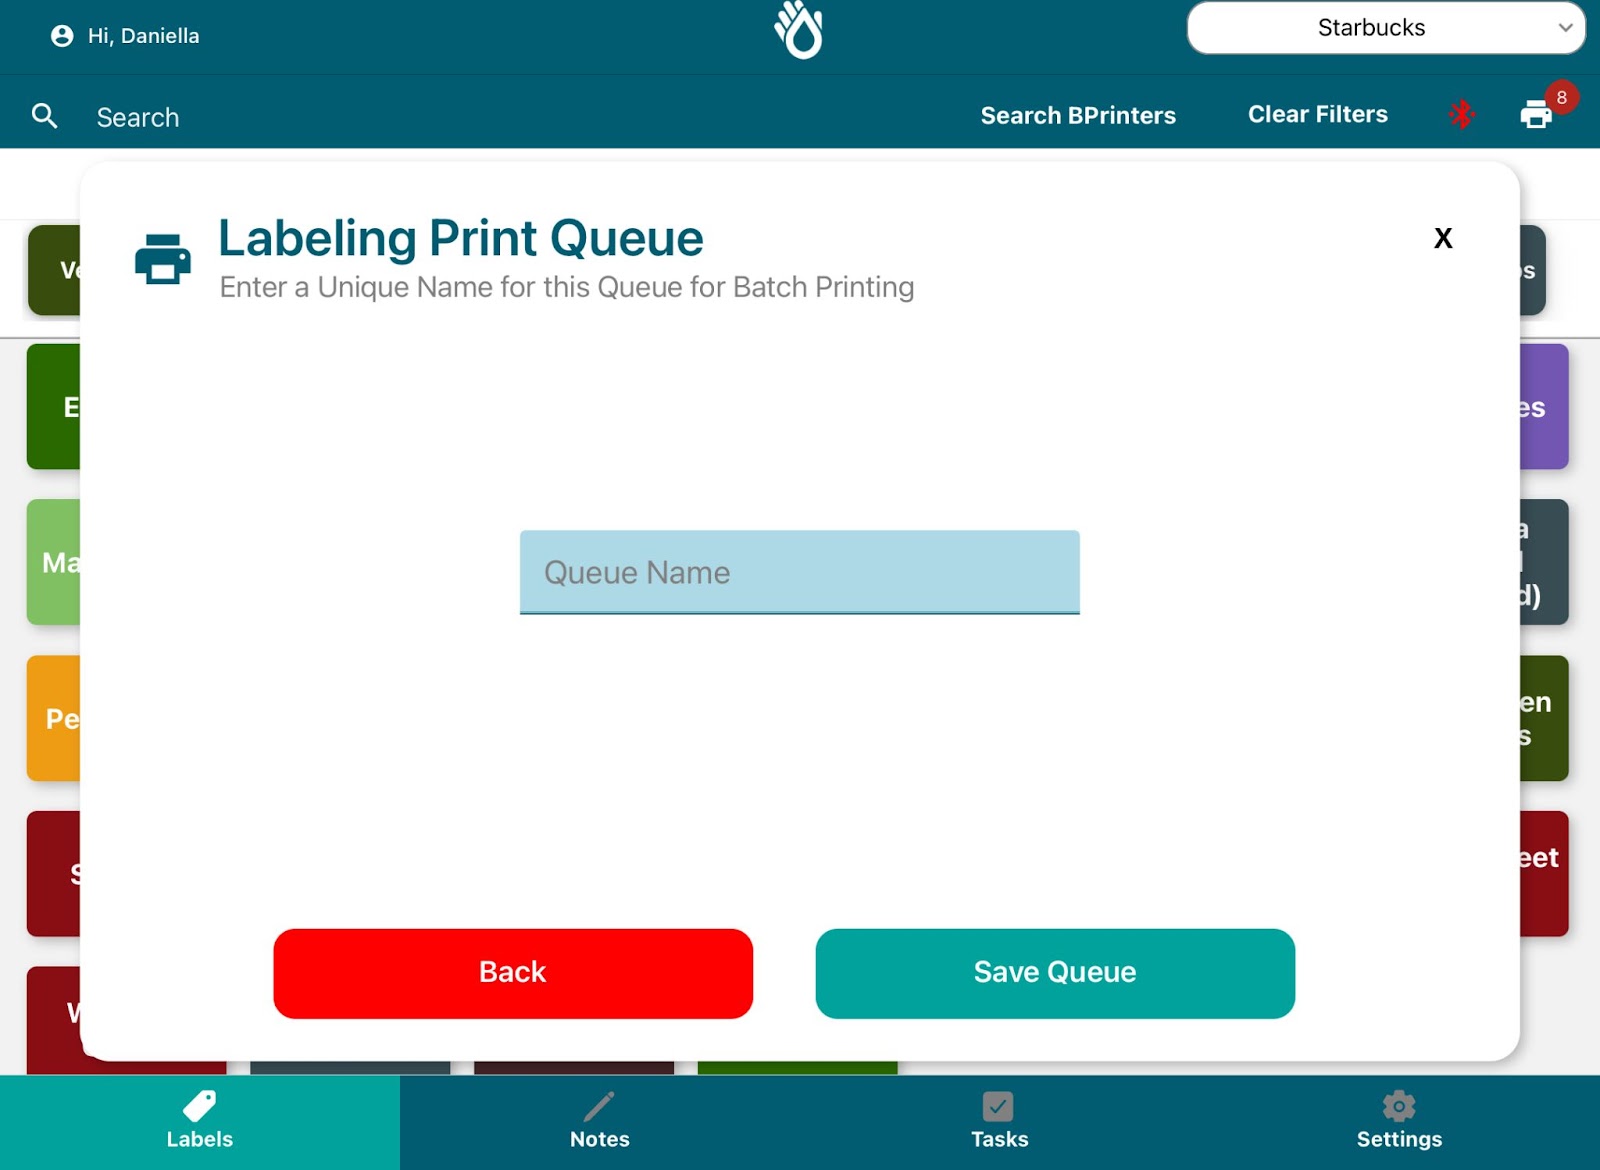
Upon clicking Save Queue, the pop up will change, allowing you to name your Saved Queue. Make sure you pick a unique name so you can identify it later. When you are ready, click Save Queue. The Queue will be immediately added to your Store’s Label Queues and will be available for anyone in your store to select.
Selecting a Saved Queue:
PatSpot PowerLabel Saved Queues are shared across all of the users of your store. To access them, just click on the printer icon at the top right and select the pickdown on the top right of the pop up. The list will open displaying all of the available Saved Queues for you to select from.
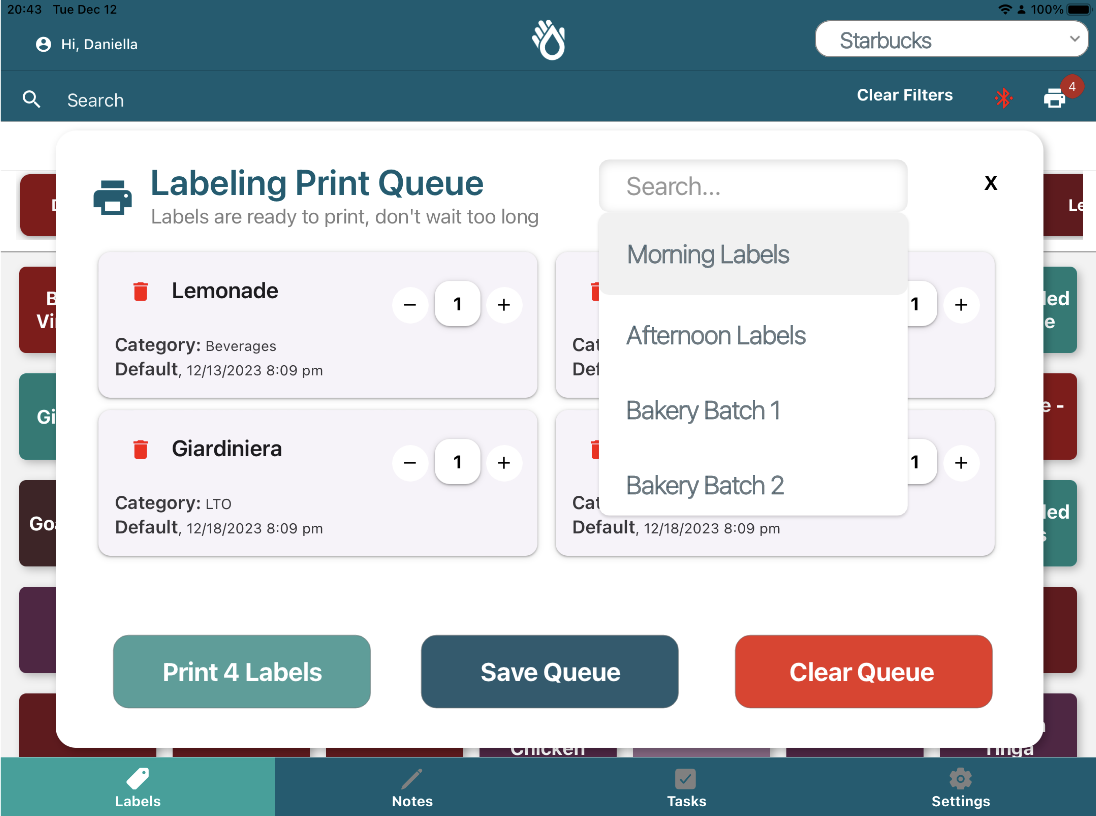
Upon clicking on the queue, the Print Queue will be populated with all of the labels that were preset in that Saved Print Queue, and show the name of the selected Saved Queue on the pickdown label. You can adjust the quantities at any time before printing, by clicking on the arrows on the label. This will not change the specified quantities in the Saved Queue, and will only change what you will be printing at this moment.

Once you are ready, click Print XX Labels and all of the labels will be sent to the printer!
FAQ:
Who do I contact to edit labels (ex: items, expirations, etc)?
Please contact your Starbucks Corporate Team lead to edit label information.
App Daily User:
How do I log-in to the tablet?
Just click on the PathSpot App icon, on your tablet screen and you will be navigated to the login screen. Here you will be able to select your user and enter your login pin .
If I forget my pin, how do I reset it?
You will need to contact your Starbucks Corporate Team lead or send an email to PathSpot Support at support@pathspottech.com to reset your pin! On next login you will be prompted to set a new pin.
What is the difference between quick print and queue for printing?
Quick print allows you to quickly print any quantity of the selected item. The Print Queue allows you to preconfigure all the labels that you would be printing before you are done prepping your food items, so you can easily print them all at once when you are ready.
What if the expiration date on my label looks wrong?
Contact your corporate team lead or PathSpot Support at support@pathspottech.com so we can contact your brand's administrator and change the expiration date for you.
What if I need to add a new label?
Contact your corporate team lead or PathSpot Support at support@pathspottech.com so we can contact your brand's administrator and create a new food safety label.