How to Troubleshoot Your Zebra Printer
If you are connecting your printer to the PathSpot APP for the first time, please follow the steps provided in the Printer Setup Guide before performing the troubleshooting steps:
Note: If the SafetySuite app has been used on another device at any point in the past and you are not set up for Wi-Fi printing, you must delete the app from the previous device(s) in order to establish a connection on the new one.
#1 Network Reset for Printer
- Long-press the power button to turn off the printer.
- While turning the printer back on, simultaneously hold down the pause and cancel buttons.
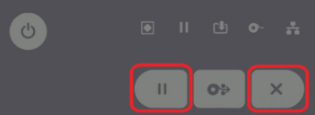
- Keep holding the pause and cancel buttons until only the status light is illuminated.

- Wait for the status light to change to green or red.
- Access the settings screen on your iPad or iPhone.
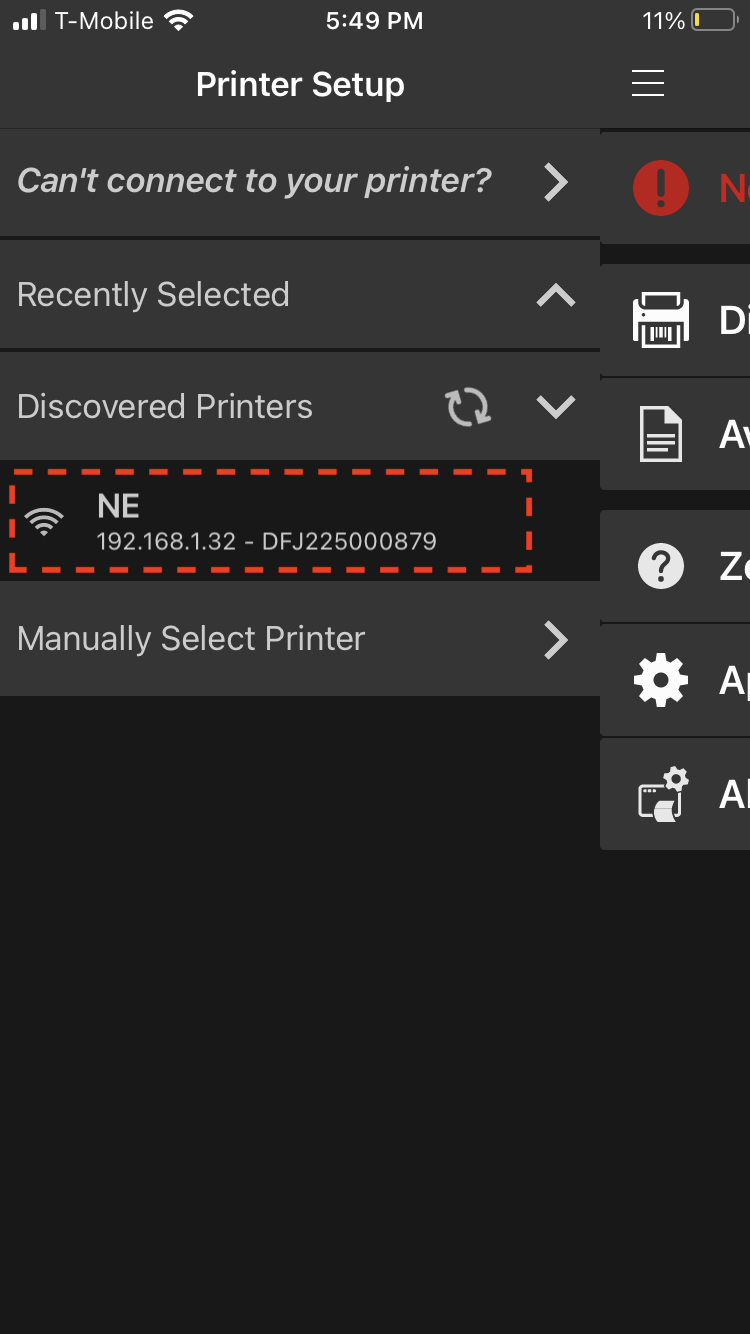
- Toggle Bluetooth off and then on again, allowing the printer to appear.
- Choose the printer from the list and establish a connection.
- If unsuccessful move to #2
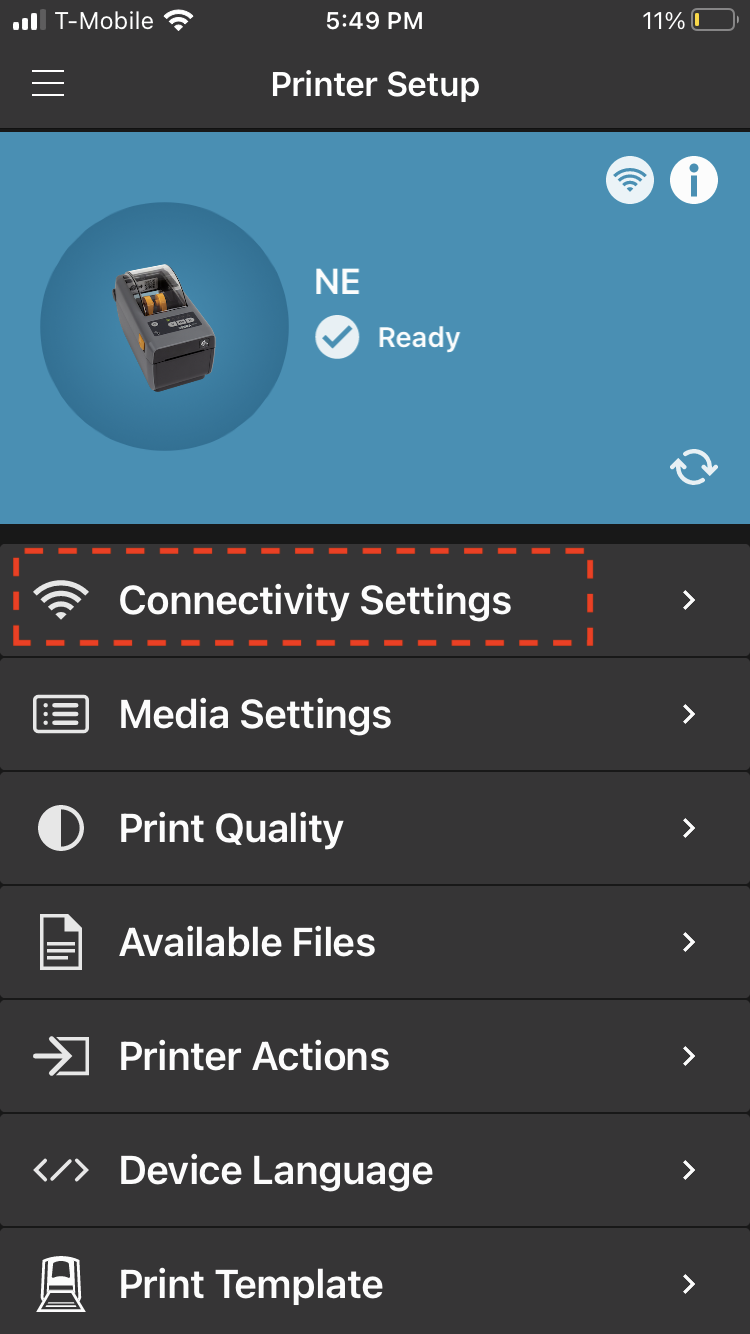
- Launch the PathSpot App and print a label.
- Template Selection (if necessary)
- Settings >> Printer >> 2x1
- Increase Text: Settings >> Printer >> 1x1
#2 Factory Reset for Printer
- Long-press the power button to turn off the printer.
- While turning the printer back on, simultaneously hold down the pause and feed buttons.
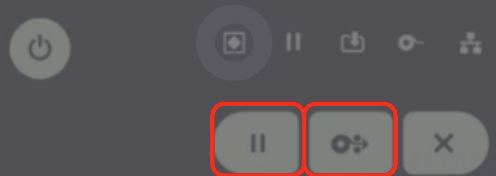
- As you continue to hold the pause and feed buttons, release the power button.

- Wait until the status light changes to green or red.
- Access the settings screen on your iPad or iPhone.
- Toggle Bluetooth off and then on again, allowing the printer to appear.
- Choose the printer from the list and establish a connection.
- If unsuccessful move to #3
- Launch the PathSpot App and print a label.
- Template Selection (if necessary)
- Settings >> Printer >> 2x1
- Increase Text: Settings >> Printer >> 1x1
FINAL RESET FOR STEP #2
If the above steps do not resolve the issue, please refer to the video at the bottom of this page titled "Printer_Network_Doc_Reset" for further guidance.
Please note: If blank labels are still not printing after following the outlined steps, the reset may not have been performed correctly.
If the issue persists, send a picture of the network document that prints successfully after a proper reset.
#3 Zebra App Extended Setup
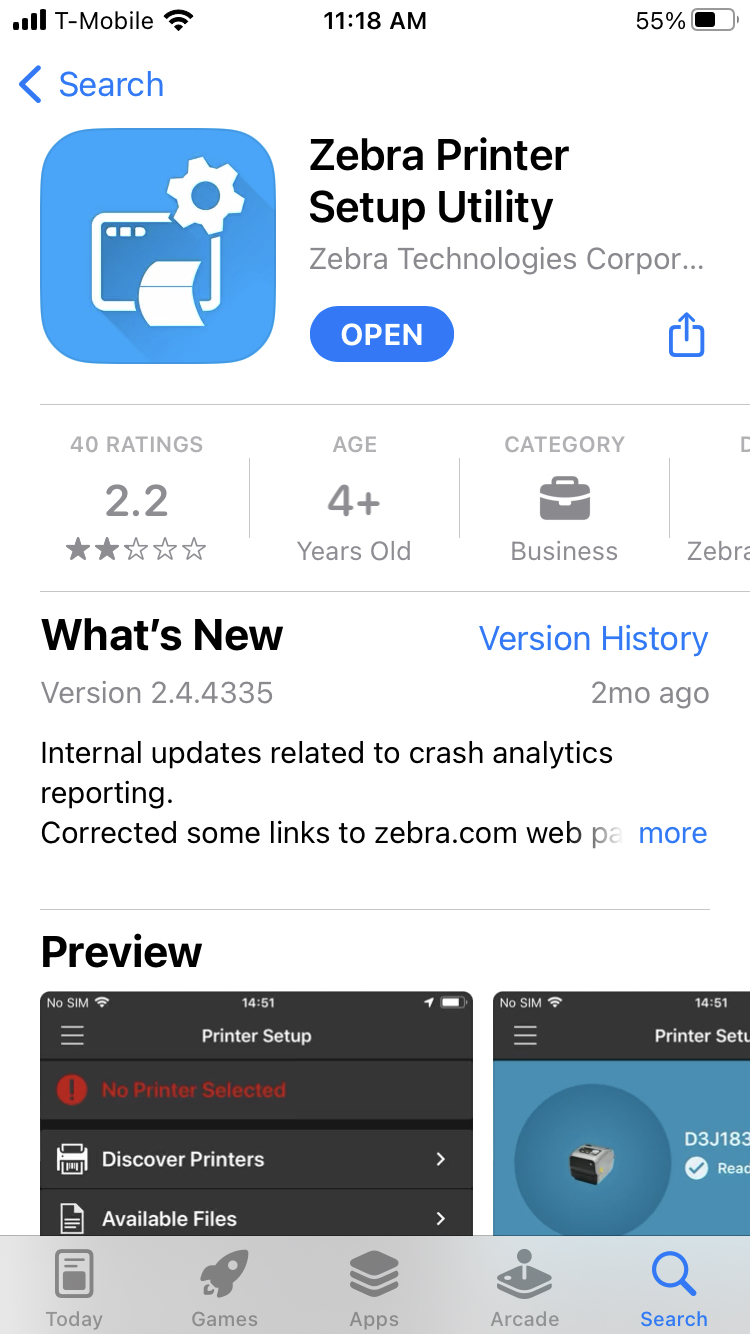
- On an IOS device, download the “Zebra Printer Setup Utility” from the Apple App Store.
- Ensure the Zebra printer is plugged in and powered on.
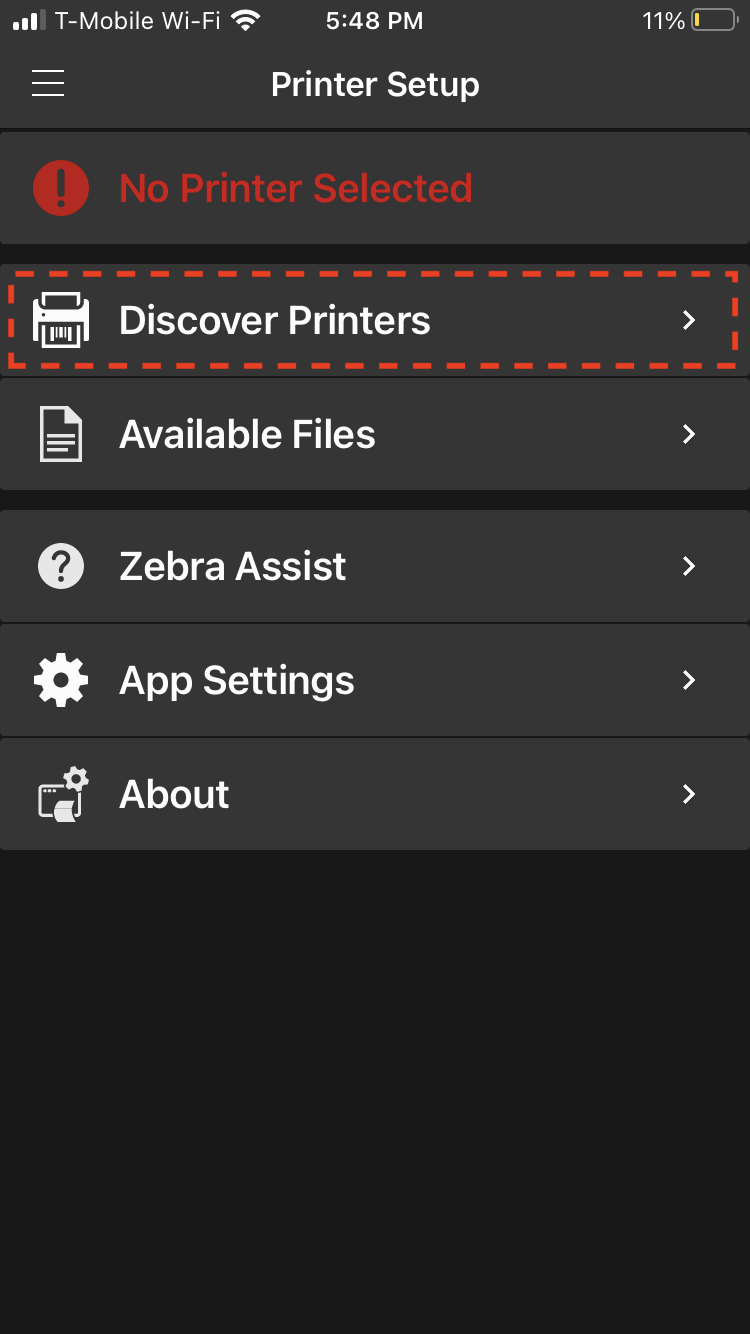
- Open the Zebra Printer Setup Utility App and select “Discover Printers”.
- Once the scan is complete, choose the printer name from the menu bar to connect.

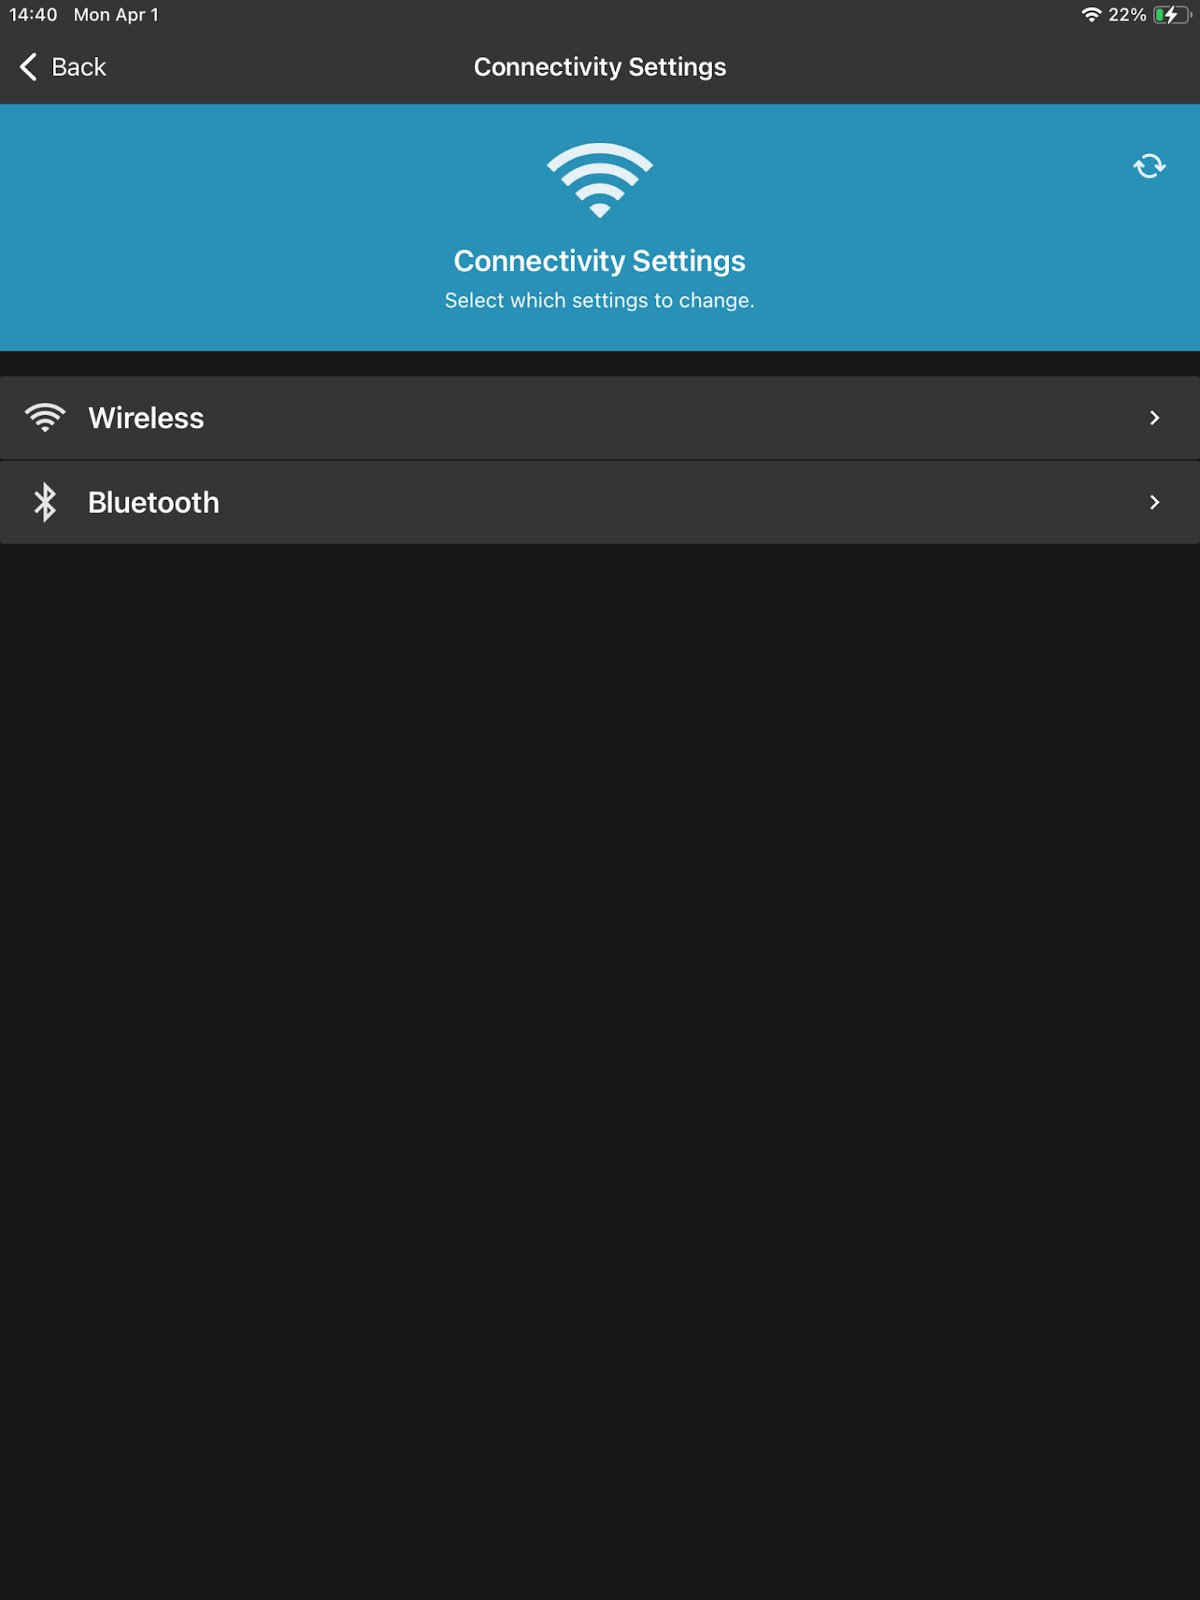
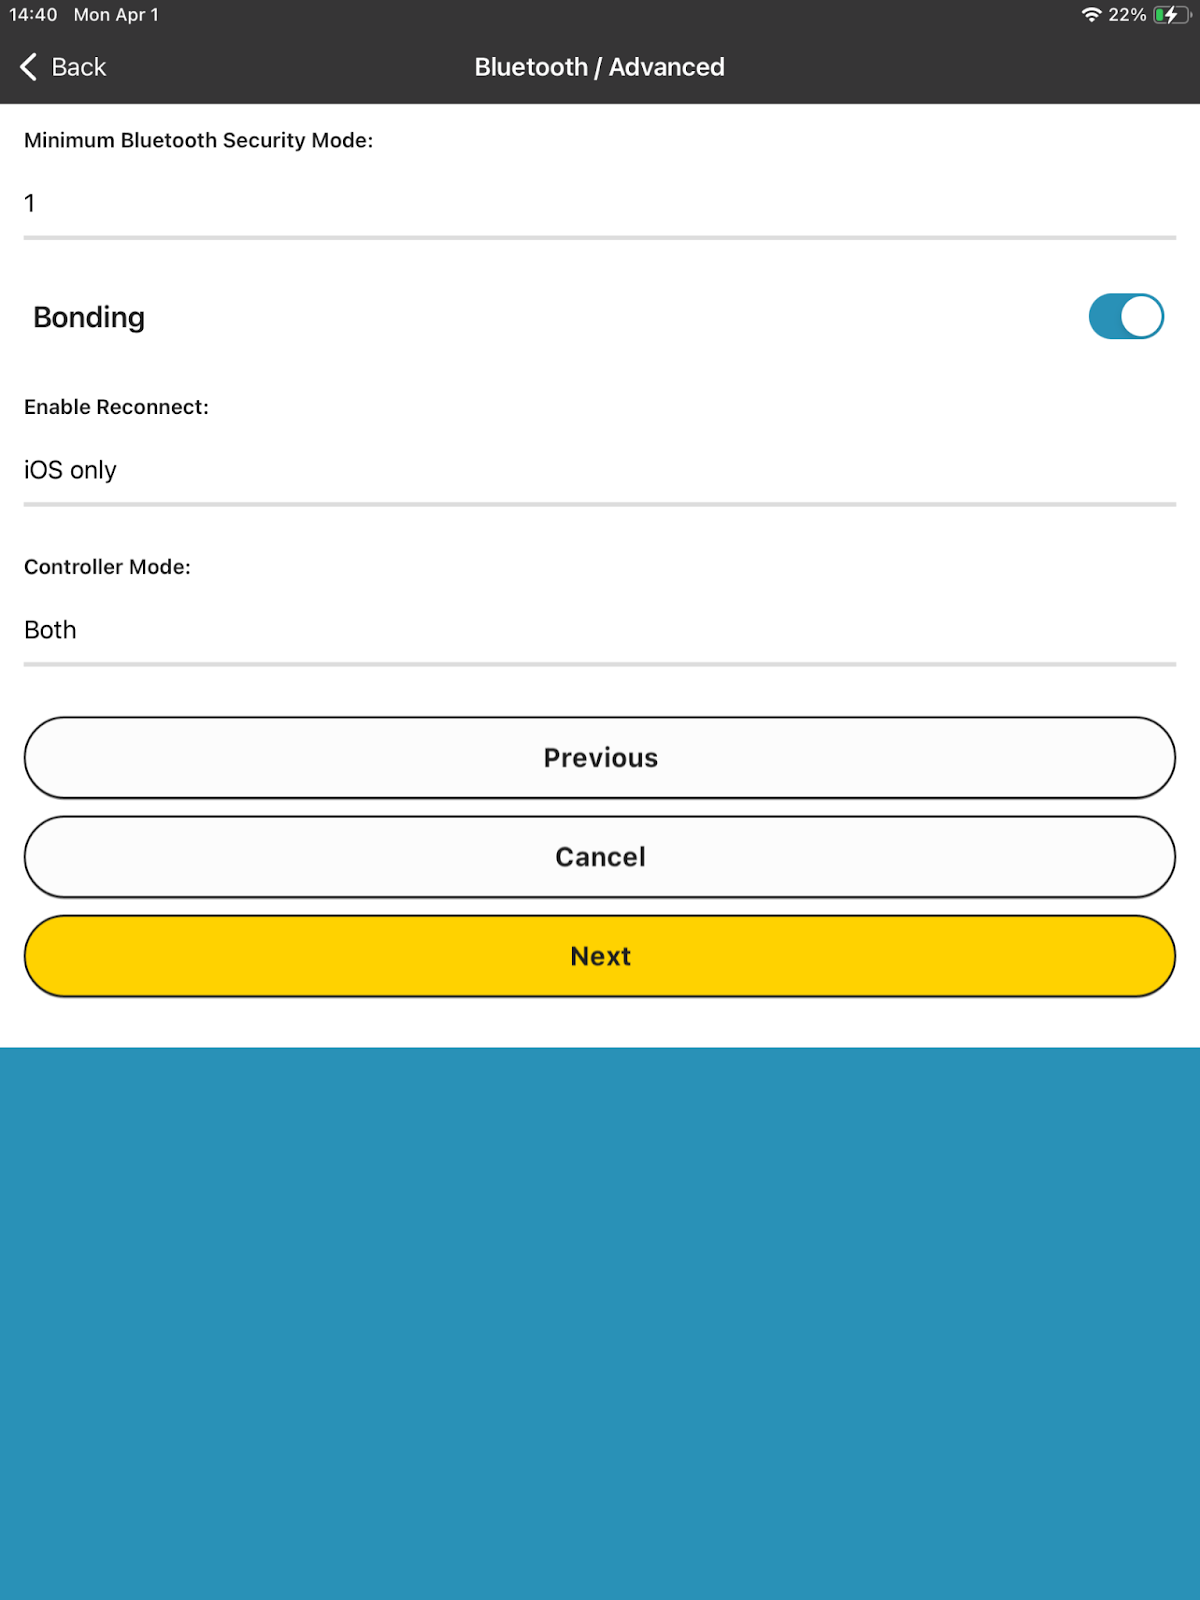
- In the Connectivity Settings, select “Wireless” and turn on Bluetooth and Discoverable.
- Optional, rename the printer for easier identification.
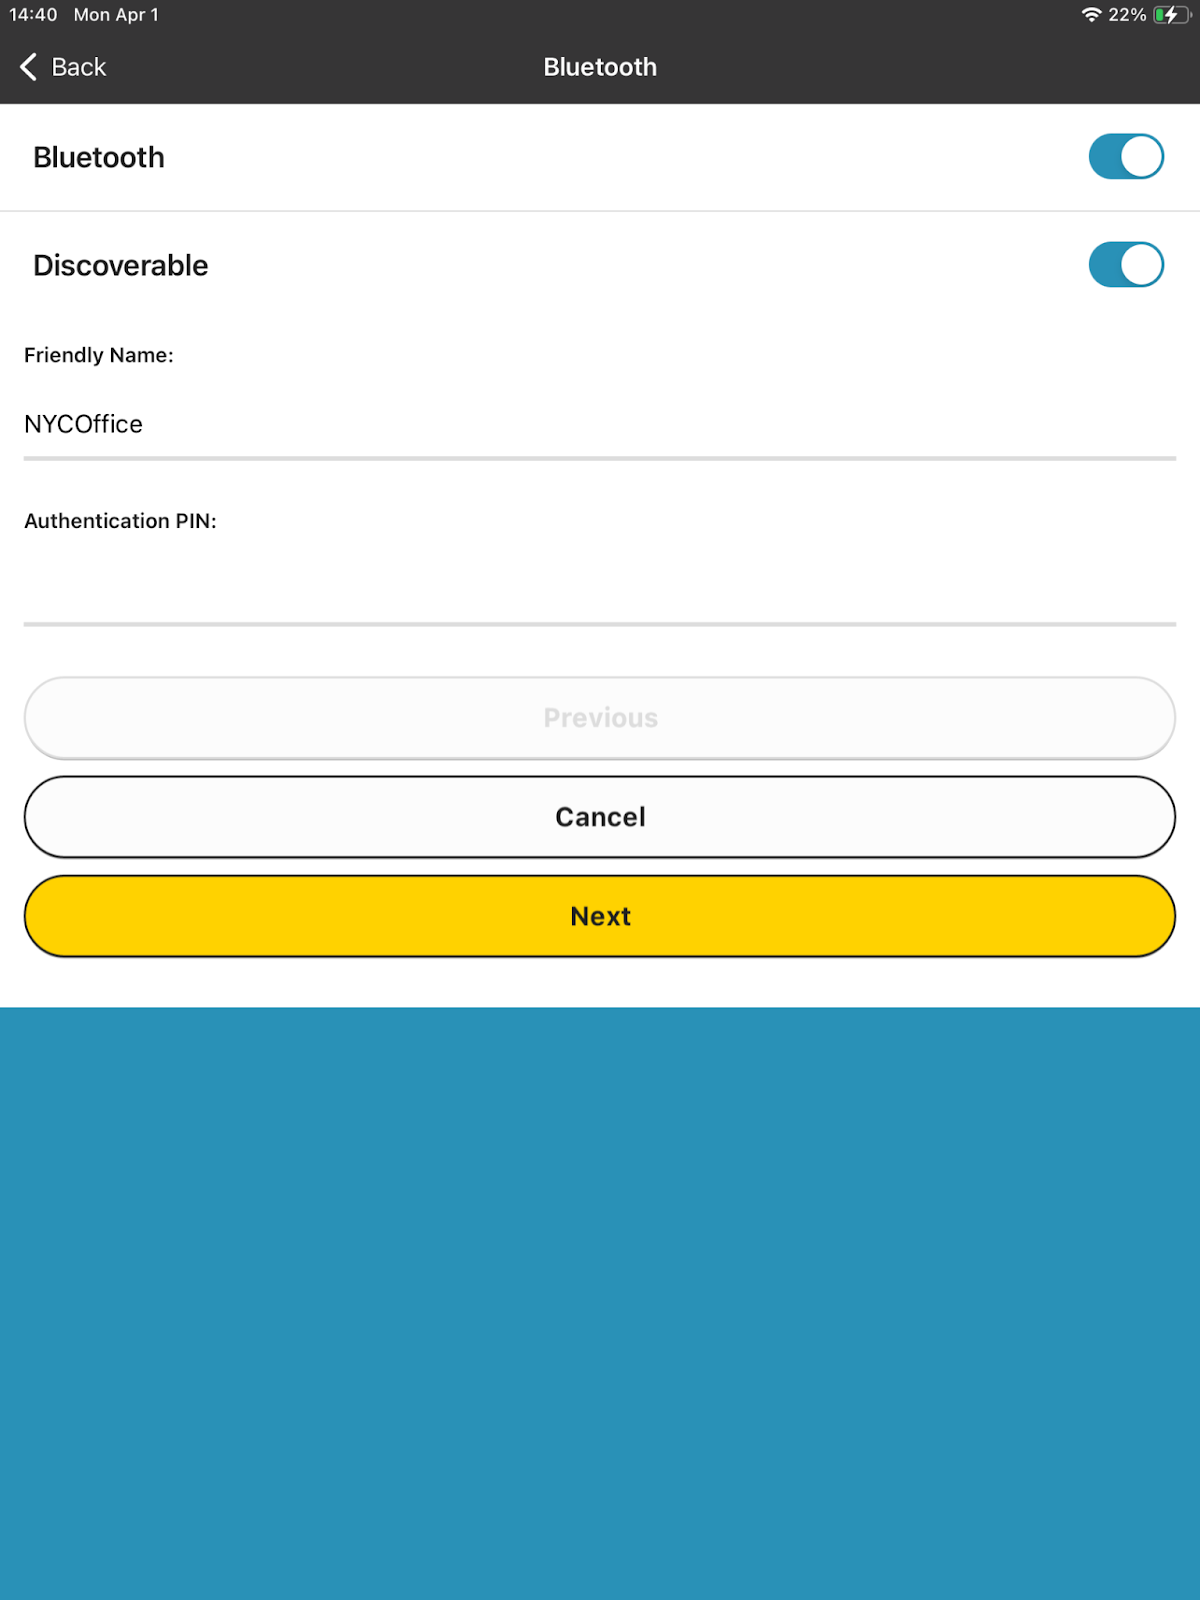
- Confirm settings match image provided in article under step 7 and click “NEXT”.
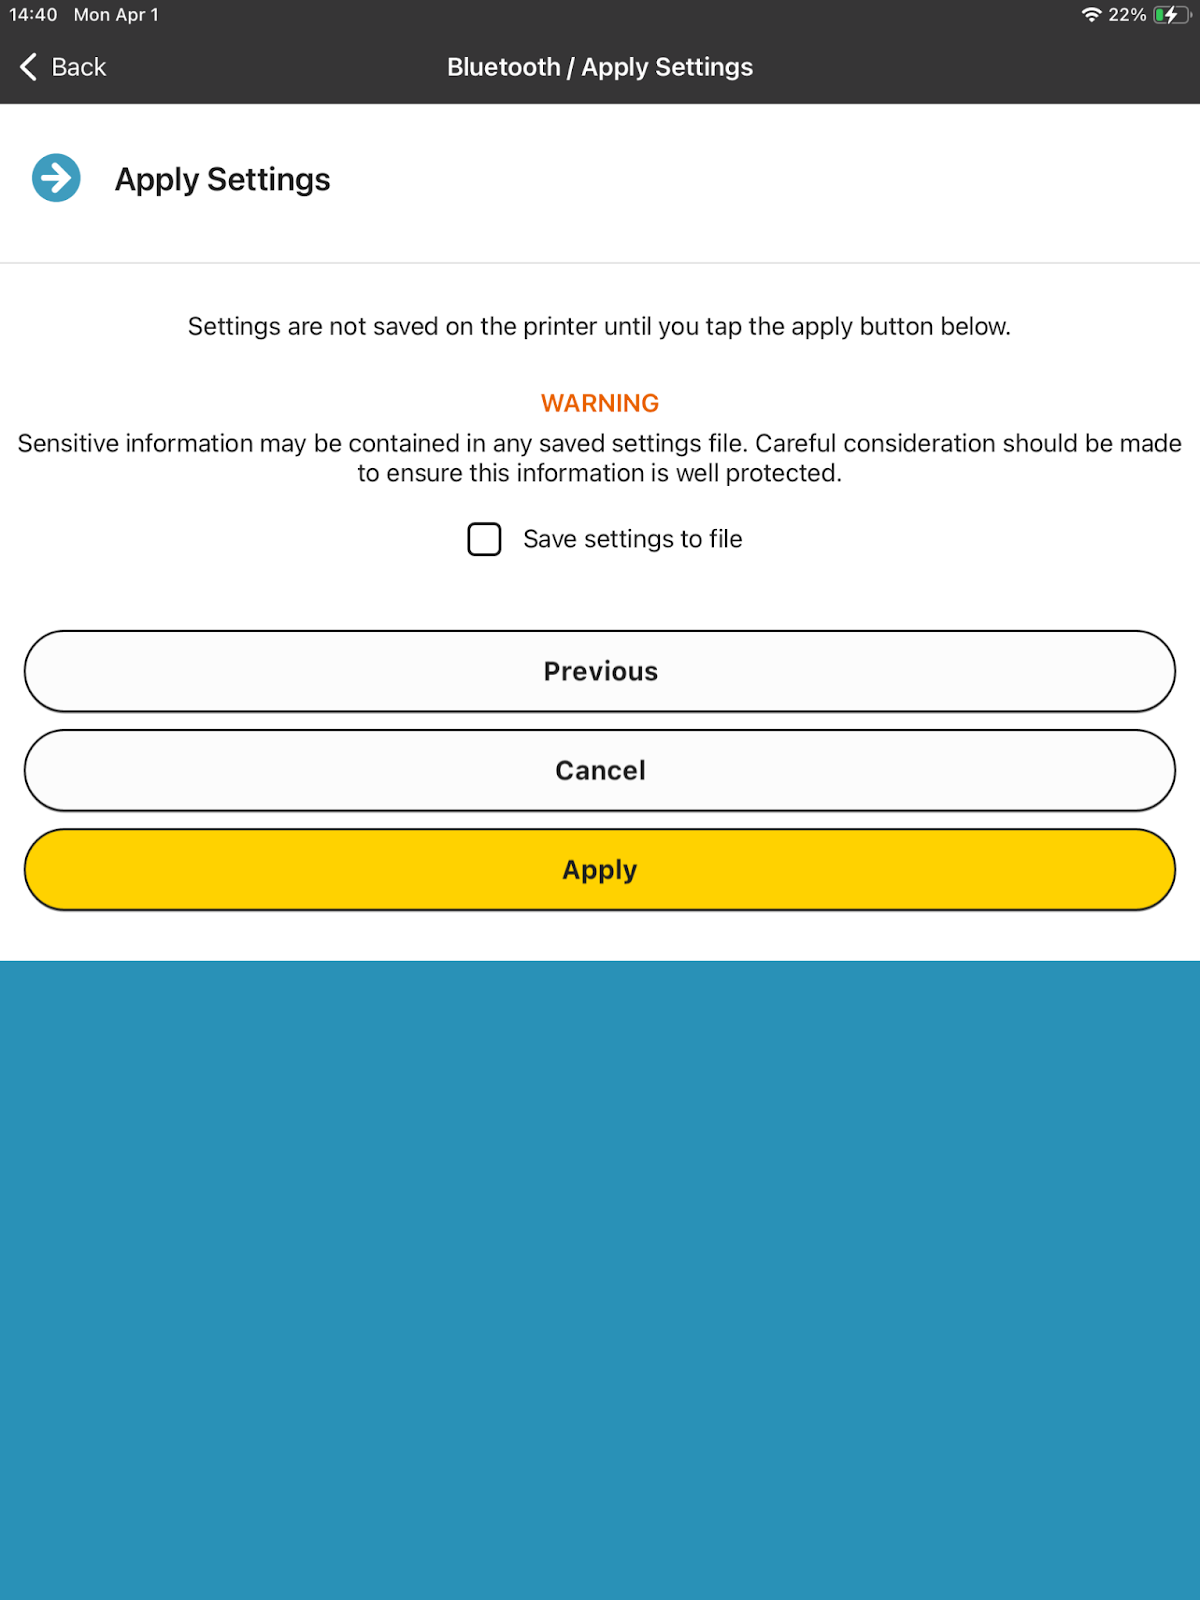
- Click “Apply” to save settings; the printer will restart.
- After the printer restarts, access iOS settings.
- Toggle Bluetooth off and then on again.
- Select and connect to the printer.
- Open the PathSpot App, go to the Labeling Tab, and ensure the Bluetooth icon is displayed.
- Template Selection (if necessary)
- Settings >> Printer >> 2x1
- Increase Text: Settings >> Printer >> 1x1
If the steps above do not work, please contact PathSpot Support at support@pathspottech.com