
Temperature & Humidity Sensors
Installation Best Practices
Additional Helpful Articles:
> Understanding Temperature Readings


Note: Your sensor includes a USB-C probe designed for specialty use only and can be discarded. Please ensure the blue connection cover is securely closed
Materials: 2 zip-ties & 3M adhesive (magnets available upon request)
 .
.  .
. 

➡️ IMPORTANT: Each sensor is assigned to a specific unit at your property. The sensor number on the side of each box corresponds to the information provided in the PathSpot Install Template shared with you by your Implementations Lead. This template indicates where each sensor should be installed where.
If you have any questions about this process, please contact your Implementations Lead. If you're unsure who that is, reach out to us at support@pathspottech.com.

-To connect the sensor to the Gateway, hold the button (circled) until it flashes green & then red once. This takes roughly 5 seconds.
- DO NOT remove the sticker that covers the circle unless this sensor is tracking Humidity
Note: DO NOT install the sensor near the fan. For additional considerations on sensor placement please refer to this article.
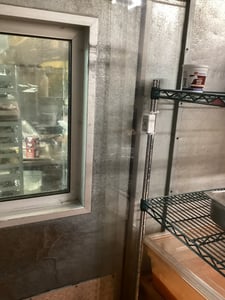
Walk‑In Sensor Installation
Using zip‑ties, mount the PathSpot Temperature Sensor upright and close to the door. This location is generally the warmest part of the walk‑in, and measuring there ensures you capture and mitigate the highest temperature risk.
Below are examples of common locations above the door for reference.


If the spots above the door are unavailable, you may attach the sensor (with zip‑ties) to a shelf or rack closest to the door. Please be cognizant if these structures are mobile and the sensor could be moved out of the unit when cleaning or rearranging.
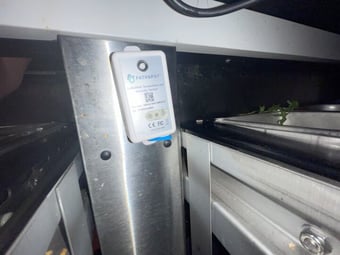
Reach-in: Utilizing zip-ties, it is recommended to install the PathSpot Temperature Sensor upright and close to the door as this is considered the warmest part of the unit. Most reach-in's have a pilaster that holds the shelves and where the sensor can be installed. If this is not an option, you can zip-tie the sensor to the rack. Below is an example of both:
 .
. 

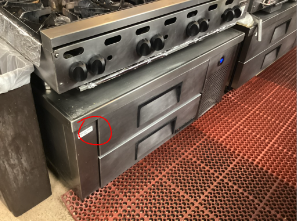
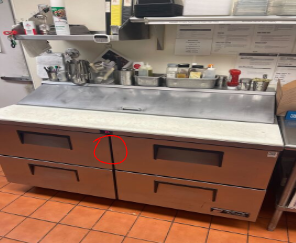
Lowboy/Prep Table: There are a variety of different models for these units. Ideally we would like to use zip-ties, but some of these will require adhesive or magnets since there is not a place to zip-tie that will allow the drawer(s) to close.
Reminder that the sensor should be installed on the opposite side of the fan
- If your view is obstructed, take a photo for a visual of the current state of where you will be installing the sensor.
- Clean the area thoroughly with degreaser or preferred cleaning product. This is very important as this area may not be cleaned as often, so the adhesive will not hold over time if mounted on grease, etc.
- Thoroughly dry the area.
- Mount the sensor with adhesive and hold w/ pressure for 30 seconds. (it is recommended to utilize 2 pieces if possible by using one from a sensor that required zip ties)
2 Drawer Lowboy Adhesive Example:
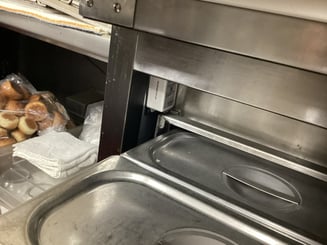
4 Drawer Lowboy/Prep Table Adhesive Example:
 .
. 
Zip Tie Examples:


If you have any questions or would like guidance on the best place to install your PathSpot Temperature & Humidity Sensor, please send photos of the area to support@pathspottech.com and we will be happy to advise.