Welcome to the PathSpot SafetySuite (minium viable version 16.4)
Take control of your food safety and in-store compliance with our SafetySuite mobile app. The PathSpot SafetySuite app makes it easy to manage your in-store tasks, communicate issues, and monitor in-store operations, all in one place. Whether you are working with your employees utilizing the in-store tablet or at home on your computer monitoring risks, PathSpot has you covered.
With features such as automated tasks, interconnected alerts, and freeform templates, our PowerApp allows you to take control of your in-store operations while at the same time personalizing activities to each business. Including seamless integration into our all-product-inclusive data platform, you will be able to see risk trends across multiple food safety areas no matter where you are.
- PowerLabels enables you to provide simple inventory management for your products, including QR codes, expiration dates, user names, and more.
- AuditNotes offers an elegant solution for capturing and organizing ideas, recipes, and important information for menu planning and recipe development. Chefs, managers, and staff can easily jot down ideas, store recipes, and access them from anywhere, fostering creativity and collaboration.
- PowerTasks optimize workflow efficiency. Whether it's managing orders, tracking inventory, or coordinating tasks across different departments, this app simplifies the complexities of running a restaurant.
PowerTasks
Overview
You can access your Task Lists by navigating to the Tasks option on the navigation bar at the bottom. On the Tasks Home page, you will see summary metrics along with specific information around your task list. Let’s break it down for you!
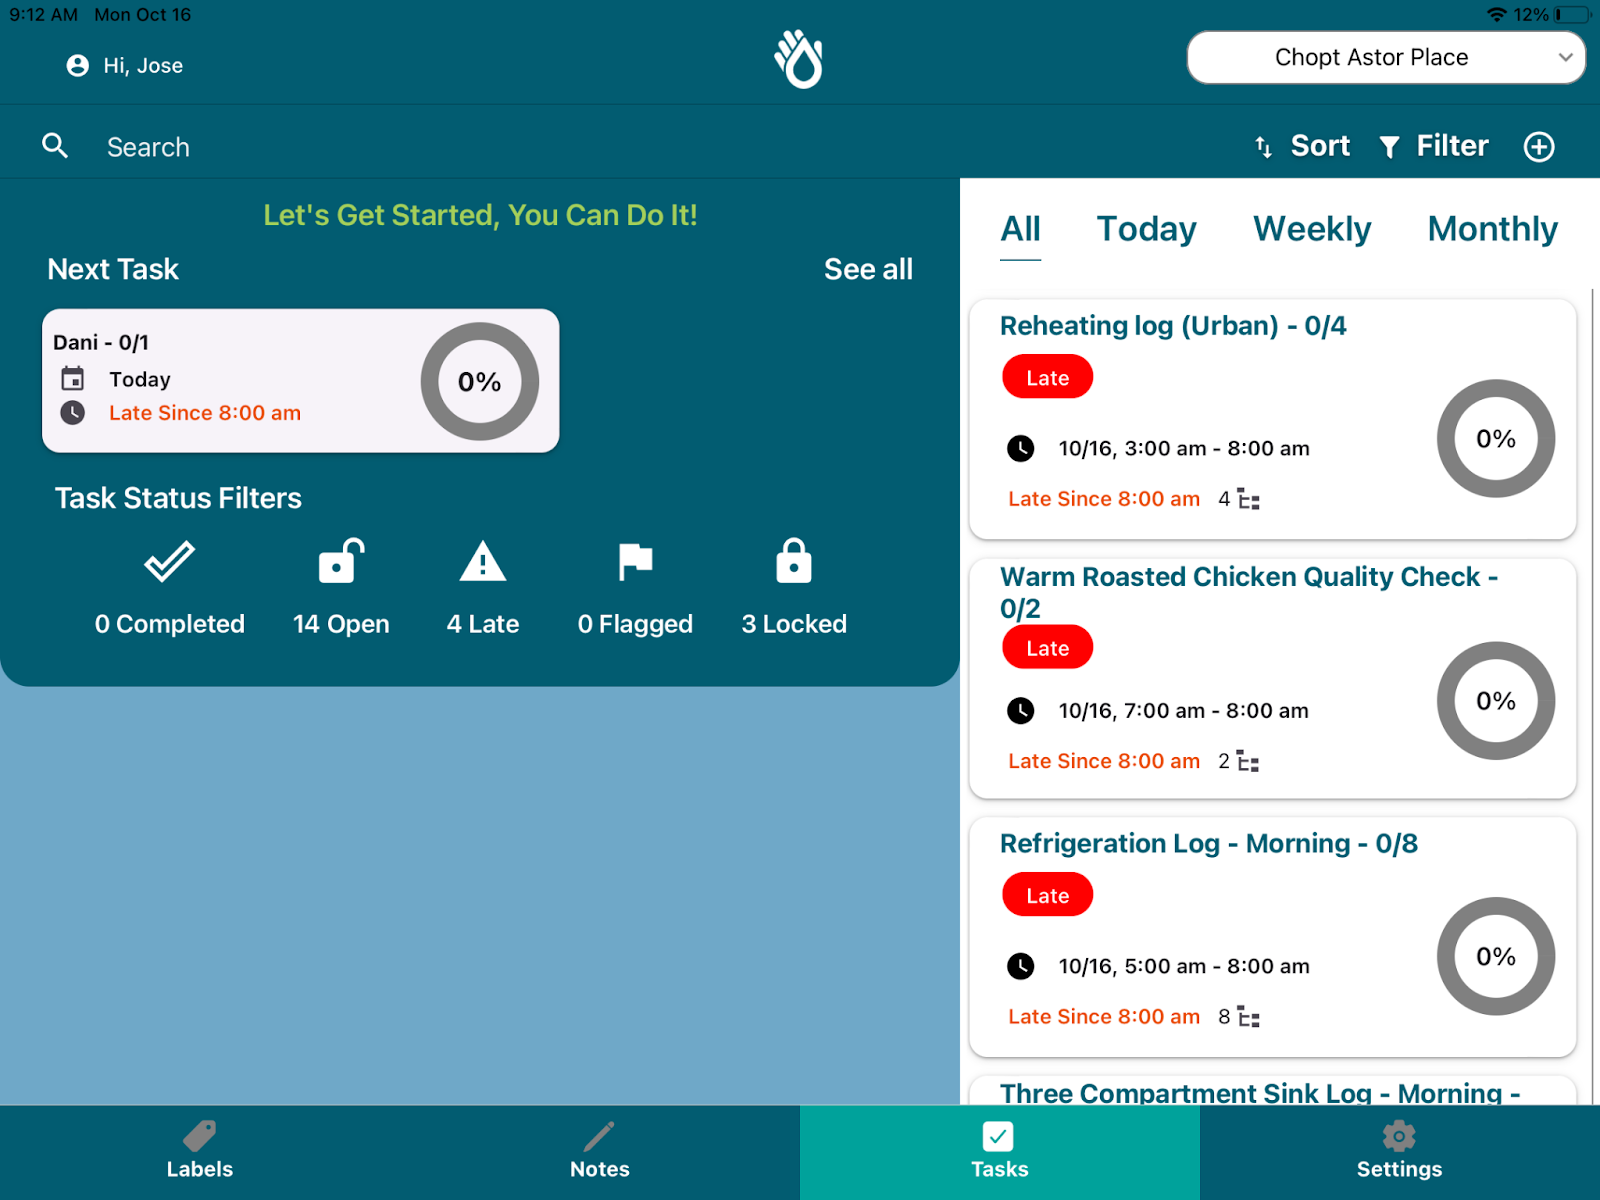
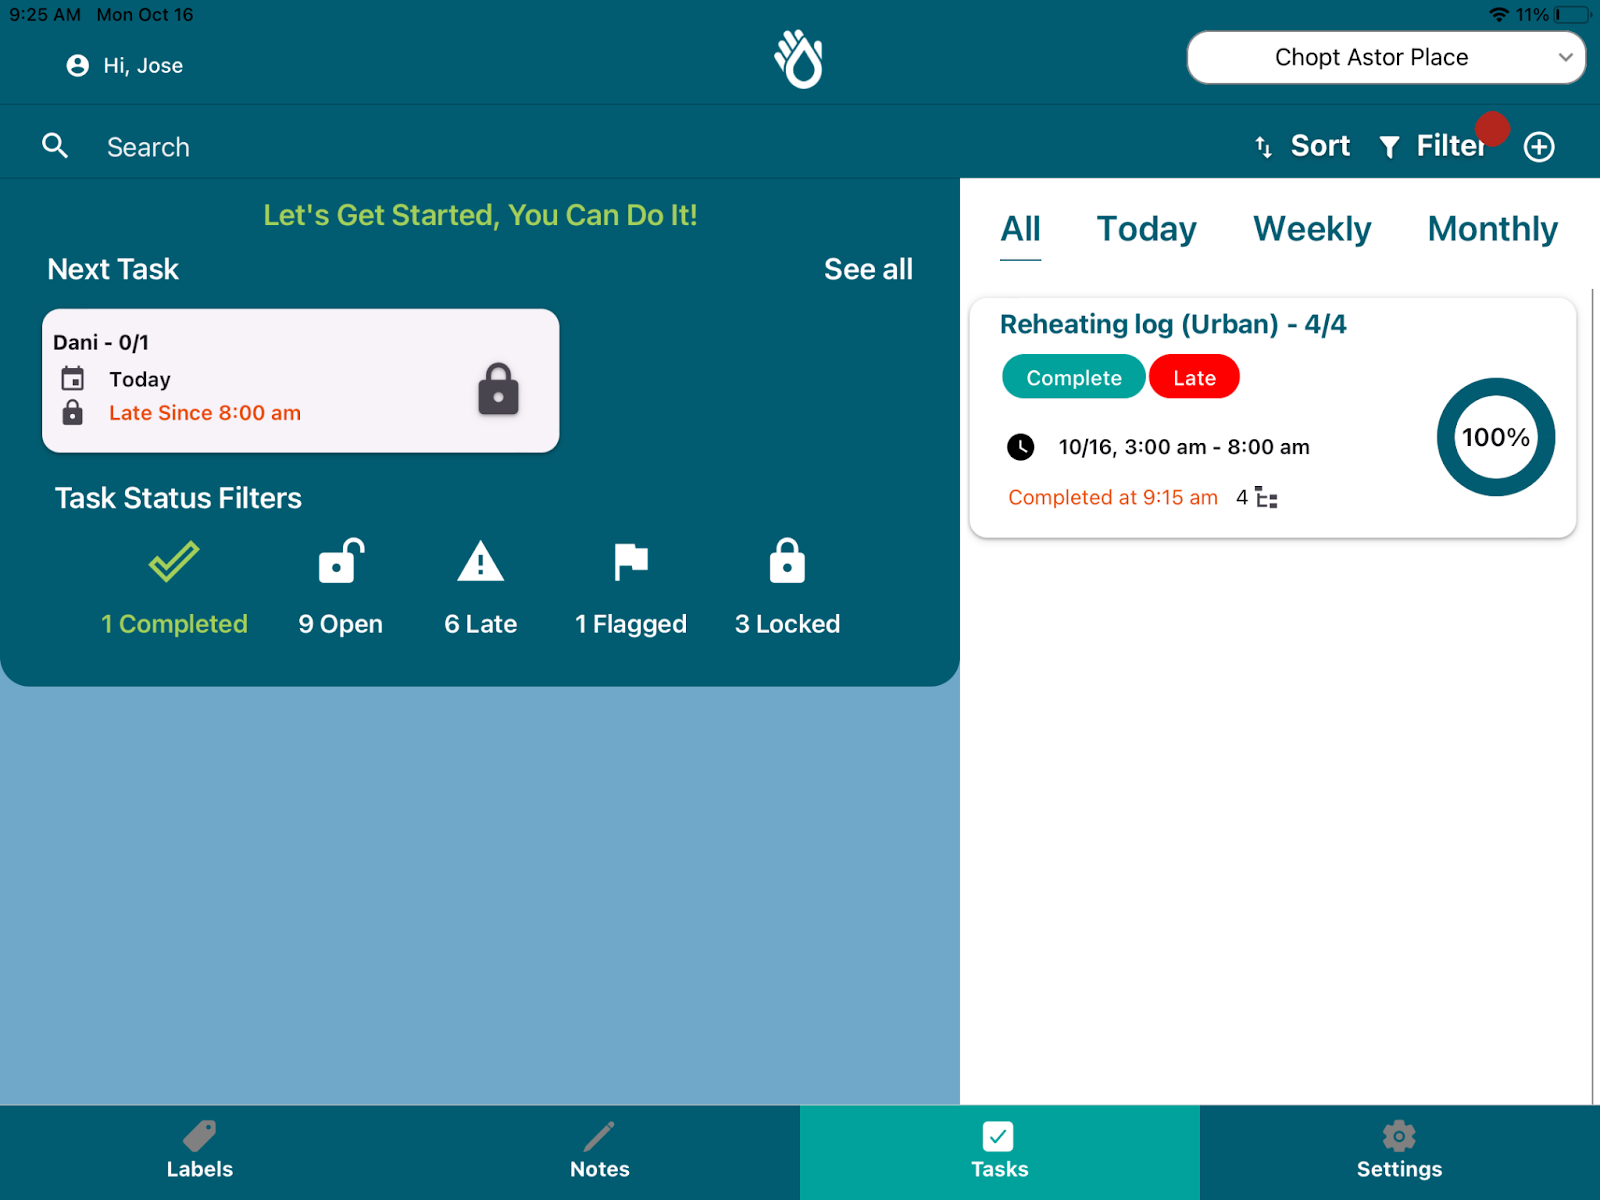
Tasks Summary Section:
This section is focused on giving a quick overview of task status and letting you know what is upcoming in the task queue.
Next Task: Will show the next task list to complete. If you see a lock on the task list card, this means the task list is not yet open for completion, we are just letting you know so you can plan to complete this later!
Task Highlights: This section shows a quick count of the Tasks Lists due today and allows you to click See All to navigate to the full task list.
Completing Tasks
To complete a task, just click on the task lists you want to complete. PathSpot will navigate you to the task list page where you will be able to access all due tasks.
Here are the different types of tasks and how to complete them:
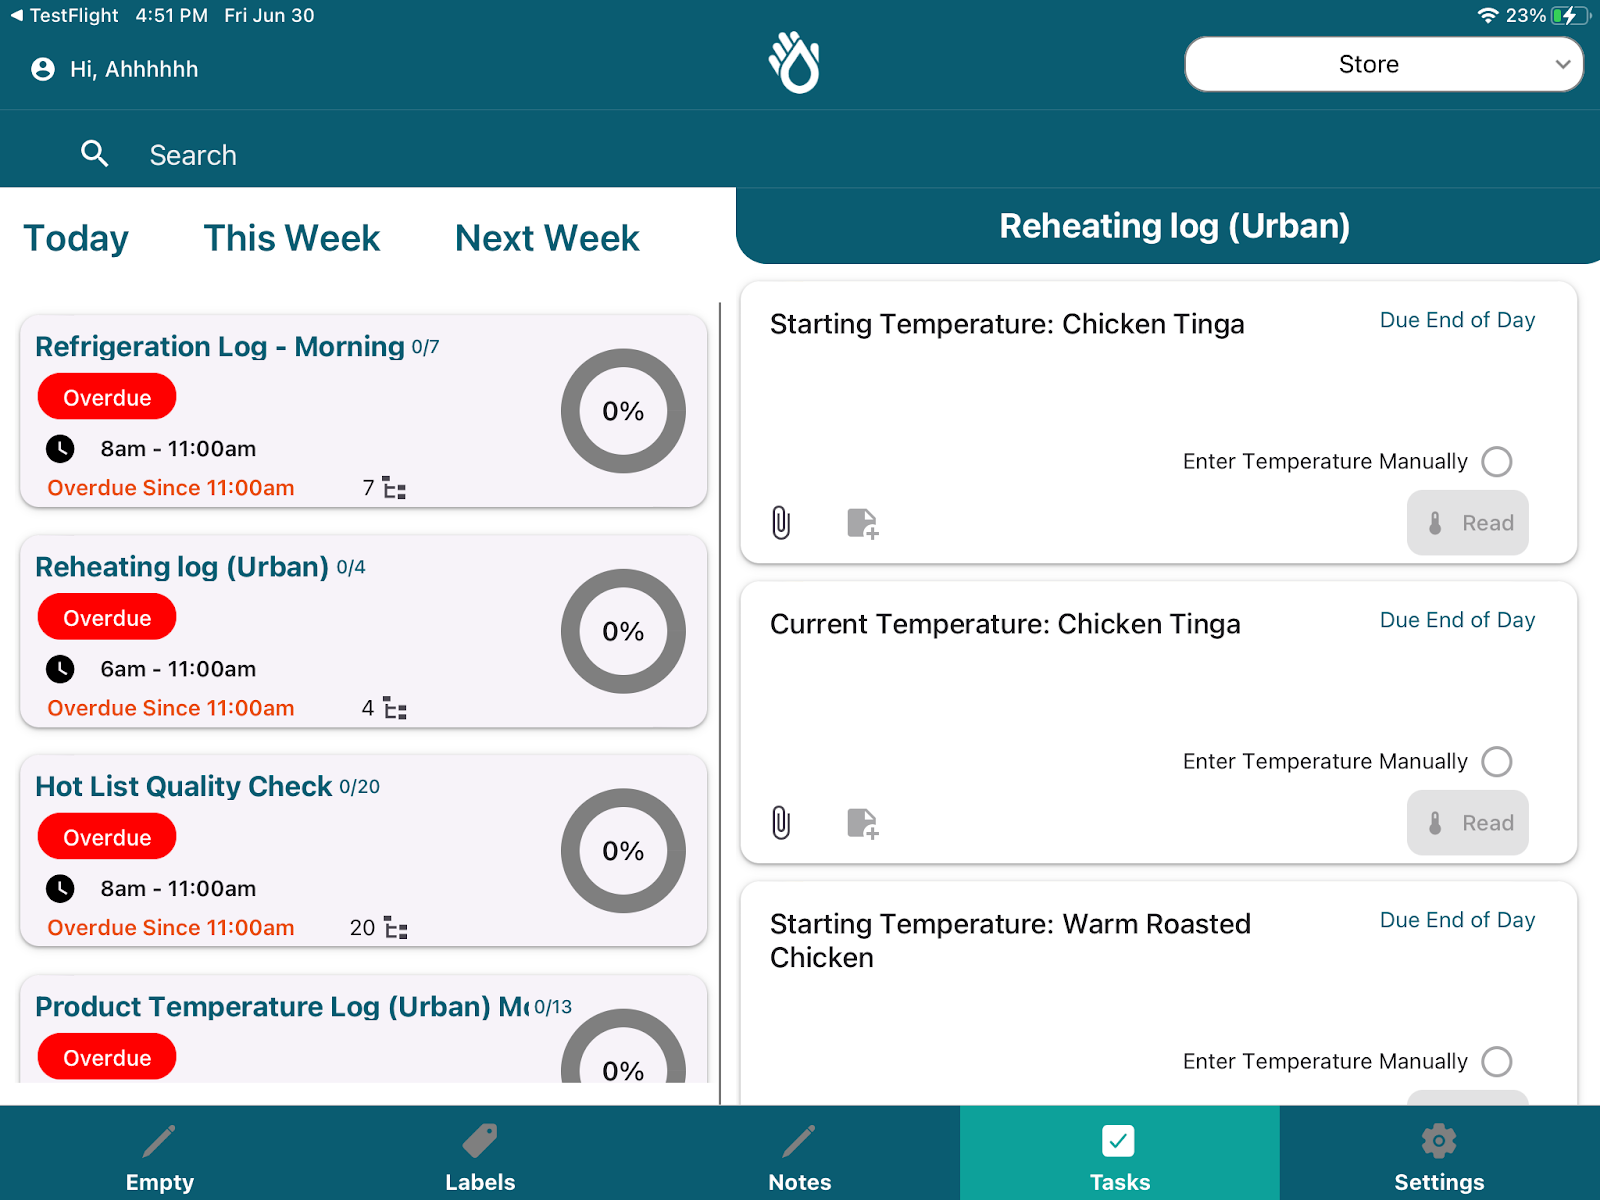
- Temperature Task- Bluetooth Probe: These tasks must be completed with a PathSpot Bluetooth probe. To complete, just unfold the probe until the screen of the probe turns on, navigate to the bluetooth task, and click “Read”. After 2-5 seconds, you will see the reading appear on the task and be able to click the save button to save the reading.
- Temperature Task - No Bluetooth Probe: These tasks require you to enter the temperature manually. Just click on the “Enter Temperature Manually” option and a field will appear allowing you to enter a temperature value.
- Text: These tasks can be completed by typing in any value.
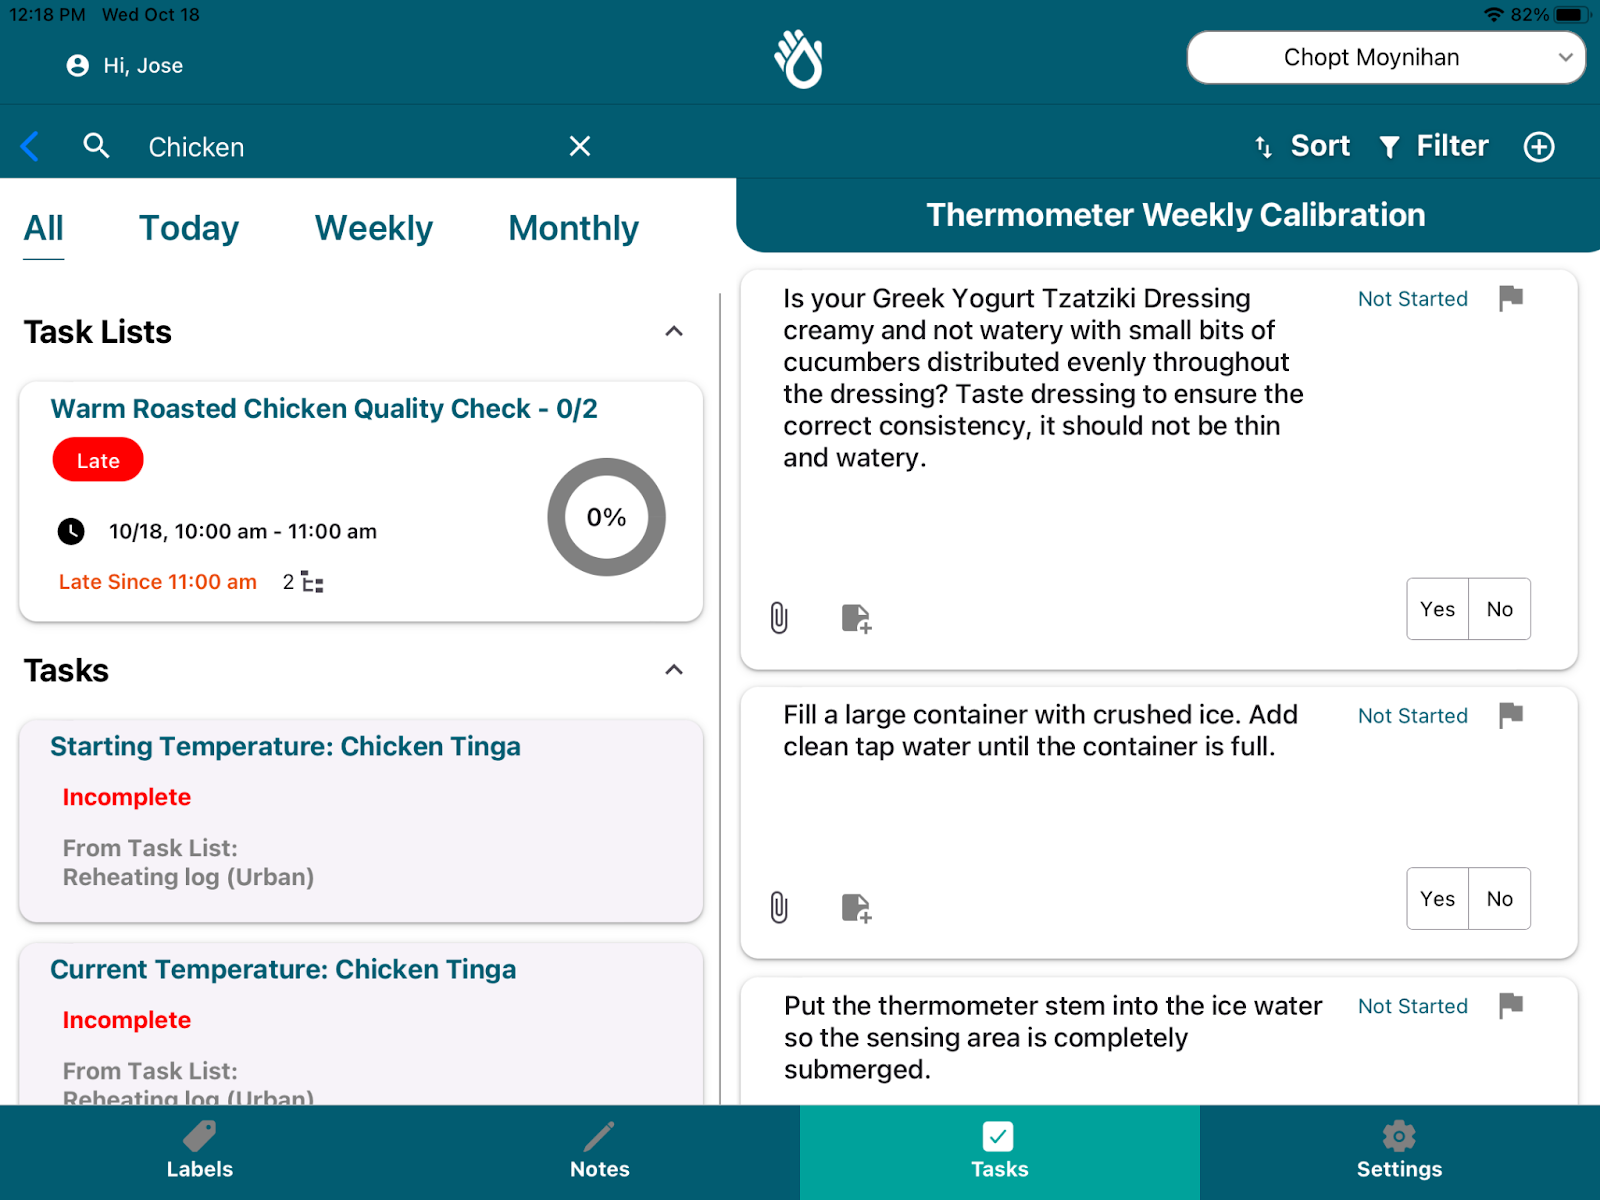
- Yes/No: These are the PathSpot version of a checklist. If your answer matches the question statement click YES if not, click NO. We will still mark your checklist as completed even if you answer NO.
- Number: These tasks will open up a pop up with a dial pad, allowing you to enter any number value. Don’t worry about entering units; just follow the instructions on the question.
- Date: A date selector might also appear allowing you to select a date to complete a task. Just click on the date field and a calendar field will appear for you to select from.
- Time: A time selector might also appear allowing you to select a time to complete a task. Just click on the time field and a time selector will appear. Click save time when you have selected the appropriate time.
- Handwashing Task: Counts the number of handwashes completed along the time the checklist is open. Just scan your hands on the PathSpot HandScanner and this will automatically complete!
- Select: Pickdowns allows you to predefine acceptable answers. In order to complete, just click the pickdown and select a response!
- Picture: Complete a task by uploading a picture from your library or taking a new picture using your camera.
- Signature: Complete a task by clicking on the signature field and drawing your signature on the task.
On every task, you will be able to see who completed the task and when on the top right of the task card. If the answer is incorrect, the task will be automatically flagged to facilitate manager review.
SubTasks:
If questions are Yes/No, SubTasks can be configured to appear depending on the answer. These will become required only if the subtask list is shown automatically by your previous answer. An example of these types of questions is shown below:
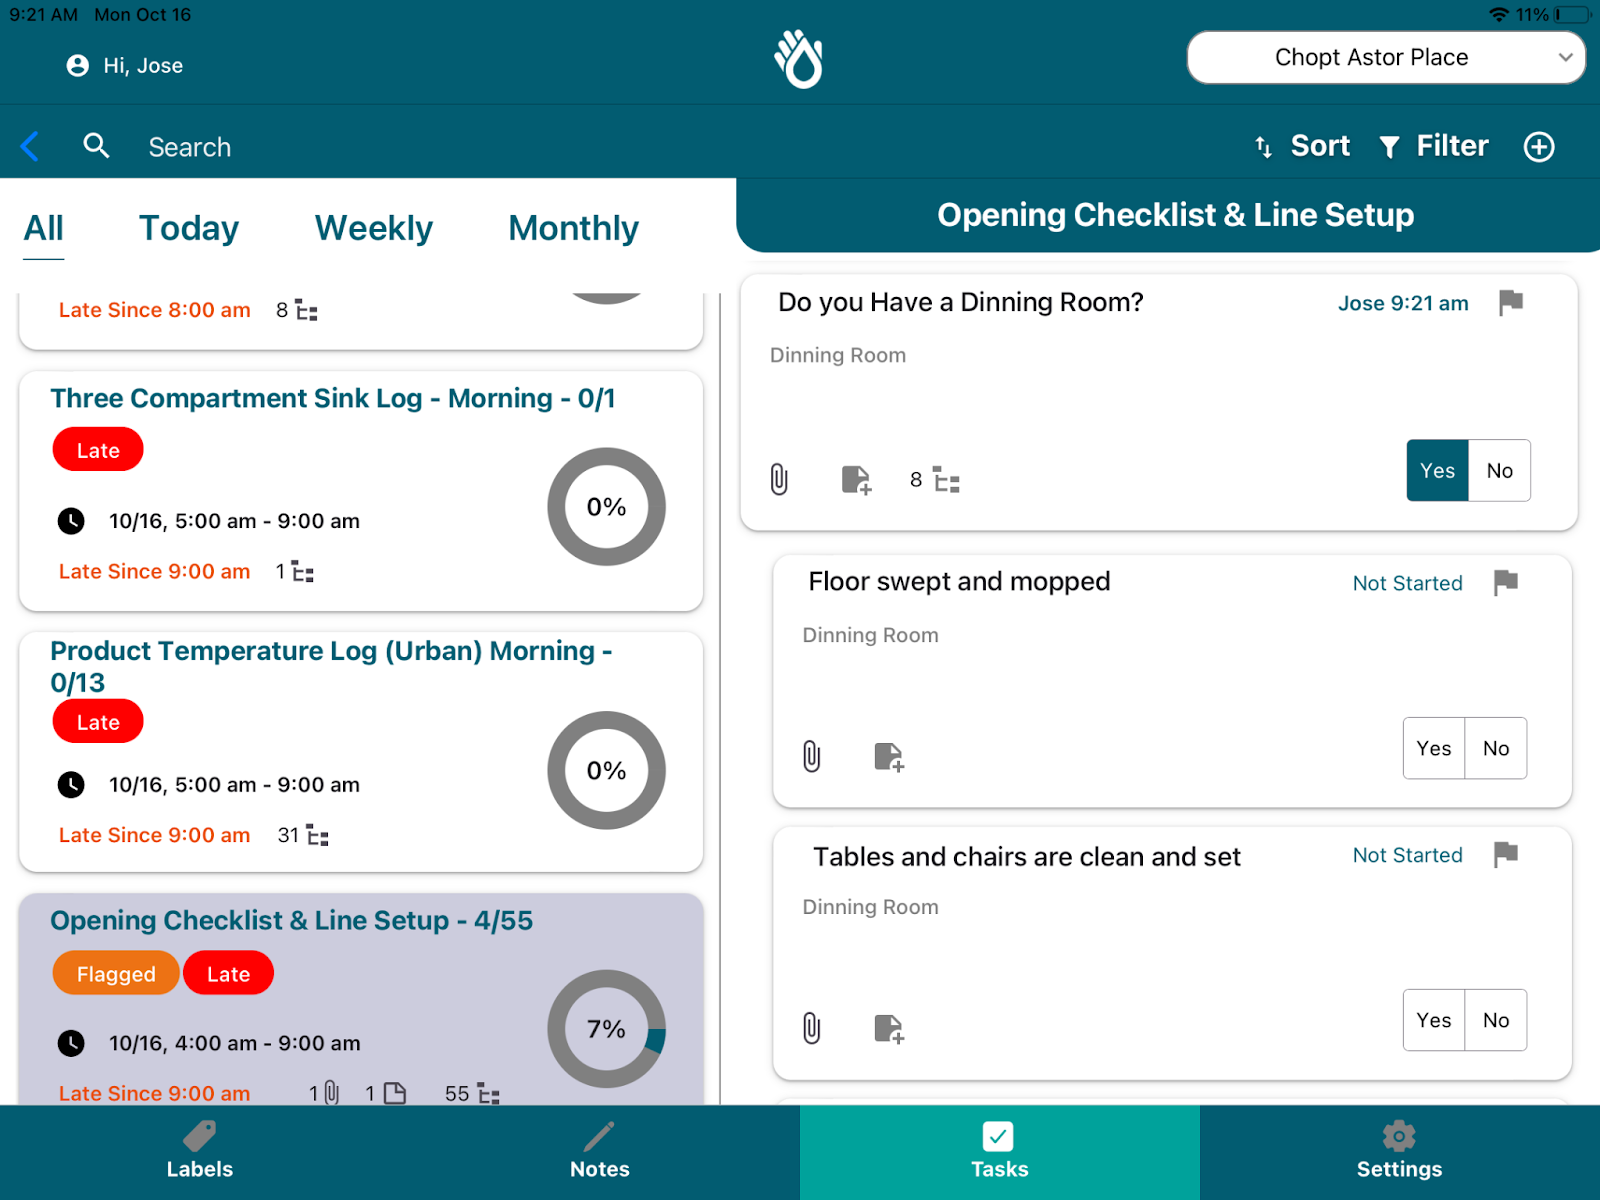
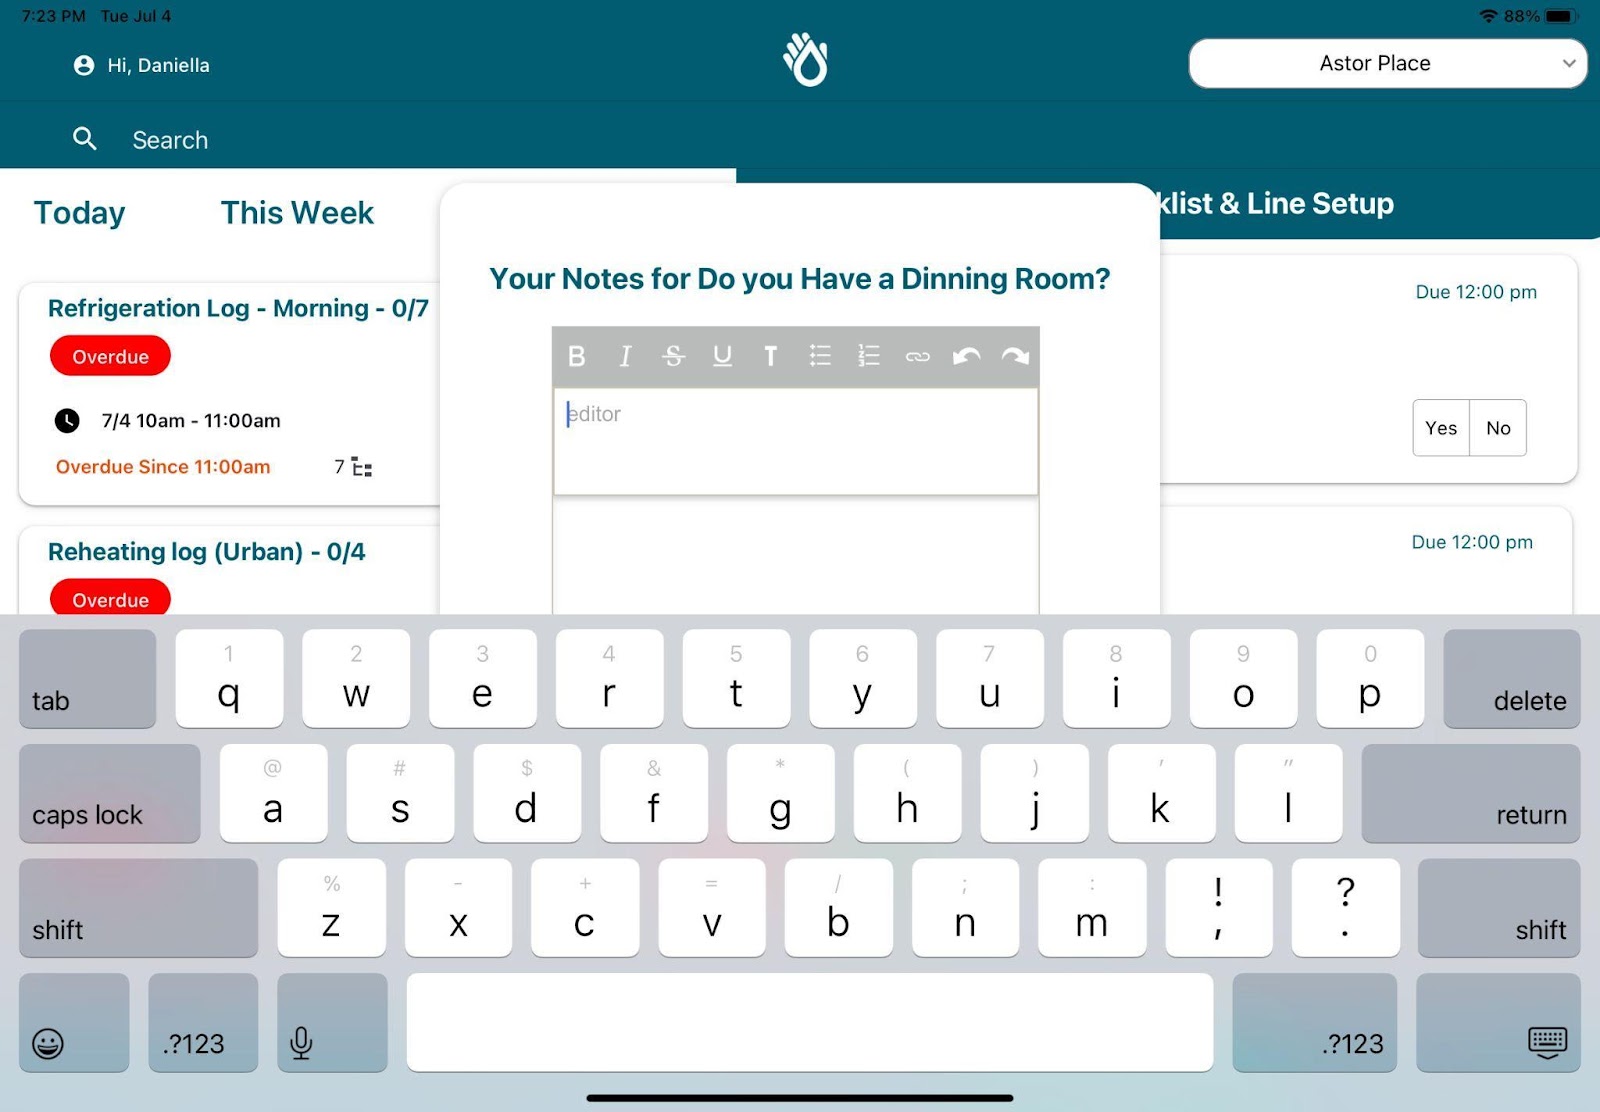
Comments:
Comments can be added to any of the individual tasks if further clarification is required. Just click on the paper icon and a pop up will show up allowing you to enter any details. When you are done, just click save and the pop up will automatically close, saving your comments.
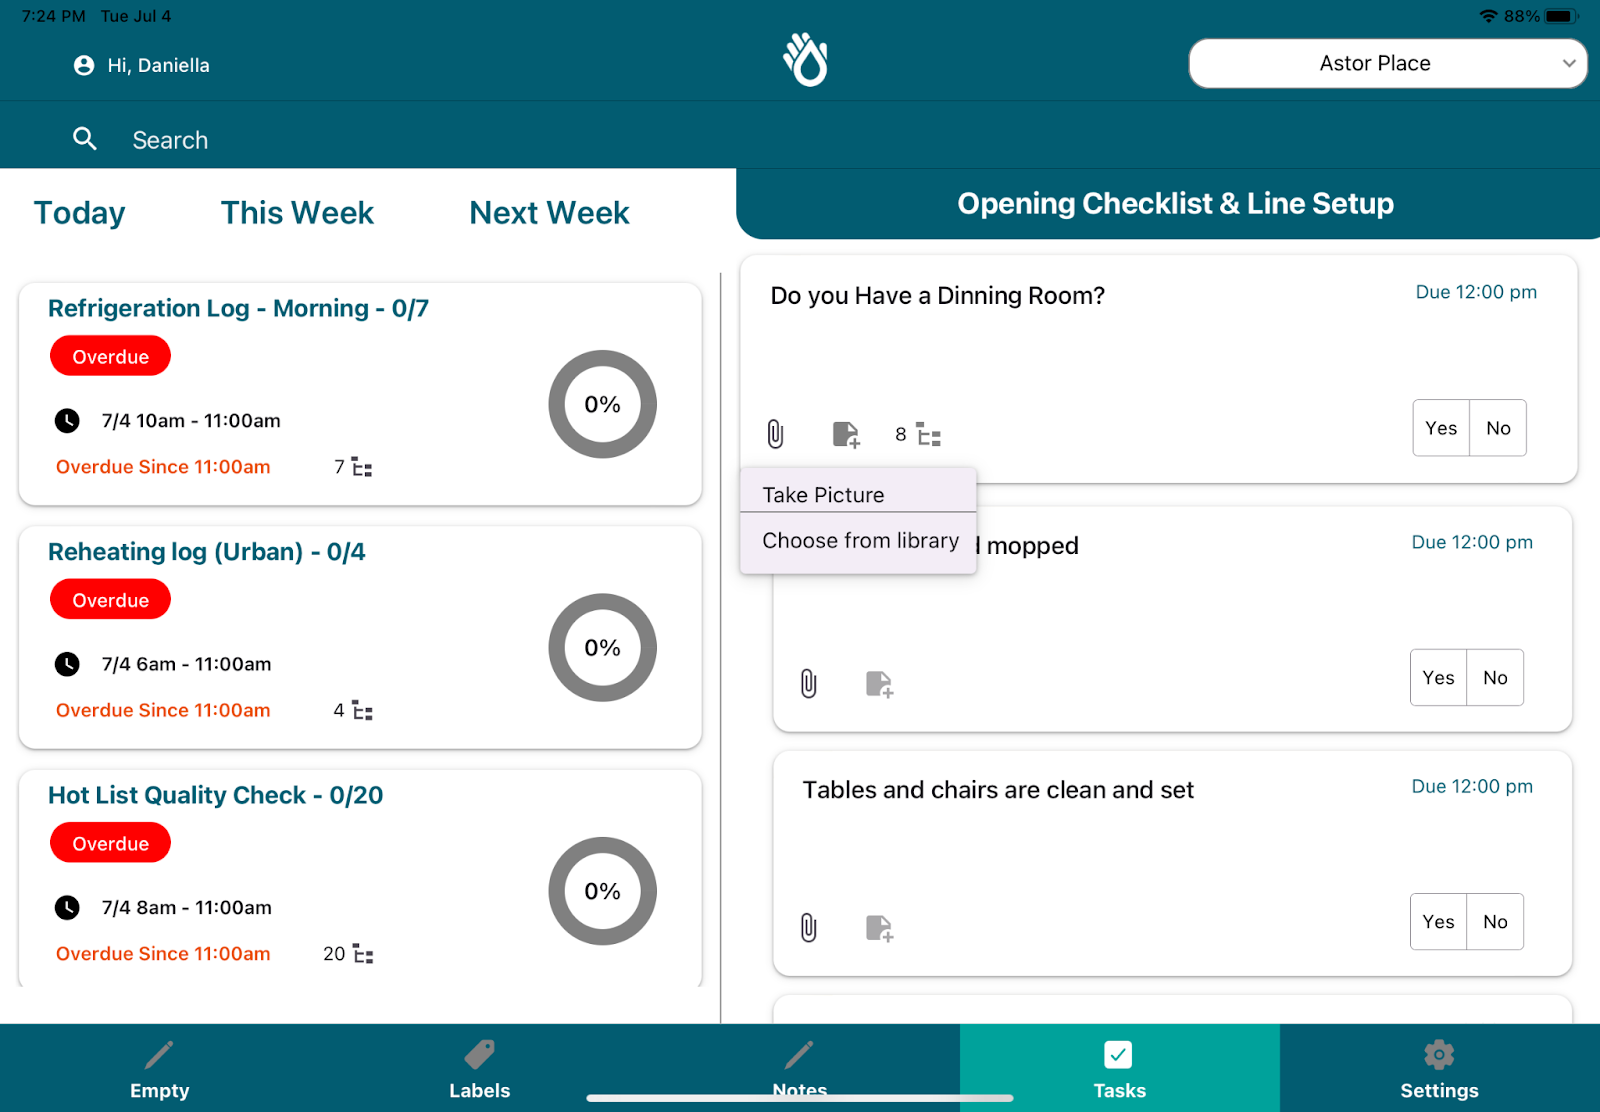
Attachments:
If you want to provide additional context, just click on the attachment field and select Take Picture, to take a new picture, or Choose from Library, to select from your photo library. Some tasks might require you to attach a picture for completion require you to attach a picture for completion.
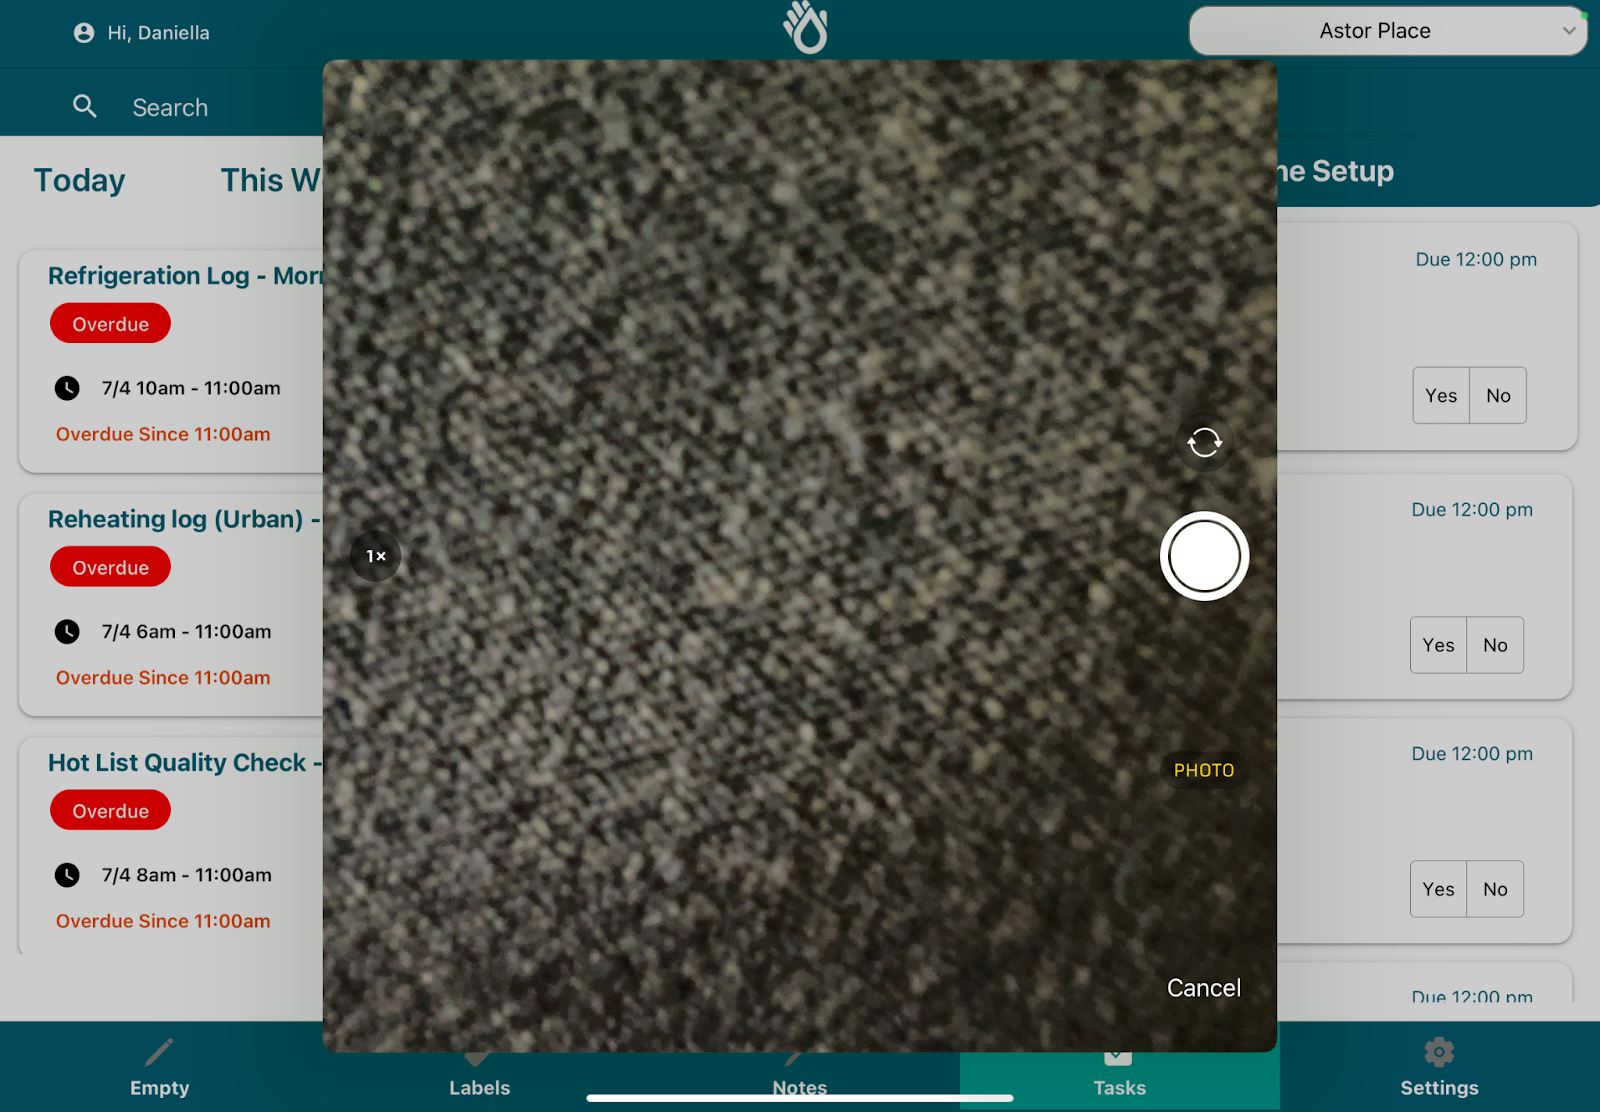
As a backup safety precaution, we will store all images into the iPads Photo file. Please make sure to give the SafetySuite App permission to add pictures to this application upon first set up!
Search, Sort and Filter:
Our app allows for flexible organization of tasks, so you can find what you need quickly. You have 3 options to choose from:
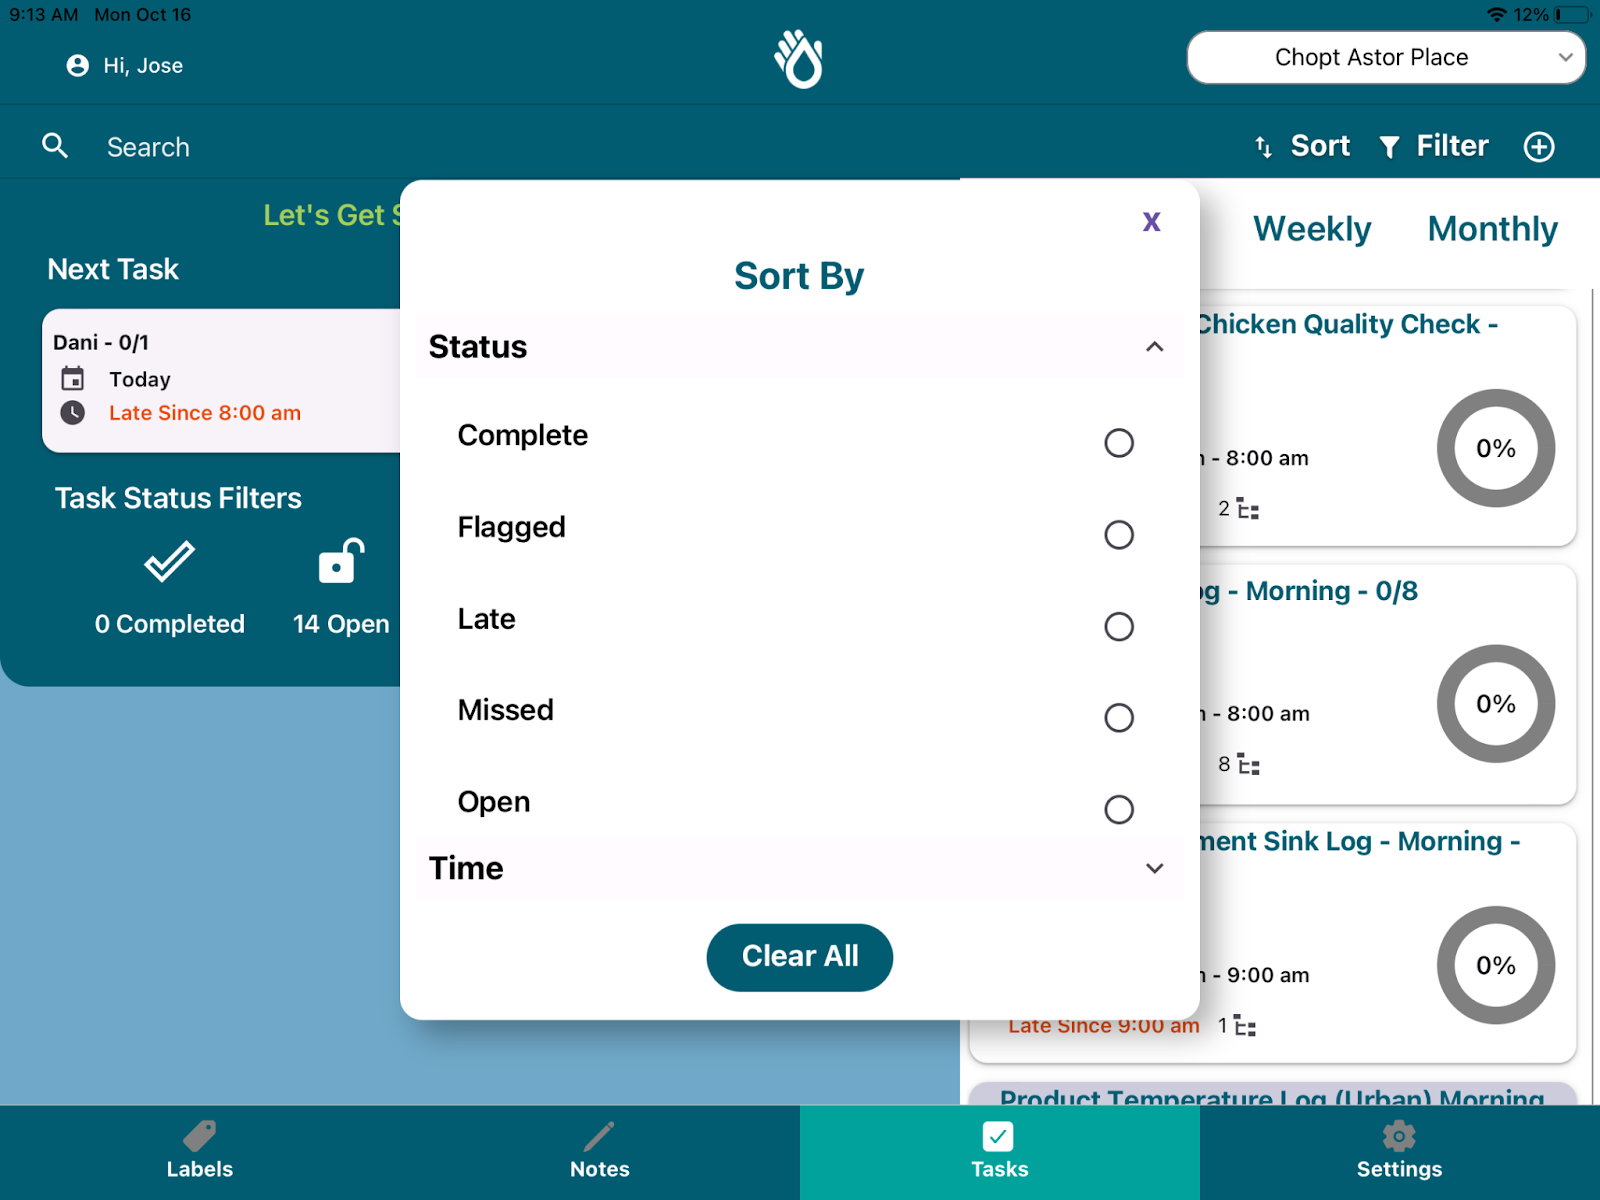
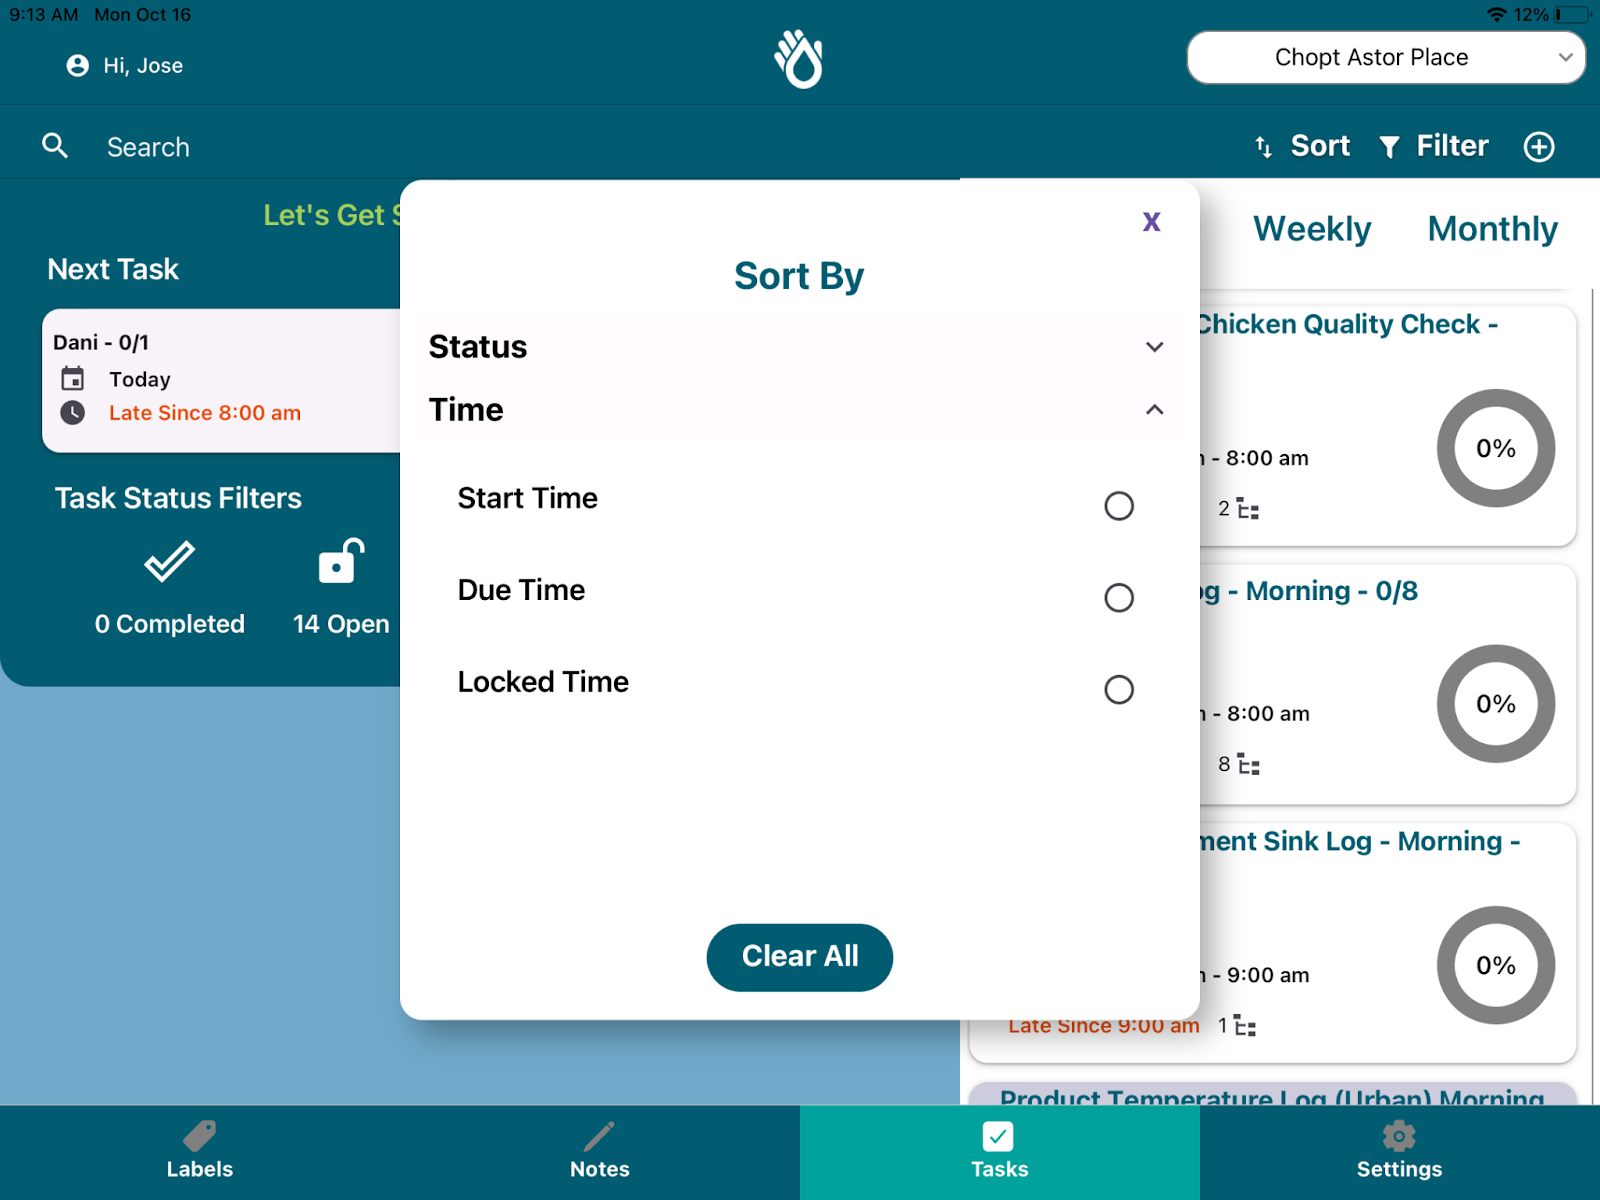
- Sorting: Allows you to order the list by status or time. To use this, just click the “Sort” button on the top right of the tasks page and a pop up will appear allowing you to sort by status or by date.
- Filtering: You will be able to filter by status, using the buttons on the main screen or by clicking the filter icon at the top right.

- Searching: PathSpot’s search feature will allow you to search for specific tasks or task lists. To use, just type relevant keywords on the search bar on the top left and your list will update to show you any matches.
Assigning Tasks - Forms
Through the PathSpot tool, you can also assign tasks lists that have been previously created by your brand straight through the App. To access, just navigate to the PowerTasks page and click the plus icon at the top right.
Note: If you can’t click on this button please contact support@pathspottech.com to help you with permissions.
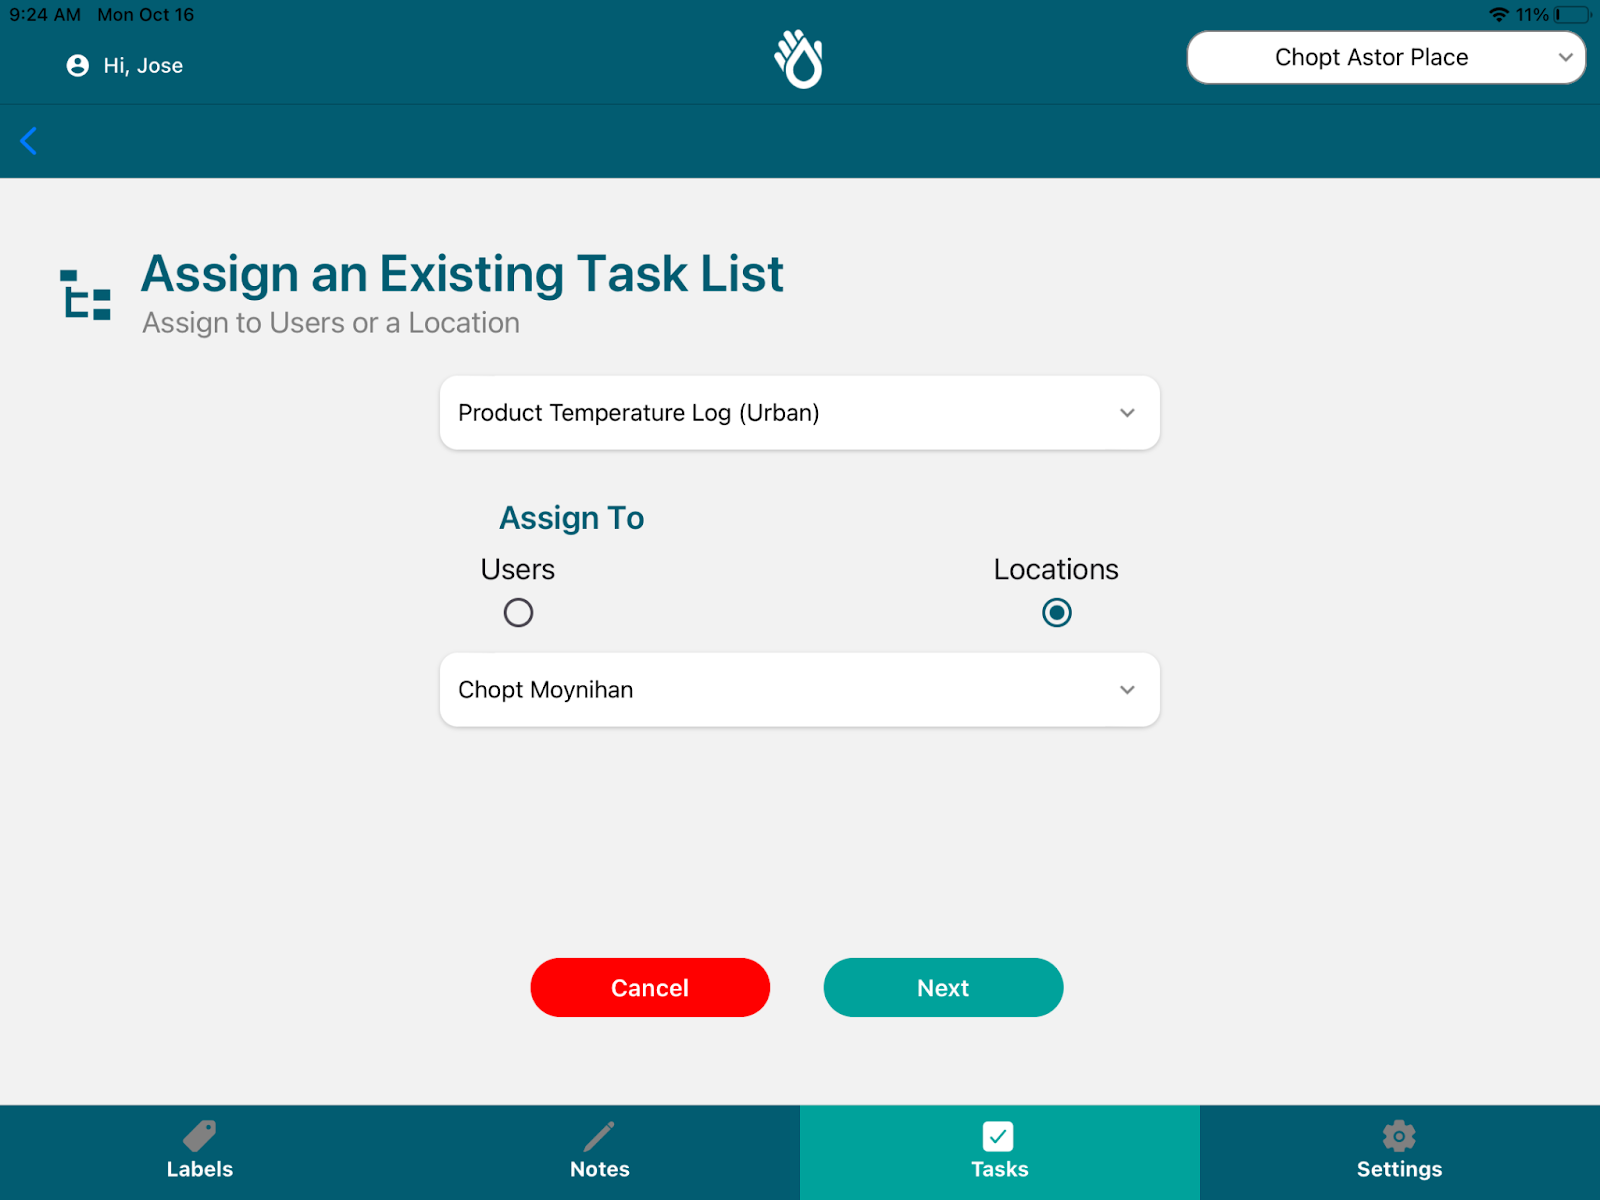
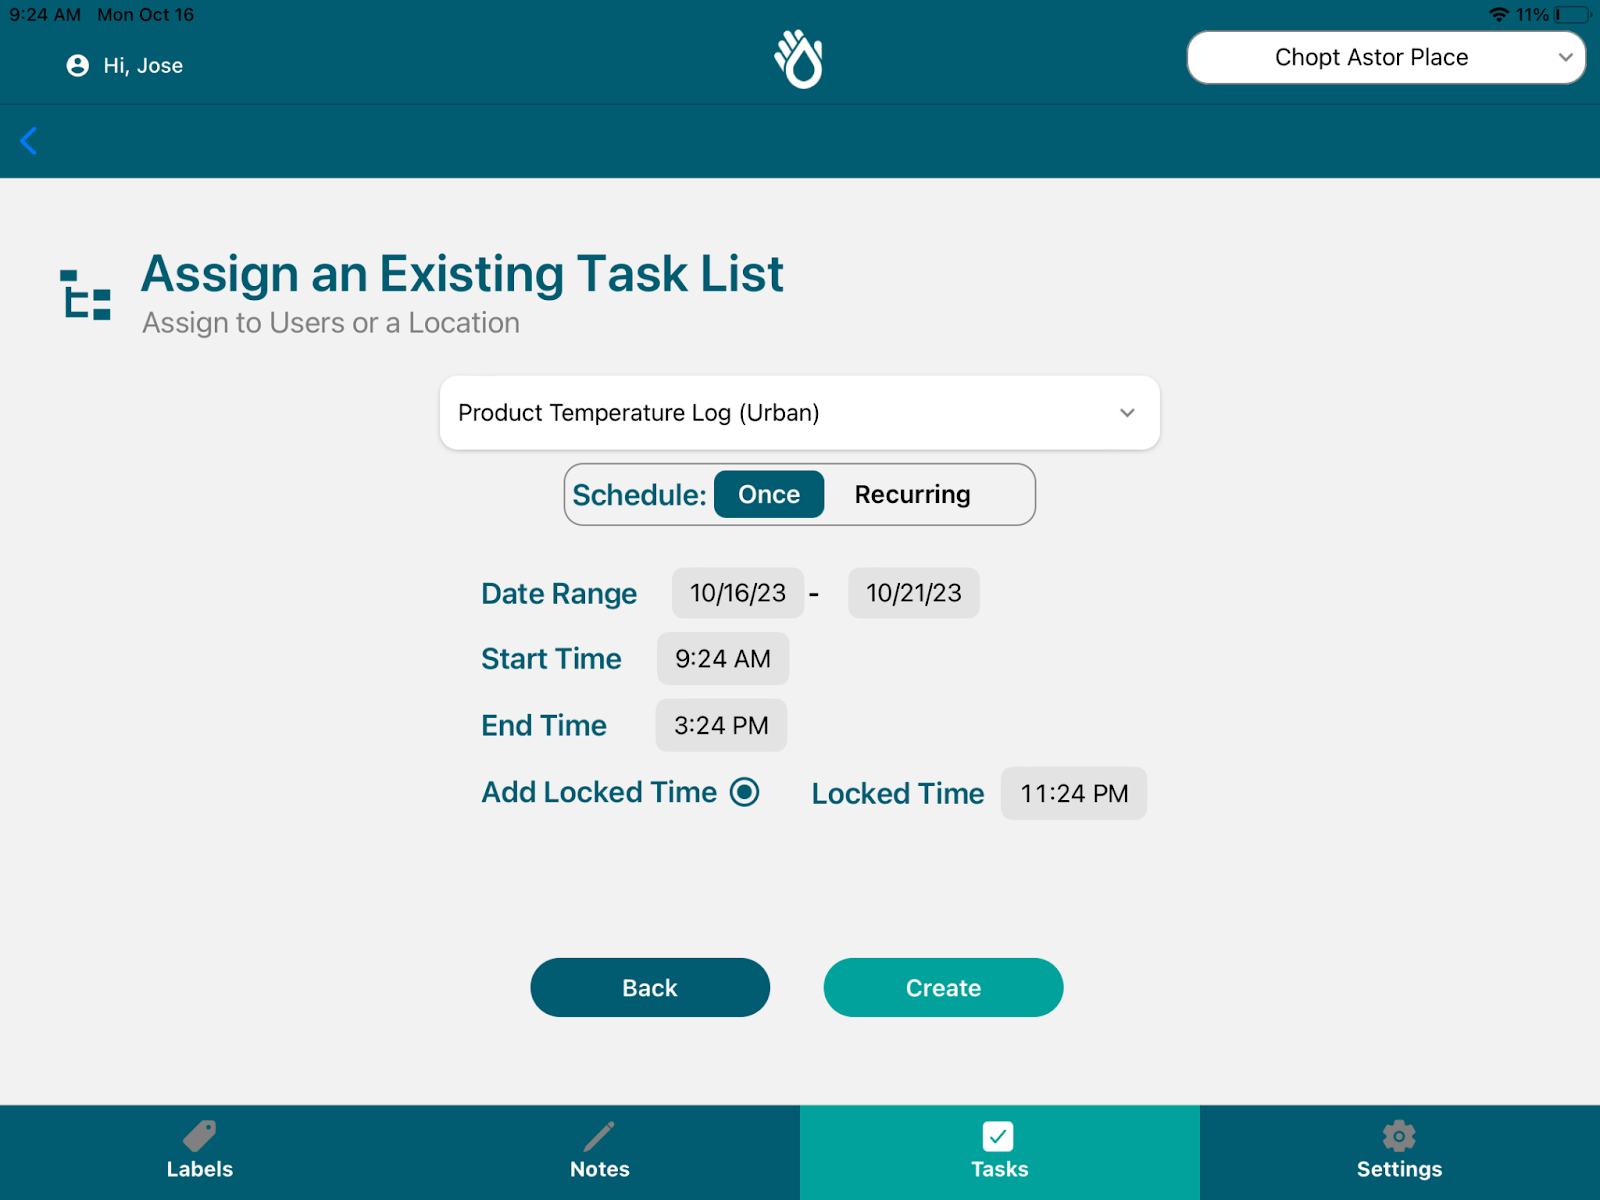
On the Assign an Existing Task list page, you will be able to select from a list of task lists available for assignment at your brand. After selecting the list, you will be able to select the location or user to which you want to assign the task list to. Click Next, when you are done.
Note: If you select a location, any user that is part of that location will be able to complete the list. If you select a user, only that user will be able to complete it.
After selecting the list and user, you will be able to select a time and date range for the user to complete. The start time will determine when the list opens; the end time will determine when the list is due; and the lock time will determine when the list closes and can no longer be completed. You will have 2 options to schedule:
- One Time: List will appear one time only and will be available only within the defined date range.
- Recurring: List will appear Daily for the location or user to complete. DO NOT USE THIS FOR FOR ONE TIME LISTS
Audit Notes
Overview
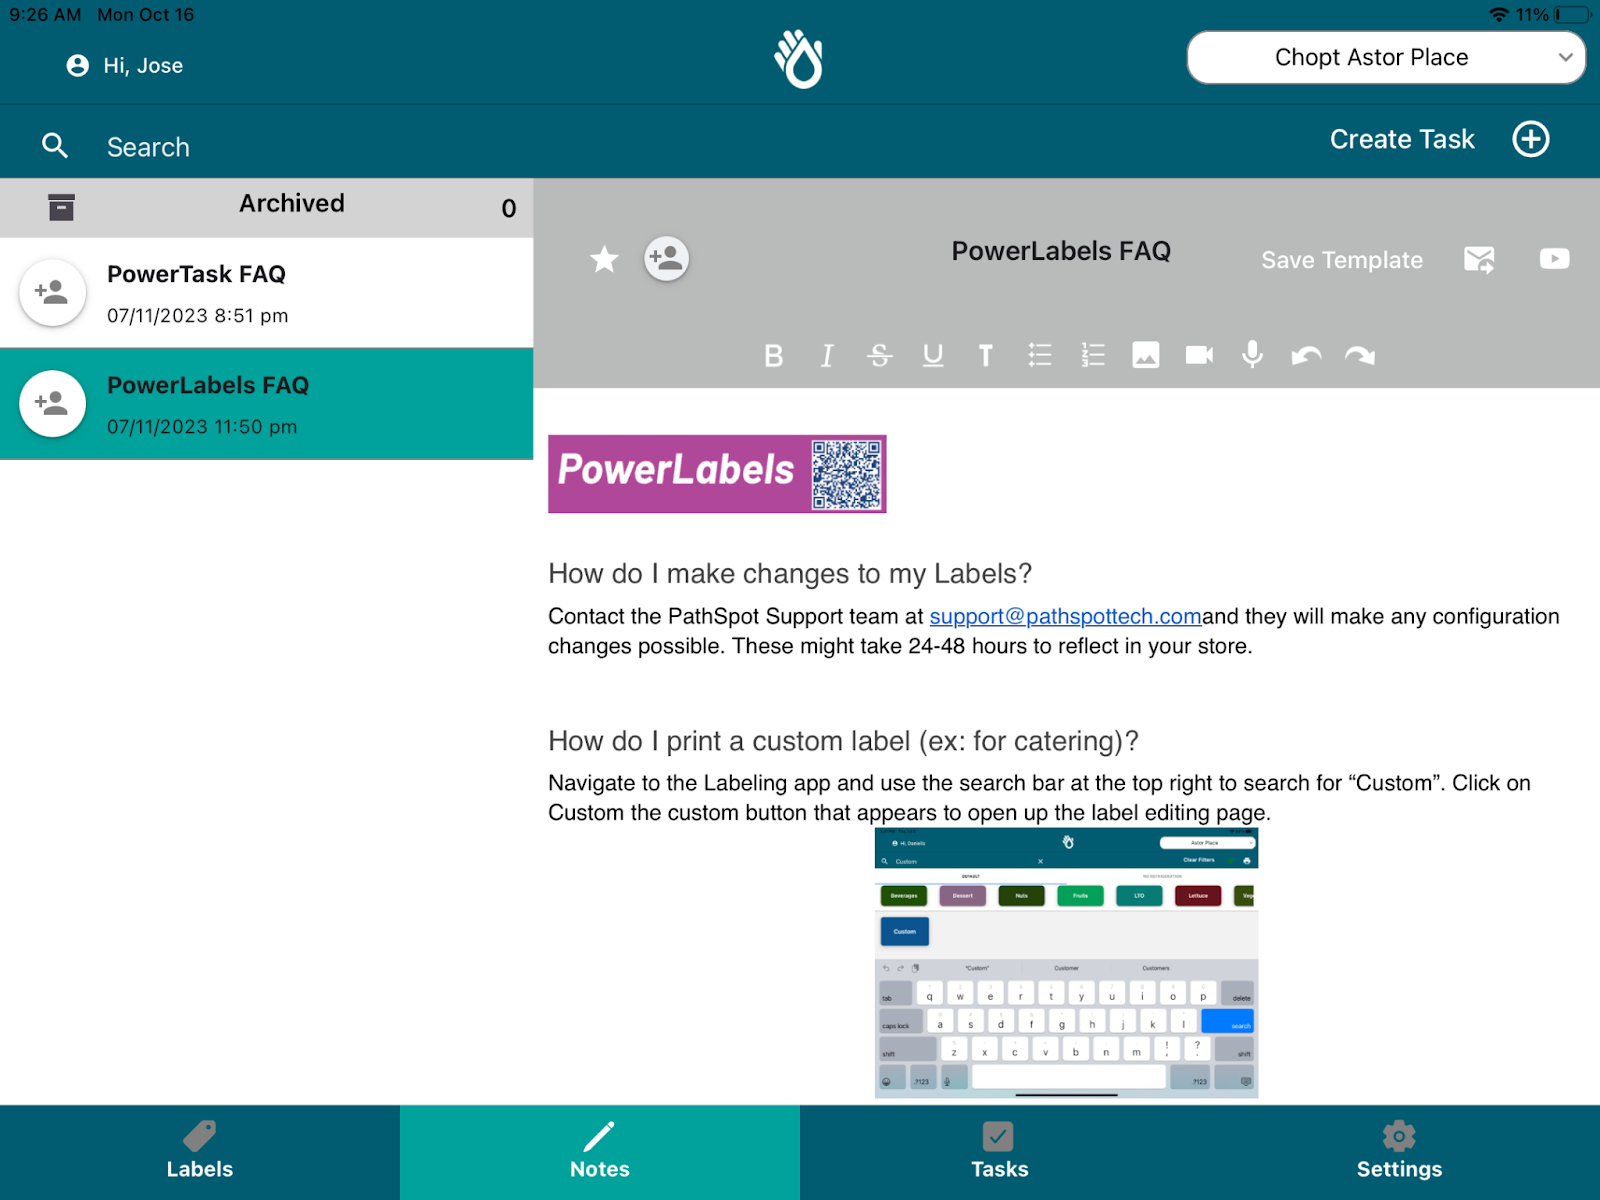
Use Audit Notes mainly to store important FAQs and training documentation for your employees. Contact the PathSpot team at support@pathspottech.com to learn more about how to create notes for your employees to read and to upload any documentation to this tool.
Create Task
On the Notes app you will also be able to access the Create Task feature, allowing you to create a single task for your employees to complete. This is ideal for setting operational reminders of any critical task that need to be completed at your store or facility.
Note: If you can’t click on this button please contact support@pathspottech.com to help you with permissions.
To use this, just navigate the PathSpot Notes tab and click on the Create Task button at the top right. This will open a pop up allowing you to detail out the Task Name and Description. It will also allow you to define the users or location to which you want to assign this task to.
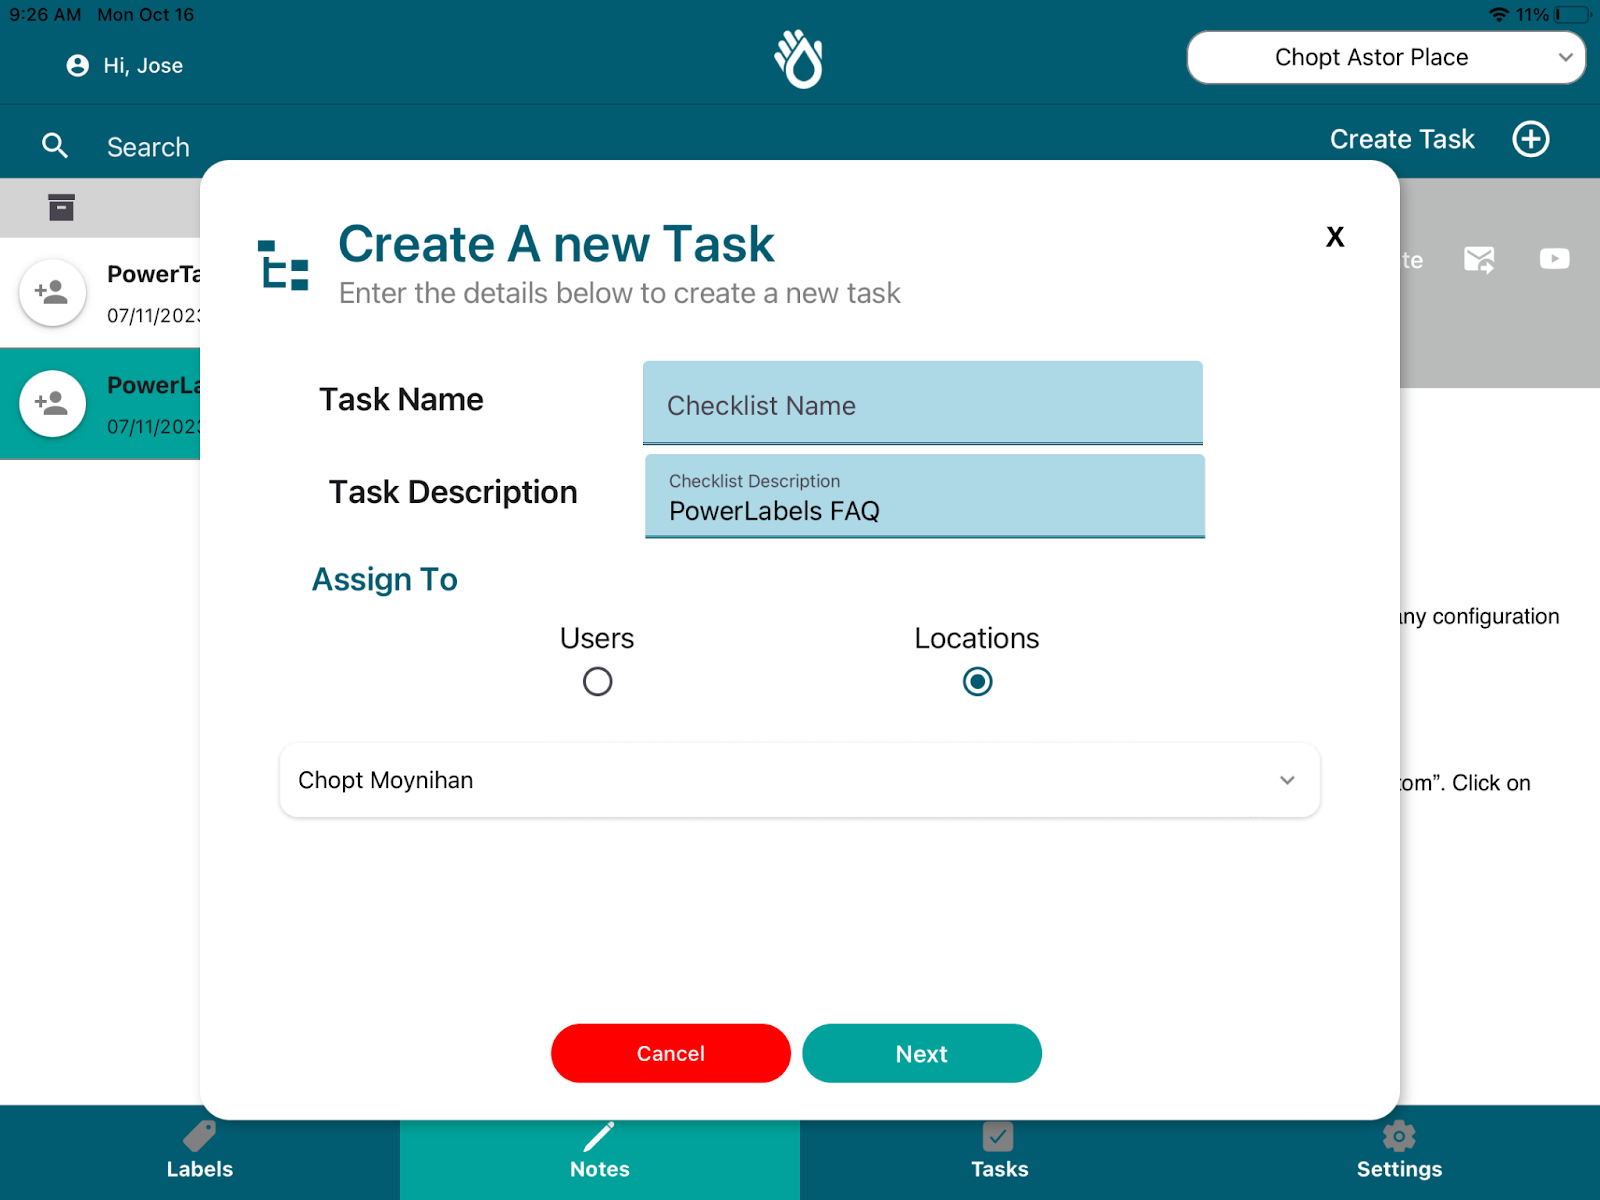
After setting these details, you will be able to select a time and date range for the user to complete. The start time will determine when the list opens; the end time will determine when the list is due; and the lock time will determine when the list closes and can no longer be completed. You will have 2 options to schedule:
- One Time: List will appear one time only and will be available only within the defined date range.
- Recurring: List will appear Daily for the location or user to complete.
When you are done, just click save ! The list will appear automatically on the relevant user accounts to complete.
Labeling (iPad)
The labeling portion of the app is designed to print out expiring and non expiring food labels via a bluetooth connected printer.
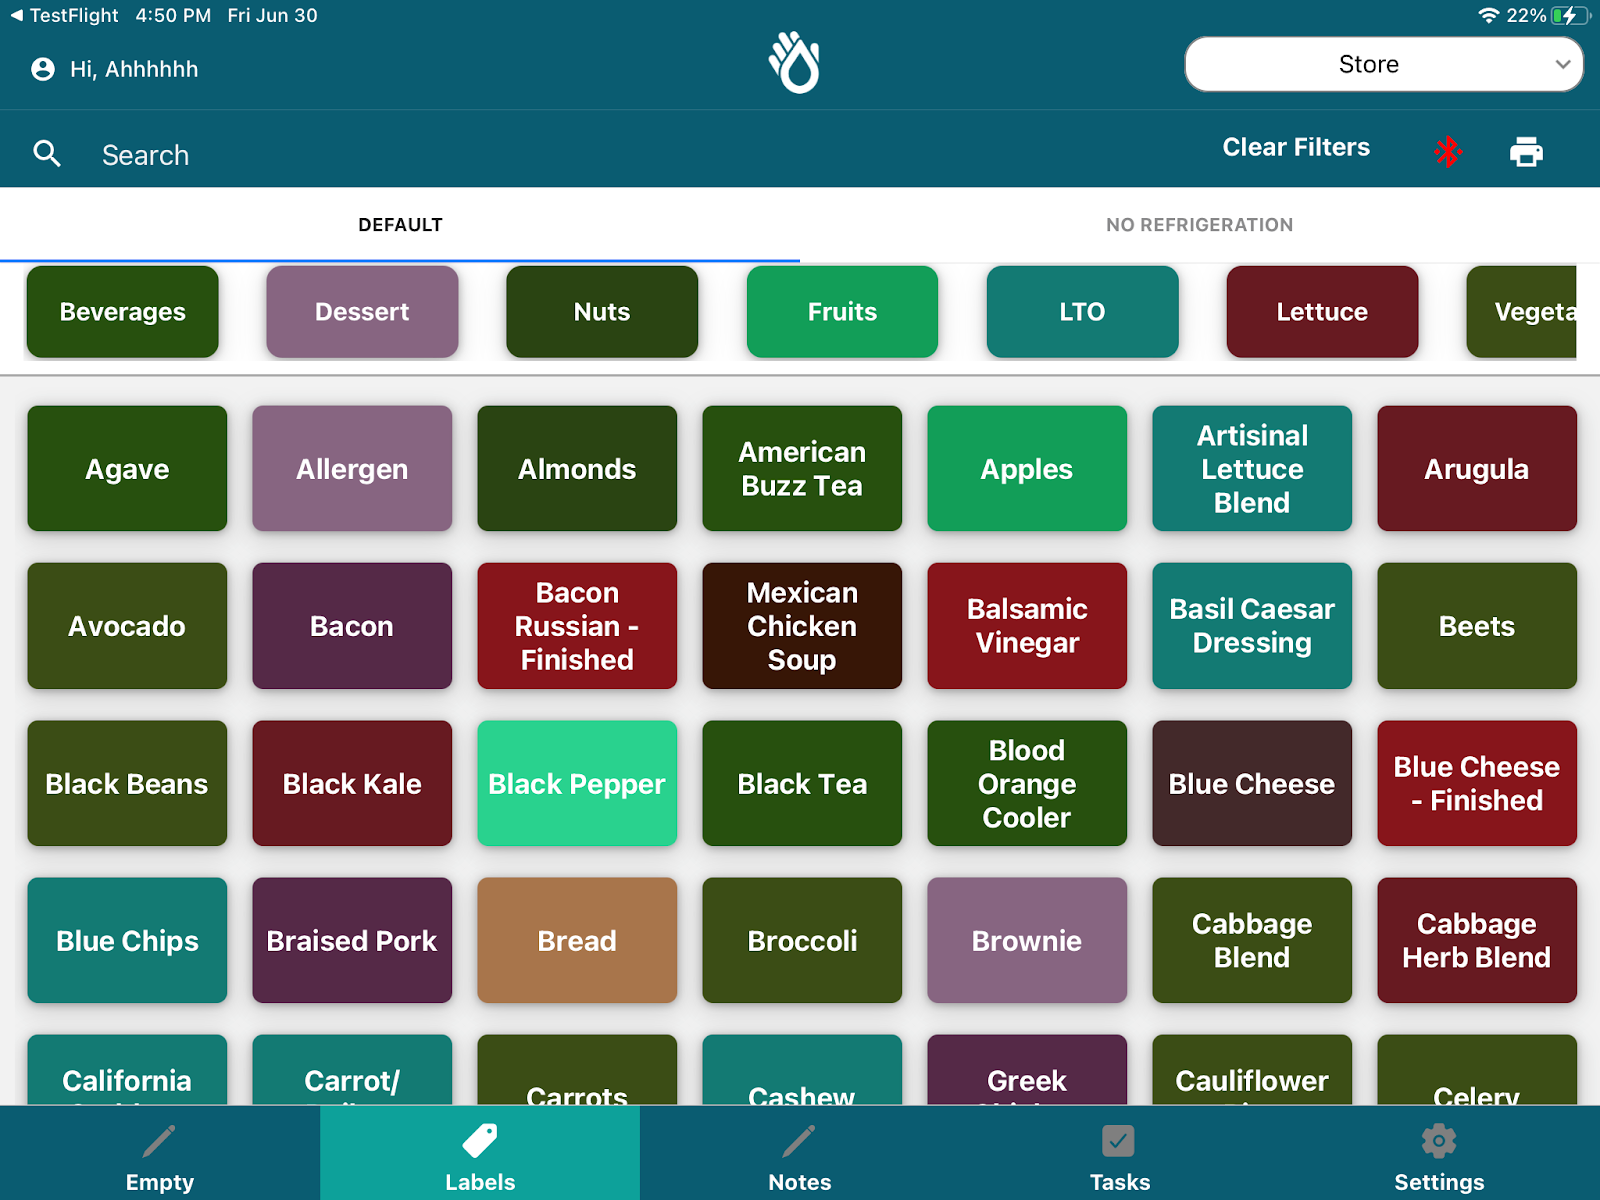
The Overview Page has 3 sections:
Navigation
Ingredient Configurations
Print Queue
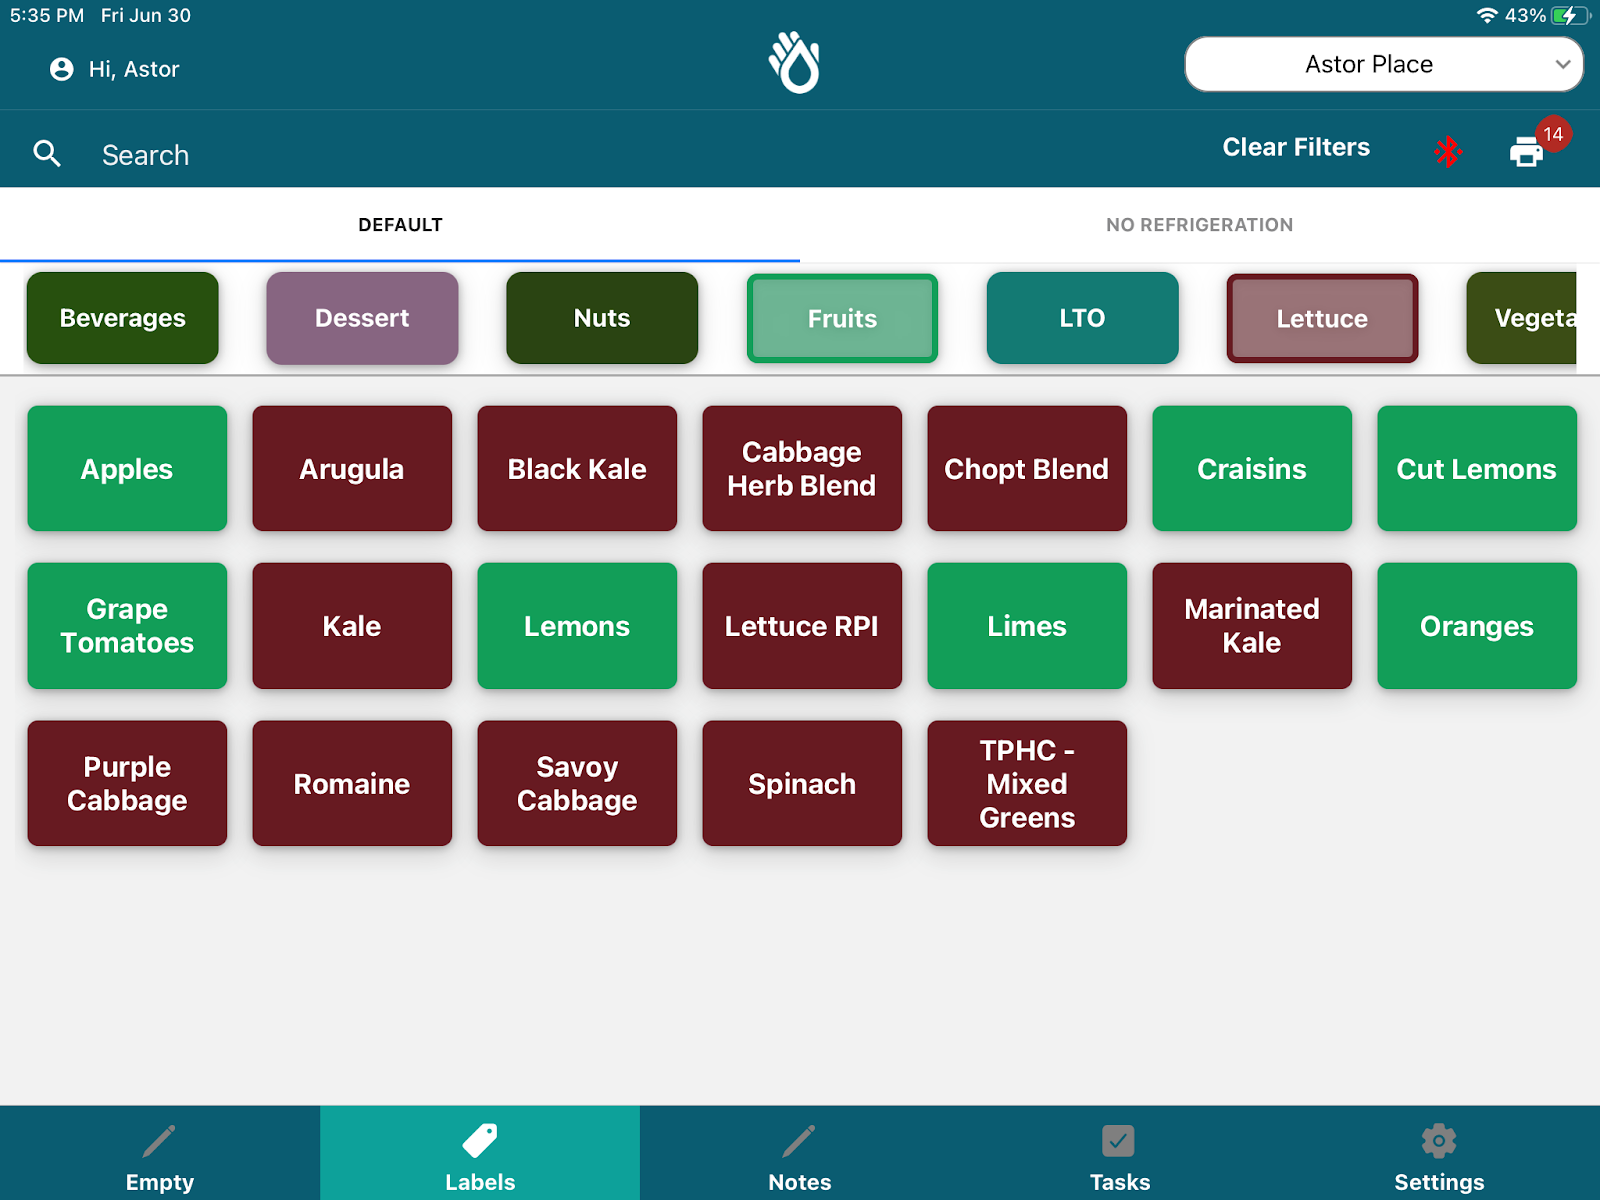
Navigation
Searching:
On the top left corner of the page, a search bar allows you to look for any ingredient you want to print a label for. Just click on the search bar, type the item name and the page will auto filter.

Tabbed Phase Switching
For convenience, we have separated the labels in two tabs. The Default category, and the No Refrigeration category ( 4 hour labels). This allows you to quickly print out labels with the right expiration date by selecting on the appropriate tab and searching for your ingredient or item.

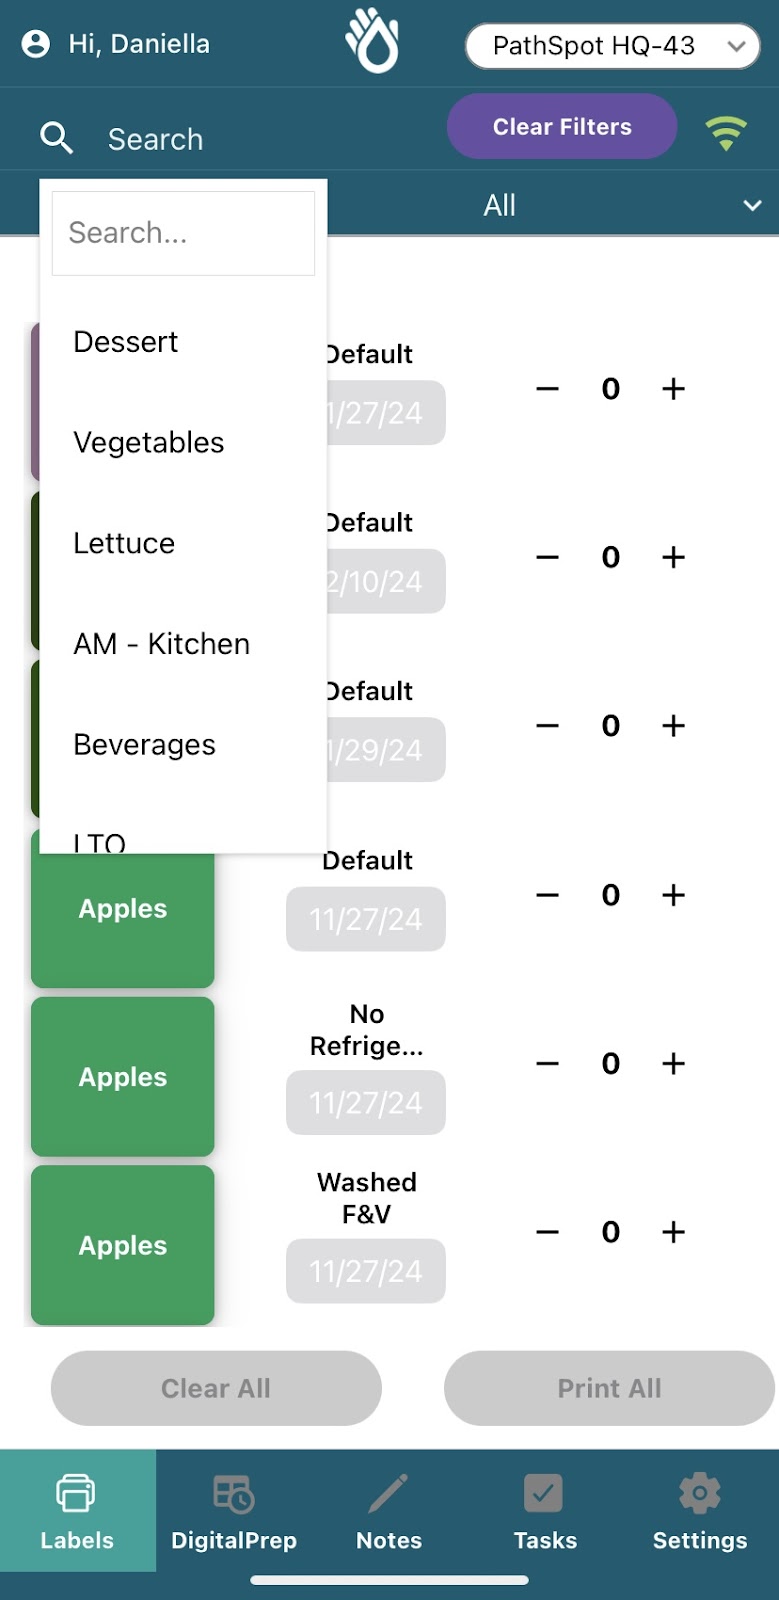
Category Filtering
If you are unsure what the name of your item is, you can leverage our category filters on the top of the page. This separates ingredients or items by top level categories to allow you to quickly filter by the type of ingredient. This is multiselect ! So pick one or multiple categories to filter the data.
Ingredient Configurations:
Once you find your ingredient, just click on the ingredient name and a pop up will open up allowing you to further specify your ingredient details, quick print the label or add to the label queue.
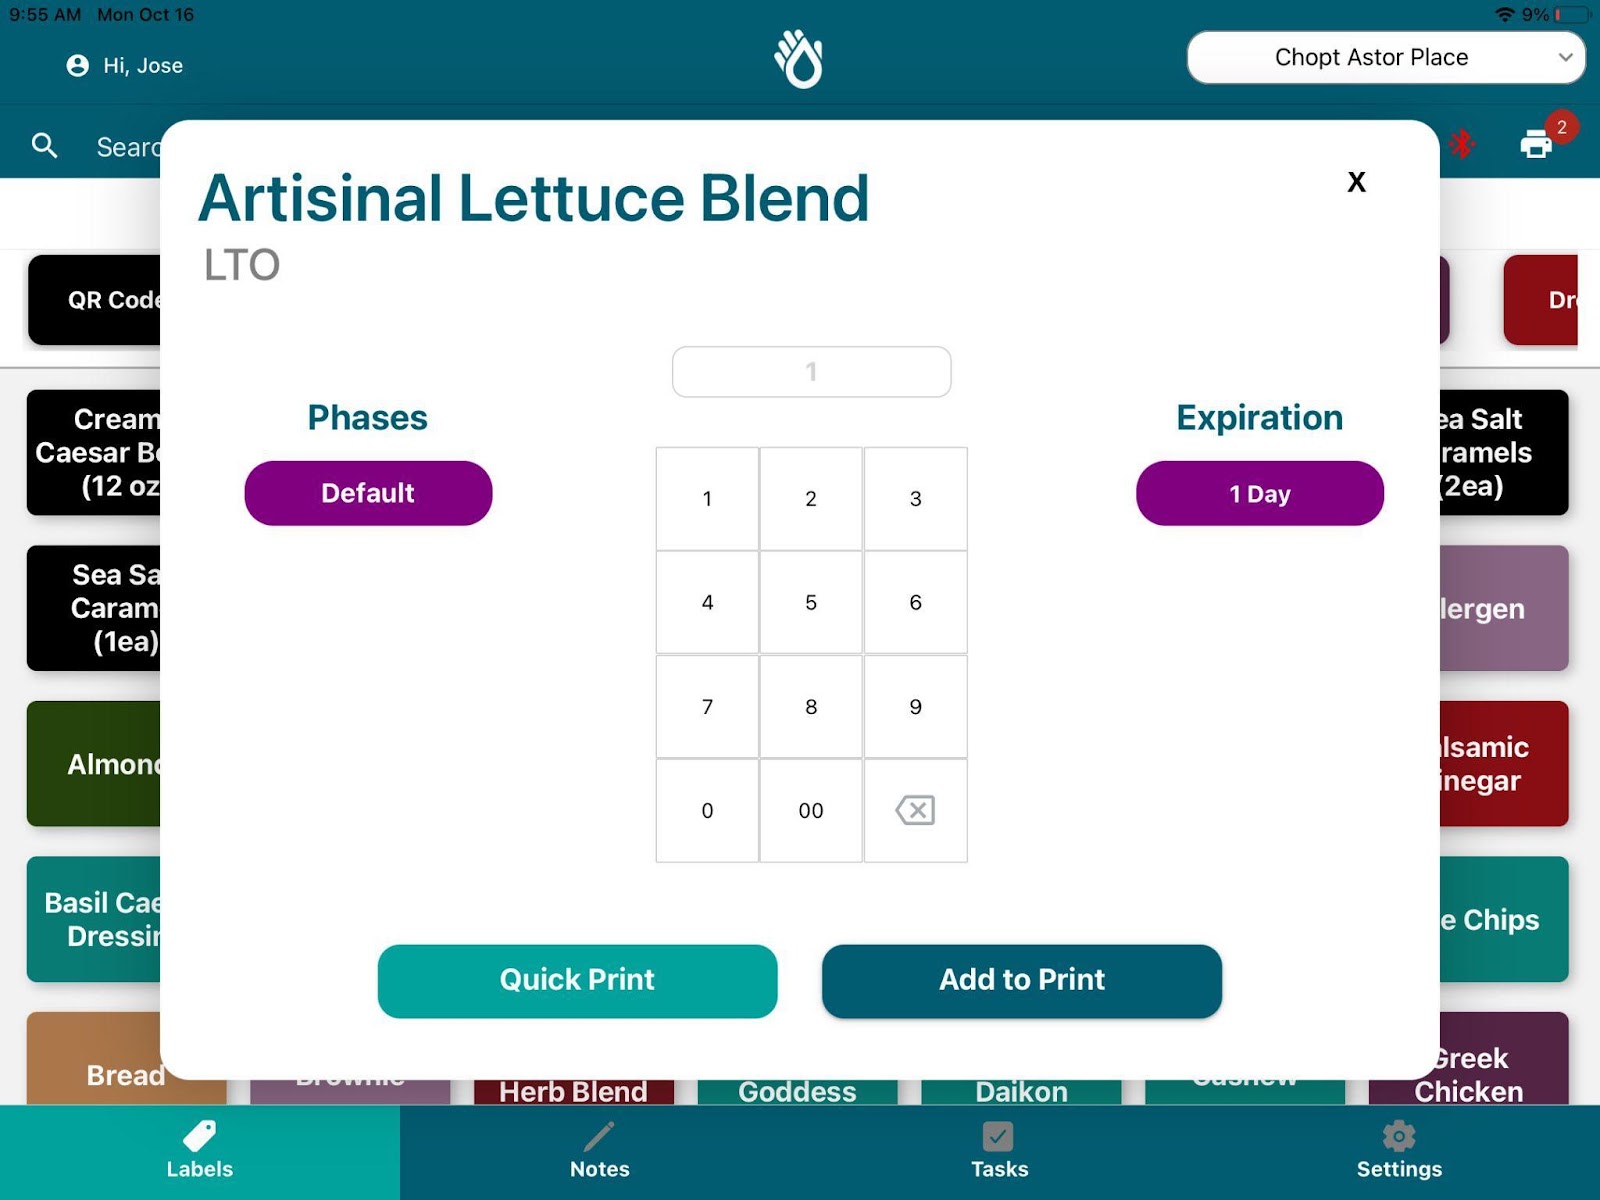
On the pop up seen on the previous page, you will be able to access multiple options:
- Ingredient Phases: Accessible on the left of the pop up, this section allows you to specify the stage of the ingredient to make it easier to know which expiration date applies. Ingredients have different expiration dates if they are frozen, refrigerated or kept in dry storage.
- Expiration Dates: Some phases might also have several expiration dates depending on when you are labeling. On the rightmost side of the label you will be able to view the expiration dates available for your ingredient phase. If more than one is available, you can select which one you want to assign. This is frequently used when food is labeled a day after it was received, as you will be able to select a custom expiration date.
- Print Quantity: The dial pad in the middle allows you to quickly define how many labels you want to print or add to your queue for the ingredient.
Printing (iPad)
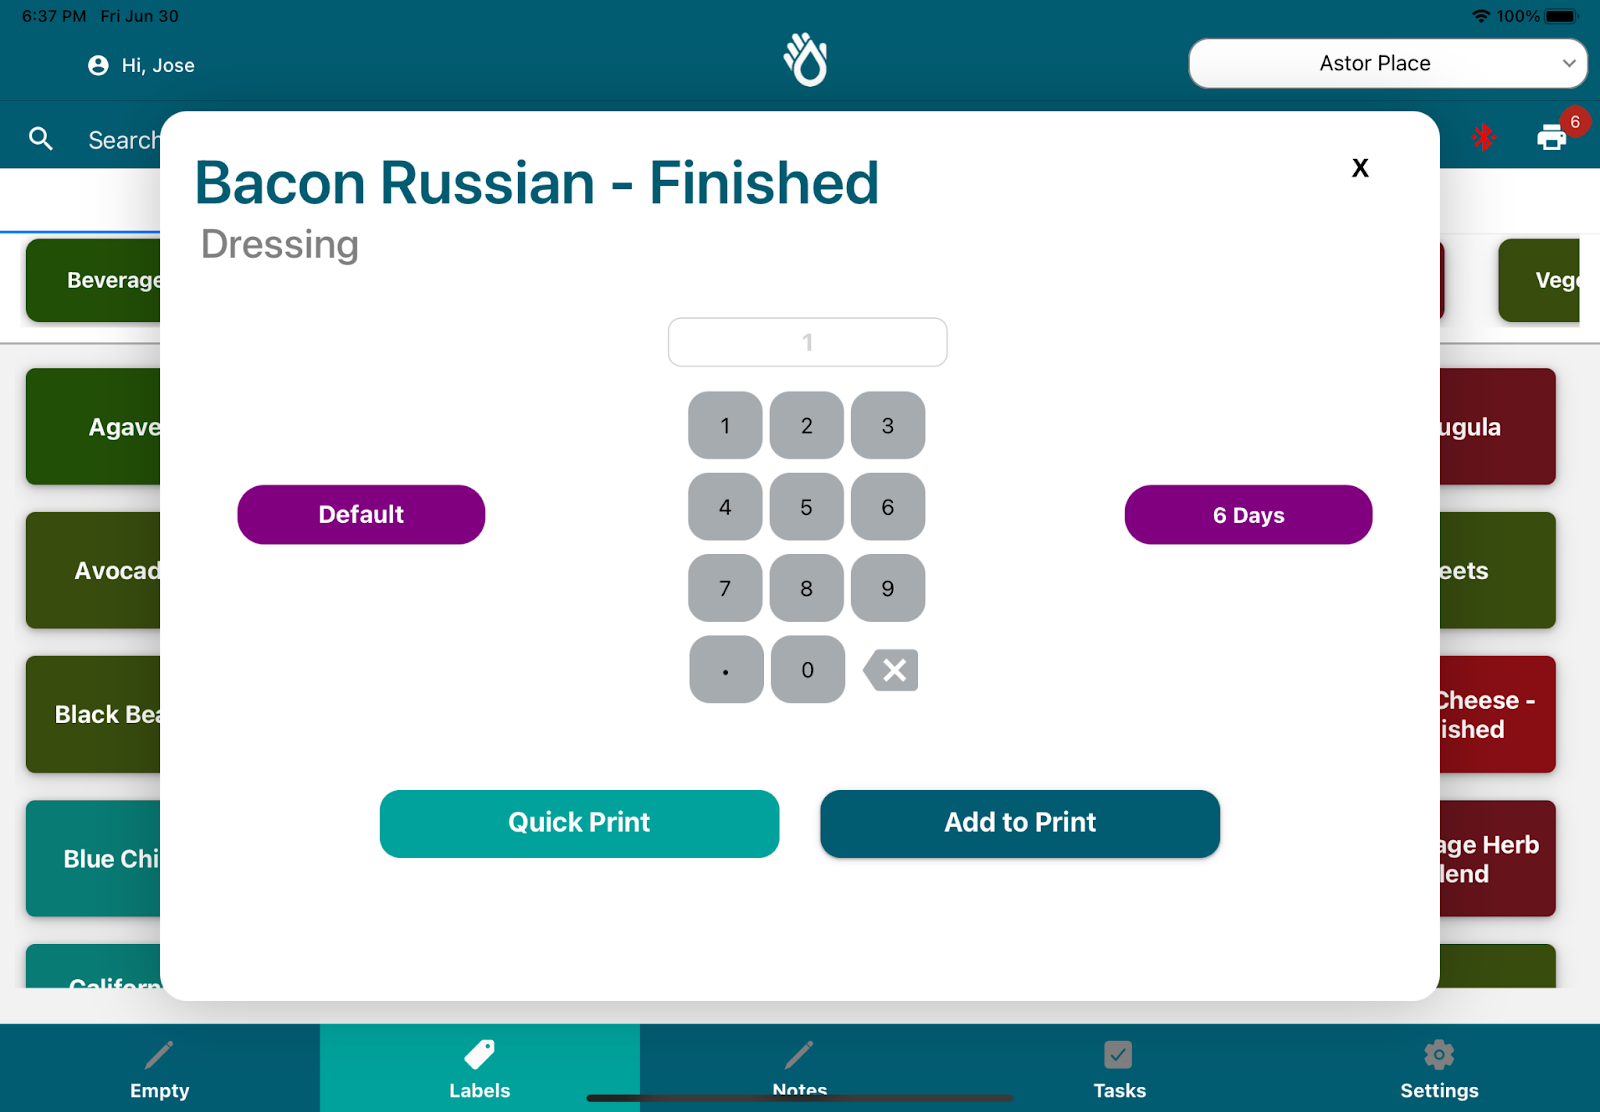
Quick Print
There are two ways to quickly print on the PathSpot SafetySuite App.
- The first way is to long press the label button to immediately print a label.
- The second way is to click on the label and open the label modal. The quick print button displayed immediately sends the label to the printer as soon as you click it. The add to print button, allows you to add your label to a printing queue for printing later.
If your labels are not printing, please refer to the Configuring Printer Section below for further details!
Queue Print
The queue print option allows you to prepare your labels and save them before printing them all at once. This is a great functionality if your store usually prints the same labels every day and wants to label all items at the same time.
To access your queue at any time just click on the printer icon at the top right of the page. The red counter will let you know immediately how many labels are waiting to be printed.

Upon clicking on this icon, a Labeling Print Queue will open, displaying all the labels in the queue. On this view you can delete any labels added to the queue, increase the quantity, or print when you are ready!
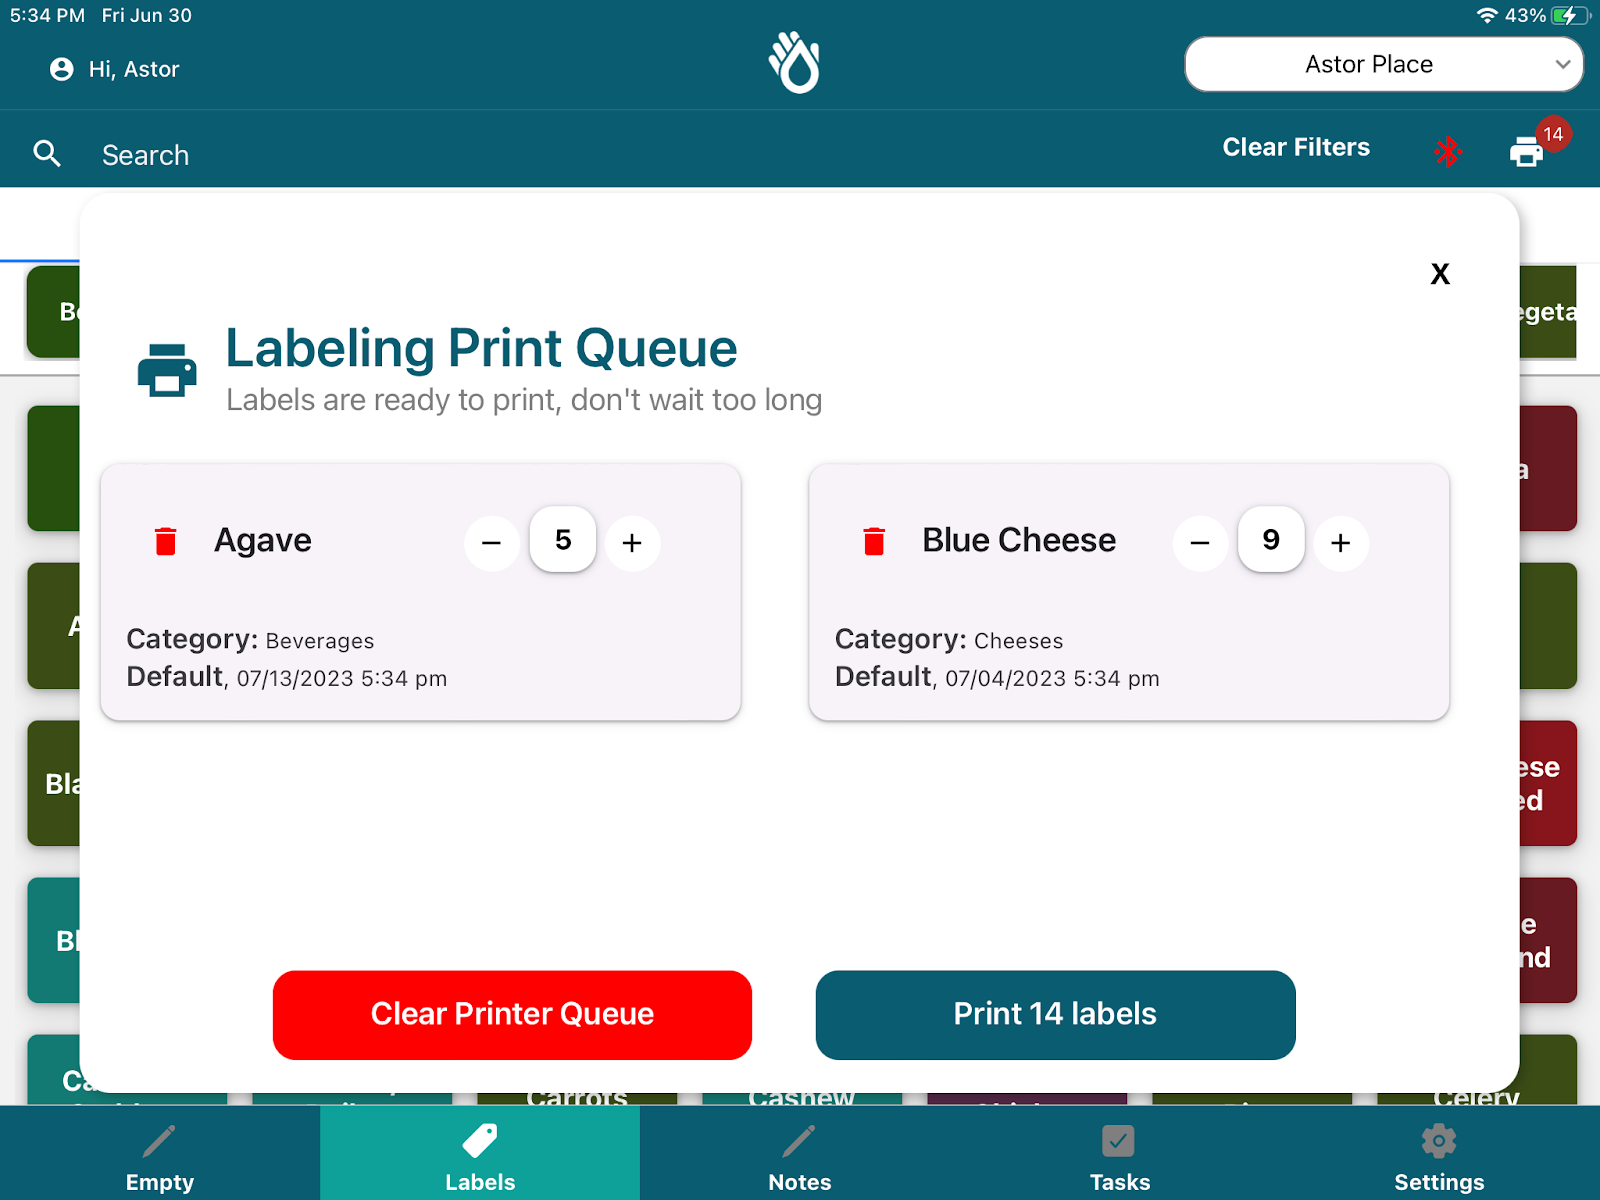
To add any additional ingredients to the queue, just exit out of this pop up by using the top right x and search for the item you want to add. When you are ready to print, click the printer icon on the top right of the page, and click print on the pop up! All of your labels will print at once.
Be careful with the Clear Print Queue button as this will clear all labels on your queue.
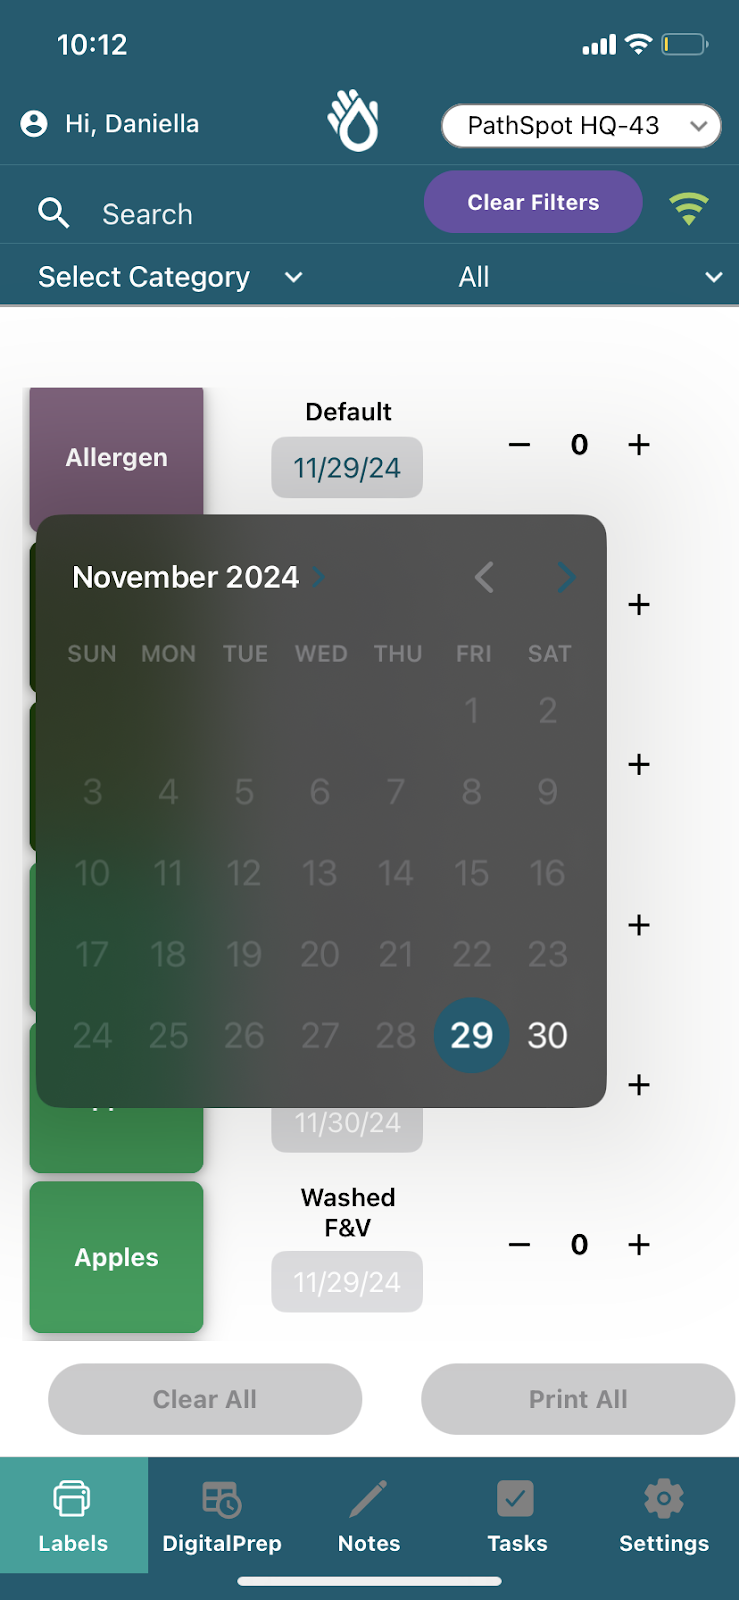
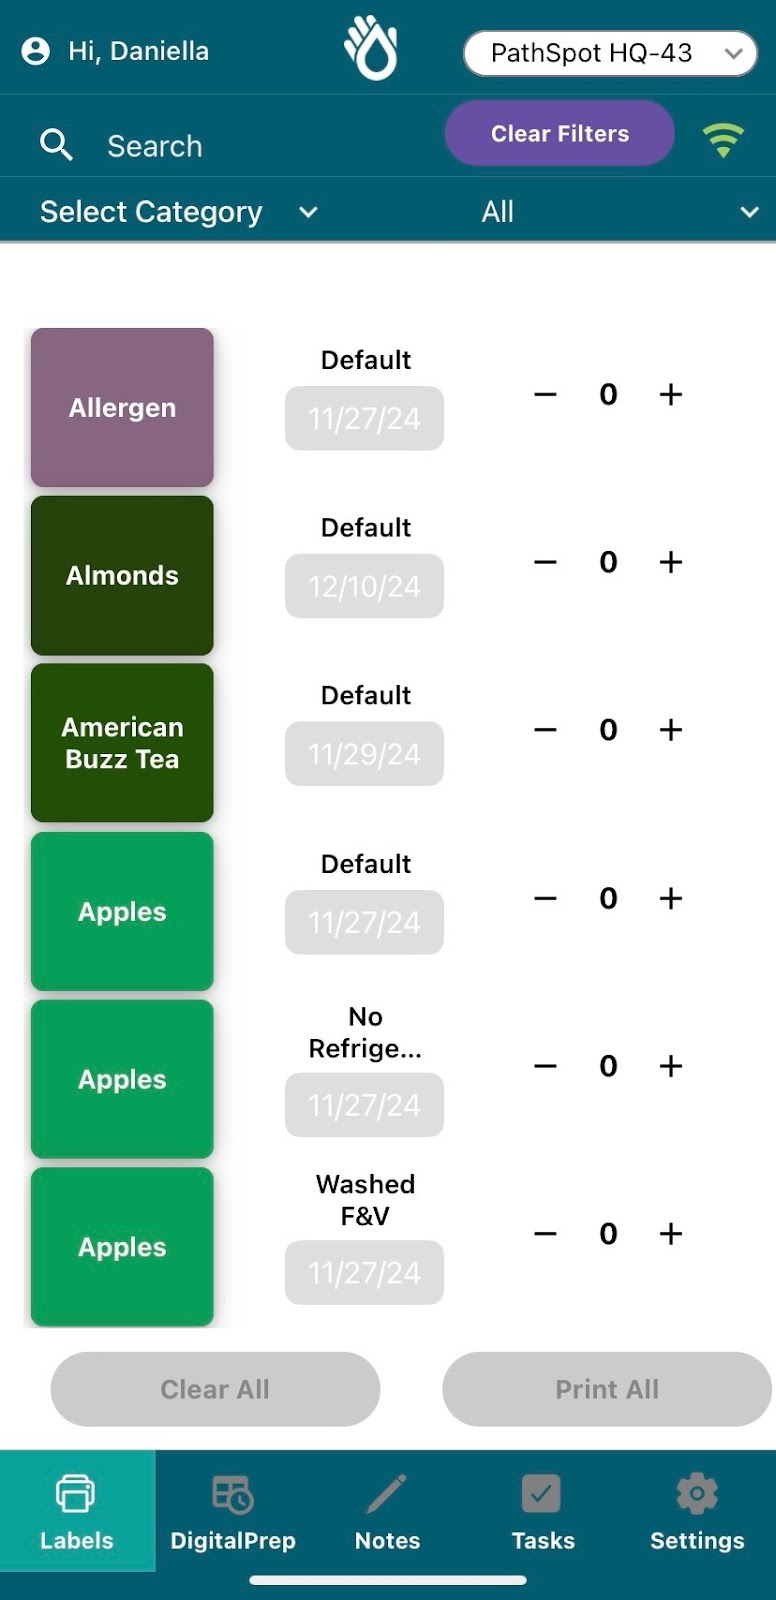
Labeling (iPhone)
The labeling portion of the app is designed to print out expiring and non expiring food labels via a bluetooth connected printer. You may change the Default date by clicking the current date listed under Default and picking a new one on the calendar that pops up.
. 
Navigation
Searching:
On the top left corner of the page, a search bar allows you can look for any ingredient you want to print a label for. Just click on the search bar, type the item name and the page will auto filter.
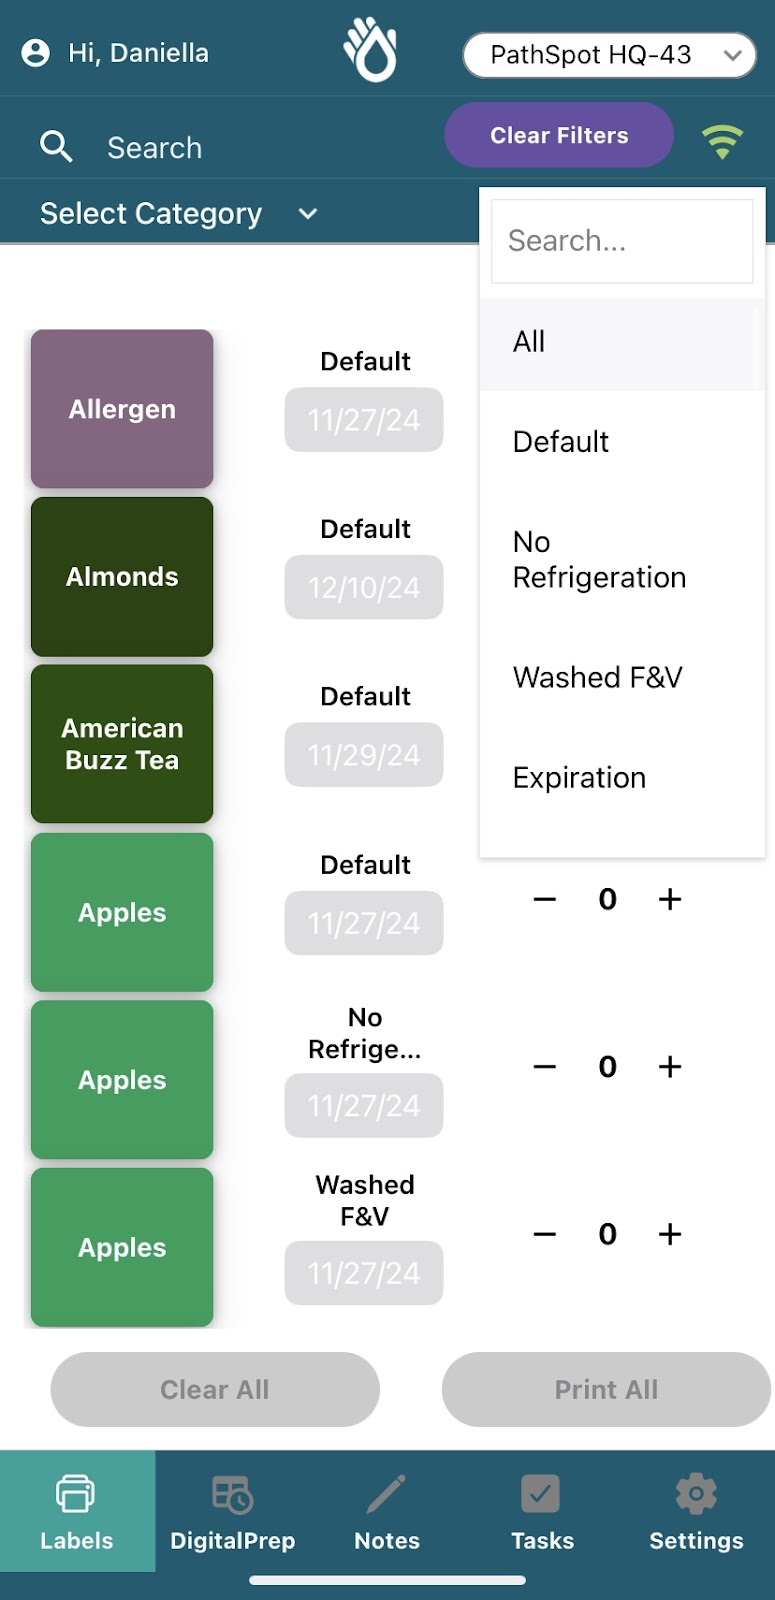
Dropdown Tab:
On the top right corner of the page, under the All tab is where you can search for items based on various filters.
Printing (iPhone)
Quick Print
You can print on your iPhone by clicking the + sign by the ingredient label you wish to print then click Print x amount of labels. It will then be added to the queue.

Configuring the Printer:
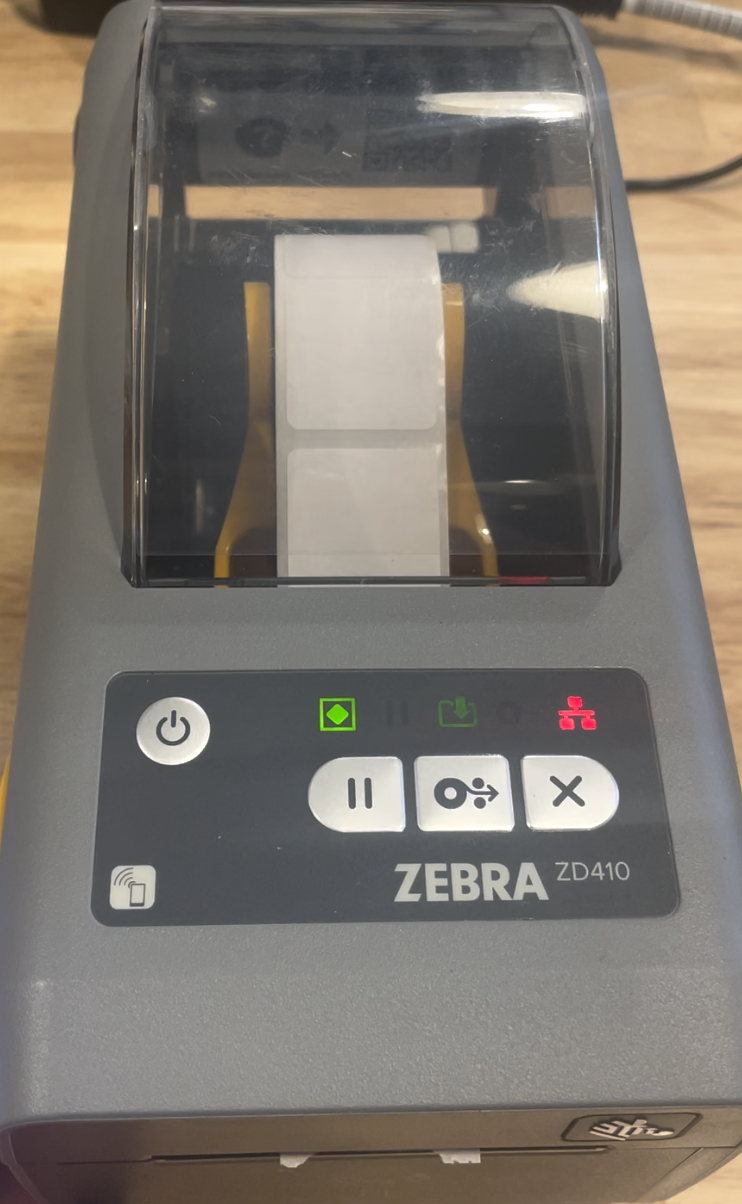
Zebra Printer ZD410 Modes:
Flashing Green light: Standby Mode - Click the power button to turn it on when in this mode.

Orange Light: Downloading Settings
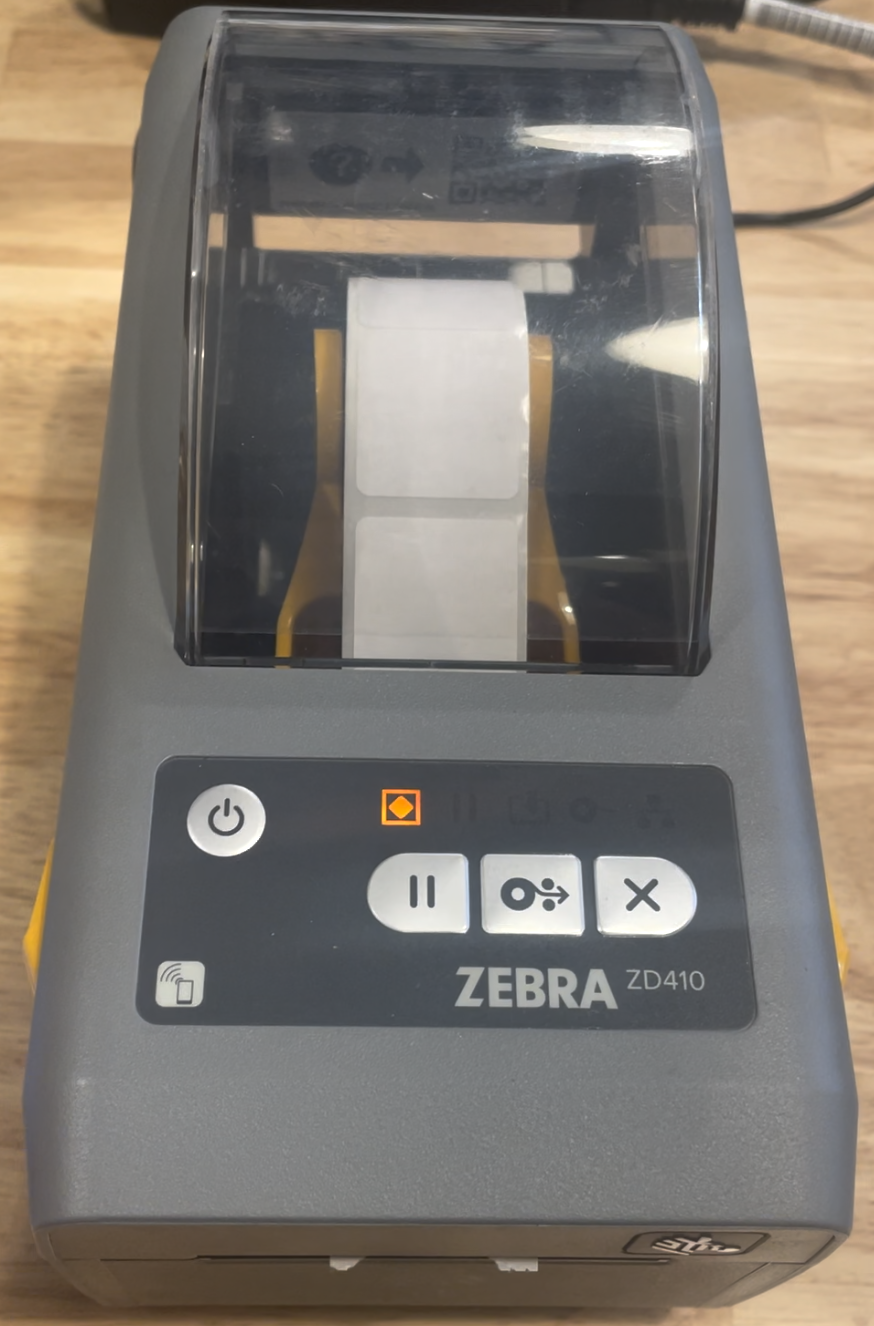
Solid Green Light: Turned On and Connected.

Green Square with Download Arrow Flashing Green: Connecting to Bluetooth
Connecting to the Printer:
Make sure there are no other iPhones or iPads connected to the printer. Then follow the steps below:
- Turn off the printer
- Turn on Bluetooth on your iPhone or iPad
- Turn on the Printer
- Find and connect to the printer named “ZDXXXX”
- Check that the printer shows as connected
- Navigate to the Label app and click “Search for Printers”
- Print a Test Label
- If the label size is too small navigate to the Settings page
- Then click Printers
- Select a different label size
- Navigate back to the labels tab and click another label to print
- If you still experience issues, just disconnect any other bluetooth devices and try again.
Common Printer Issues:
- If your labels are not printing, your printer might be paused. If the pause button has been pressed, you will see a flashing paused icon on the printer.
- The printer can only connect to one phone or iPad at a time. Make sure you have disconnected all devices from the printer before attempting to print.
- If the labels are not printing with the correct alignment, click the middle button to align the label and make sure the role is properly inserted in the printer.
- The printer has been factory reset - This issue will arise if you can’t find the printer on your bluetooth list. If this happens, contact PathSpot to walk you through next steps.