
Gateway Registration
Materials Needed:

LoRaWAN Femto Gateway - Wifi + Ethernet
A phone, tablet or laptop
Access to a 2.4GHz Wifi network or Ethernet (Ethernet gateway only)
Questions? Need help? Please contact PathSpot Support at: support@pathspottech.com
Call or Text (718) 550-0040
LoRaWAN Gateway - Ethernet:
Step-by-Step Instructions:
- Plug the Gateway to power – Make sure this is as close to the wifi router as possible as this will improve wifi stability.
- Using your phone or a computer, connect to the wifi network Femto-xxxxxx or Femto_Lite-xxxxxx and enter the Wifi password printed on the gateway.
- If you do not see the gateway network, unplug and replug the gateway back in. Make sure there is no other cable connected to the gateway.
- Once you have connected, the setup page will open automatically. If it doesn’t open, type http://192.168.4.1/ on your browser or scan the code below.

- Click into Step 1 and ENABLE OTA Mode
- The browser will open up the Femto Settings page, where you will be able to see and set the the gateway's connection mode. Select ethernet under Step 3.SET WAN
%2011.37.57%20a.m..png?width=420&height=292&name=Captura%20de%20pantalla%202025-05-30%20a%20la(s)%2011.37.57%20a.m..png)
- Under ethernet settings you will now be able to select your preferred authentication:
- DHCP (Default - Recommended) - Select this option if your organization doesn't require a static IP. This will automatically pre-fill all gateway details and rely on DHCP authentication to allow the gateway through.
- IT Teams - You will need to manage the gateway's IP lease and will need the gateways mac address in order to allowlist the gateway. The IP address/Subnet Mask/Default Gateway/DNS will be assigned by the DHCP server.
- Static IP - Only select this option if your IT team or network provider has given you specific options for the ethernet settings. This option allows you to set the gateway IP and any other specific network details required for authentication.
%2011.56.17%20a.m..png?width=281&height=372&name=Captura%20de%20pantalla%202025-05-30%20a%20la(s)%2011.56.17%20a.m..png)
- IT Teams - Ethernet Status details the information of IP address/Subnet Mask/Gateway/DNS. Ethernet Settings allows you to configure the IP address of WAN.[Static IP/DHCP client]
- DHCP (Default - Recommended) - Select this option if your organization doesn't require a static IP. This will automatically pre-fill all gateway details and rely on DHCP authentication to allow the gateway through.
- Once the ethernet details are complete, click Save. The page will change to a status page. Once this process is successful, you will notice the message at the top right will turn red.
Confirming Femto Gateway Ethernet Connection:
When the connection is complete, the Power, WAN, and LoRa lights will be solid blue.
%209.27.31%20a.m..png?width=284&height=229&name=Captura%20de%20pantalla%202025-05-30%20a%20la(s)%209.27.31%20a.m..png)
Do: Provide the gateway mac address to your IT team prior to connection. The most common reason our gateways fail connection is that the mac and the ports have not been allowlisted.
Don’t: Press the small RESET button -This will clear the PathSpot configurations of the Gateway and will no longer be able to connect without PathSpot assistance
%2011.46.31%20a.m..png?width=506&height=142&name=Captura%20de%20pantalla%202025-05-30%20a%20la(s)%2011.46.31%20a.m..png)
❌ If the light sequence matches the one shown, the Wi-Fi option was selected instead of Ethernet. In this case, the device must be reset and the setup steps repeated. If the issue persists, please contact support@pathspottech.com for assistance. The GLOBE (ethernet symbol second from the right) needs to be lit up not the WiFi logo if the Ethernet connection being pursued

LoRaWAN Gateway - Wifi :
Don’t Press the small RESET button -This will clear the PathSpot configurations of the Gateway and will no longer be able to connect
Step-by-Step Instructions:
OPTION 1: Ethernet
- Plug the Gateway to power – Make sure this is as close to the wifi router as possible as this will improve wifi stability.
- Using your phone or a computer, connect to the wifi network Femto-xxxxxx or Femto_Lite-xxxxxx and enter the Wifi password printed on the gateway.
- If you do not see the gateway network, unplug and replug the gateway back in. Make sure there is no other cable connected to the gateway.
- Once you have connected, the setup page will open automatically. If it doesn’t open, type http://192.168.4.1/ on your browser or scan the code below.
- The browser will open up the Femto Settings page, where you will be able to see and set the wifi network you want to connect the gateway to. On Step 3, select Wi-Fi.
%2011.37.57%20a.m..png?width=403&height=280&name=Captura%20de%20pantalla%202025-05-30%20a%20la(s)%2011.37.57%20a.m..png)
Considerations:
-
❌LoRaWAN LED off: If the LoRaWAN LED is not illuminated, the keys may have been cleared — PathSpot support will be required.
-
🌐 Network configuration: If a static IP is configured, toggle back to DHCP. If the device connects successfully, the static IP configuration is likely the issue.
-
✅ Status check: Both the Globe icon (internet) and LoRaWAN LEDs must be illuminated to show a succesful connection.
OPTION 2: WiFi
- Select the WiFi network you want to connect to by clicking on the network name or the + button next to the name.
%2012.07.16%20p.m..png?width=217&height=251&name=Captura%20de%20pantalla%202025-05-30%20a%20la(s)%2012.07.16%20p.m..png)
- If you do not see the network, please ensure a 2.4GHz (not 5GHz) network option is available to connect.
- If you are trying to connect to a Hidden network, click on SET NETWORK or ADD (HIDDEN) SSID. Here you will be able to manually enter the network name and password (if the network has one).

- If the Wi-Fi network you're trying to connect to redirects users to a login page (captive portal) or requires a username and password, you won't be able to connect via wifi.
- Enter the WiFi Network password.
- This page will not indicate if the password is correct or not, so make sure you are entering the correct password (Case Sensitive).
%2012.08.51%20p.m..png?width=305&height=106&name=Captura%20de%20pantalla%202025-05-30%20a%20la(s)%2012.08.51%20p.m..png)
- This page will not indicate if the password is correct or not, so make sure you are entering the correct password (Case Sensitive).
- Once the wifi details are complete, click Join or Save and Reboot. The page will change to a status page. Once this process is successful, you will notice the message at the top right will turn red.

Confirming Femto Gateway Wifi Connection:
When the connection is complete, the Power, Wifi, and LoRa lights will be solid blue. Do: Provide the gateway mac address to your IT team prior to connection. The most common reason our gateways fail connection is that the mac and the ports have not been allowlisted.
Don’t: Press the small RESET button -This will clear the PathSpot configurations of the Gateway and will no longer be able to connect
If all of the above steps fail and the gateway light doesn’t turn solid blue, please contact support@pathspottech.com . Make sure you have the details of the troubleshooting steps followed.
LoRaWAN Temperature Sensor:
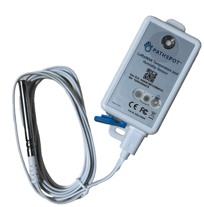
Note: Your sensor includes a USB-C probe designed for specialty use only. To activate this probe, please contact PathSpot Support at support@pathspottech.com . If you do not need the probe, simply discard it and ensure the blue connection cover is securely closed.
Pairing Sensors to Gateway
Ensure the gateway light is solid green before attempting to connect the sensors. This indicates an active Wi-Fi connection, which is required in order to pair the sensors to the gateway.
On the LoRaWAN sensor(s), press and hold the button on the front of the sensor (circled above) until the light flashes green and then flashes red once.
Contact support@pathspottech.com if no lights appear.Mounting the sensors on your units:
- Best Placement: Install the sensor inside the unit near doors, as this area experiences the most temperature variation.
- Preferred Installation Method: Use the provided zip ties for the simplest installation and easy replacement.
- Alternative Installation: If zip ties are not an option, use the provided adhesive (Magnets available upon request). Before applying, thoroughly clean the surface with a degreaser or your preferred cleaning product, then dry completely. Press and hold the sensor firmly in place for 30 seconds to ensure a secure bond.
(Optional) Using the USB-C Probe:
- If you plan to use the probe, please notify the PathSpot team. Otherwise, discard it.
- To use the probe, connect it to the sensor via the USB-C port at the bottom.
- Secure the probe cable with a zip tie or bread tie to keep it tidy and prevent cross-contamination.
Scan this QR Code for additional tips!

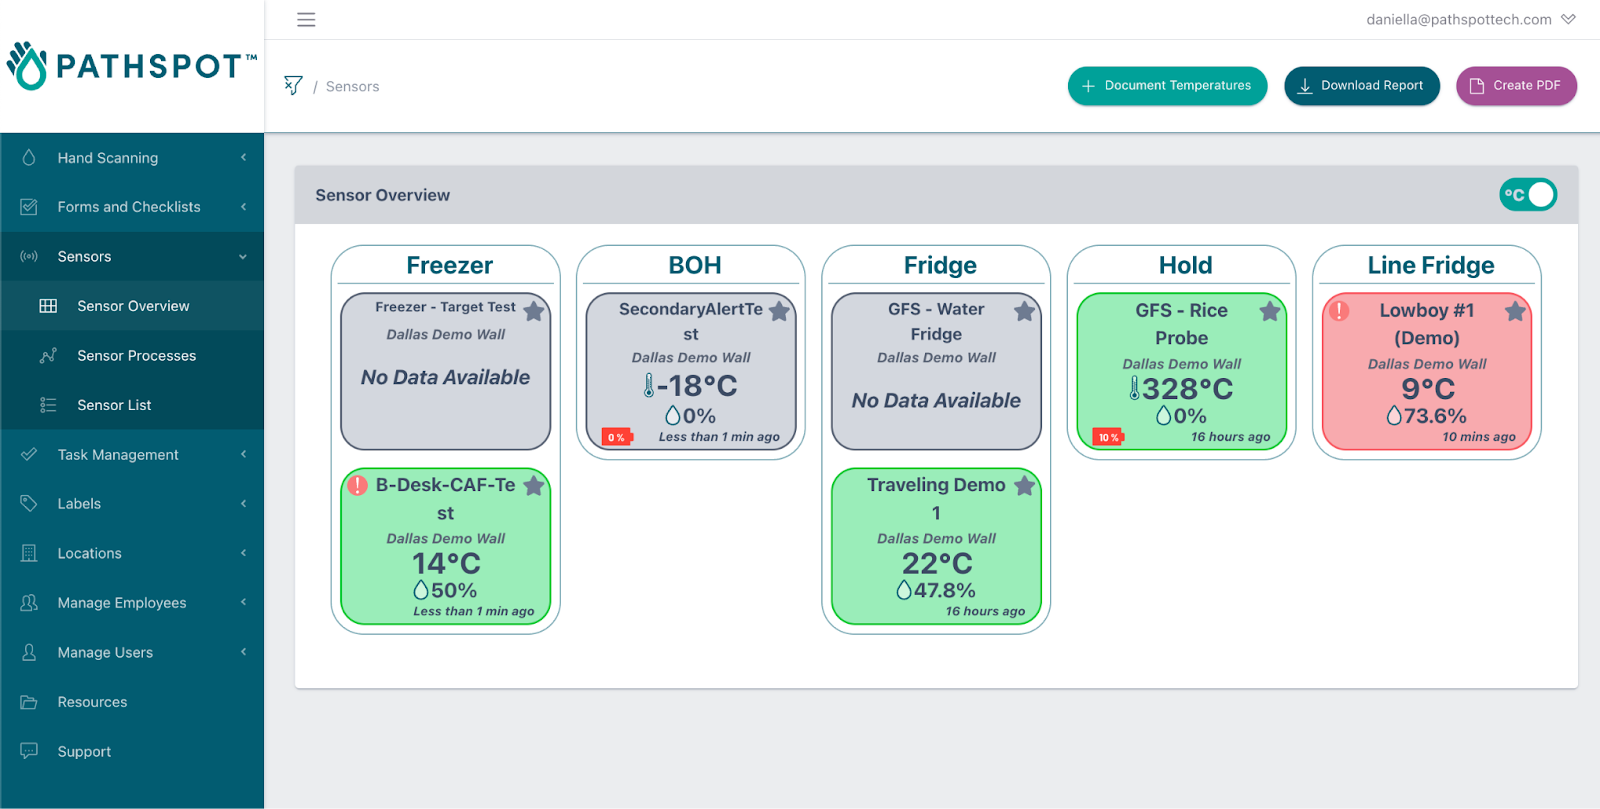
Confirm Sensor Pairing:
Login to the PathSpot Dashboard (pathspot.app) and verify sensor connection on the Sensor Overview page. Sensors send a temperature reading every 20 min.
- Grey Tile: Sensor is pending connection or it's been 3 days or more since the last reading.
- If this is the case, long press the sensor button until the light flashes green and then flashes red once.
- If the sensor light doesn't turn on, contact support@pathspottech.com as a battery replacement might be needed.
- Green Tile: Sensor is online and within set temp limits.
- If limits have not yet been set please reference our alert configuration article.
- Red Tile: Sensor is online and currently out of range.
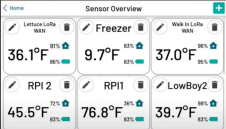
If a PathSpot HandScanner has also been installed, on the HandScanner screen, tap on “Sensor Overview”. Your connected sensors will display a temperature reading (this can take up to 5-20 minutes after sensor pairing).
Don’t Press the small RESET button -This will clear the PathSpot configurations of the Gateway and will no longer be able to connect
Additional Details:
This guide has best practices on placement/installation.