PowerTemp Set-Up Guide
This document provides simple step-by-step instructions for setting up your PowerTemp system. Your Customer Success Manager and Implementation Lead will also share additional guidance to support you throughout the installation process.
Please reference the following links to better understand the product, platform and functionalities. For more dedicated training please contact your Customer Success Manager.
> Understanding Temperature Readings
> Installation Best Practices
> Sensor Care Guide
_________________________________________________________________________________
Installation Materials
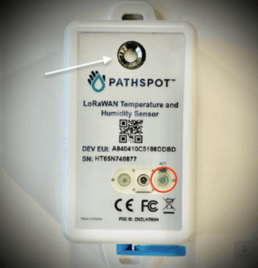
White arrow = Humidity tracker, leave sticker covering if humidity is not being tracked
Red circle = Activation, hold button until light blinks red to activate (after gateway setup).
LoRaWAN Sensor (+ optional probe) LoRaWAN Gateway
2 zip-ties & 3M adhesive (magnets available upon request) .
.  .
. 
Questions? Need help? Please contact PathSpot Support at: support@pathspottech.com
Call or Text (718) 550-0040
_____________________________________________________________
🔌 PowerTemp Gateway Setup (LoRaWAN Gateway)
DO NOT PRESS THE RESET BUTTON ON THE BOTTOM OF THE DEVICE!
This will clear the PathSpot configurations of the Gateway and will no longer be able to connect
OPTIMAL NETWORK SETUP:
-
After whitelisting the gateway MAC address(es), we recommend placing the gateway on a dedicated VLAN and assigning it an IP via DHCP reservation.
-
If that setup isn’t possible, the next best option is to allow the gateway on the property’s guest network.
-
If you have any questions about the whitelisting process, please share the contact information for your Internet Service Provider with our team so we can ensure everything is configured correctly on your behalf. If your network requires additional NAC this article provides additional specifics on what needs to be allowed.
_____________________________________________________________
If Pre-Configured by PathSpot (NON - STANDARD):
-
Power Up: Plug the Gateway into a power outlet near your Wi-Fi router to ensure a strong signal.
-
Wait for Connection: Allow the light to turn solid green, indicating a successful connection.
-
Completion: Once the light is solid green, the setup is complete.
If the light doesn’t turn solid green and continues to flash, please contact PathSpot Support or follow the step-by-step instructions in the section below.
_____________________________________________________________
If Not Pre-Configured - (STANDARD)
-
Prepare for Setup: Locate the Wi-Fi password on the back of the Gateway; you'll need this for the next steps. For any gateway that has an EUI preceded by GUS the password will be Pathspot (case-sensitive). This will be clearly marked on the gateway(s) and included in the accompanying setup instructions
-
In these instances that means the longer more complex password on the back of the gateway can be ignored.
-
-
Power On: Plug the Gateway into a power outlet near your Wi-Fi router.
-
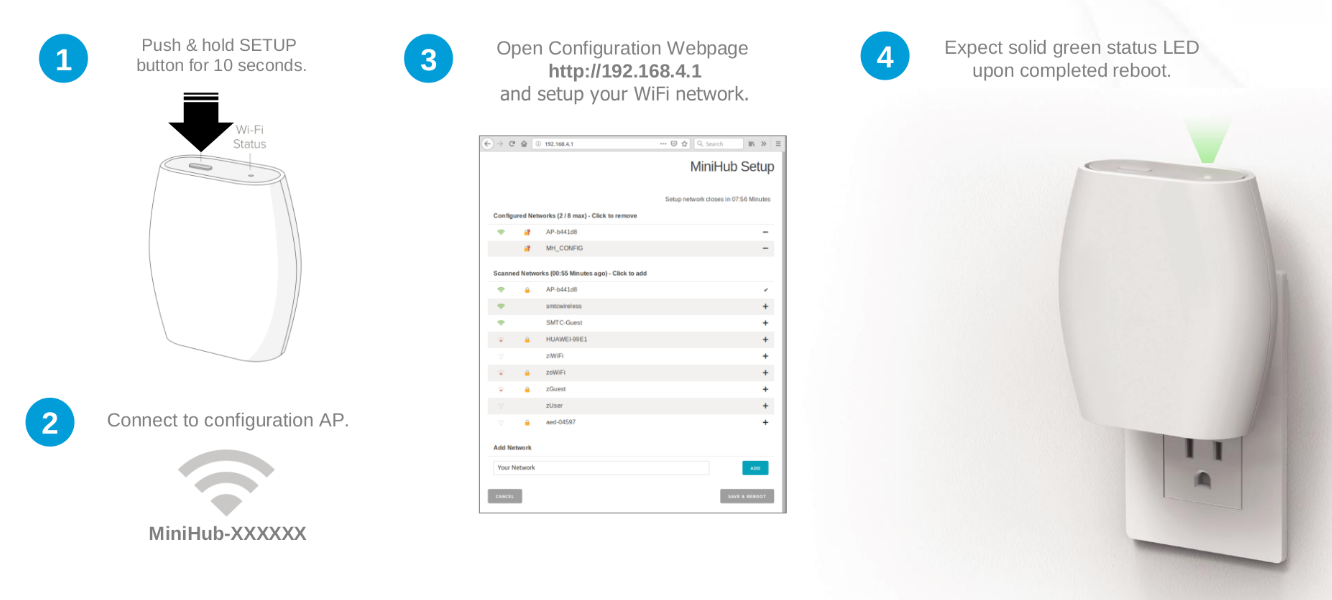
Enter Setup Mode: Press and hold the setup button for 10 seconds until the light starts flashing orange.
-
Connect to MiniHUB Network: Using your phone or computer, connect to the Wi-Fi network named
MiniHUB-XXXXXXorTBHM###-XXX.-
The password to connect will be provided by your Customer Success Manager (CSM). You can also find it on the back of the gateway, following the WiFi Password. For any "GUS"-branded gateways, the password will be "Pathspot". You can identify these by the materials provided or the sticker on the gateway itself.
-
Non-GUS branded gateways use the Wi-Fi password printed on the back of the device, labeled “WiFi Password.”
Please note that the text is very small. If you’re unable to read it, the password can also be provided by your CSM or by our support team at support@pathspottech.com.
-
- If you do not see the network, please ensure a 2.4GHz (not 5GHz) network option is available to connect.
- If the Wi-Fi network you're trying to connect to redirects users to a login page (captive portal) or requires a username and password, you won't be able to connect.
-
- Access Configuration Page: This page with certain gateways will automatically launch. If not Open a web browser and go to http://192.168.4.1/. QR code below will also redirect you to the configuration portal.
- At this point, depending on your Gateway model, you may be prompted to add an additional password to access the configuration page in the future. If this applies to you, please scroll down to the section titled "Admin Password Setup."
- If your gateway model does not prompt you to create a different admin password then your gateway will have the same password for both the network and mini-hub portal and you can continue on to step 6.
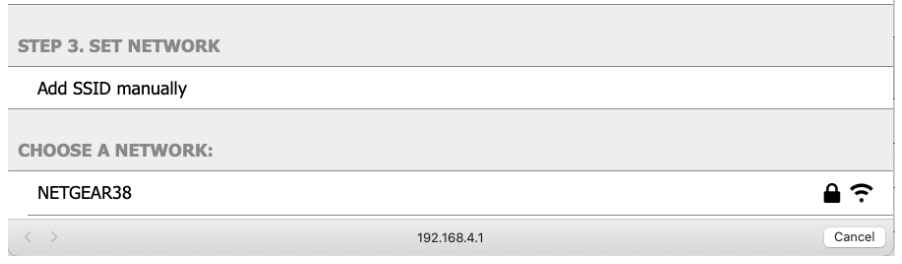
- Select Wi-Fi Network: Choose your desired Wi-Fi network and enter the password.
- This page will not indicate if the password is correct or not, so make sure you are entering the correct password (Case Sensitive).
- Select Wi-Fi Network: Choose your desired Wi-Fi network and enter the password.
- Save and Reboot: Click 'Save' and allow the Gateway to reboot. The status light will flash between orange and green during this process.
- If it remains rapidly flashing in orange (or between orange/green) for 10 min or more contact support@pathspottech.com.
- If the pairing fails, after 10 min the light remains flashing, please refer to the table below.
- Completion: Once the light turns solid green, the setup is complete.
Note: This device does support hidden networks; in such instance rather than selecting chose a network you can click set network

Confirming Gateway Connection:

Do: Provide the gateway mac address to your IT team prior to connection.
Don’t: Press the small RESET button -This will clear the PathSpot configurations of the Gateway and will no longer be able to connect
GreenGreenIf all of the above steps fail and the gateway light doesn’t turn solid green, please contact support@pathspottech.com . Make sure you have the details of the troubleshooting steps followed.
Admin Password Setup:
- When accessing the MiniHub configuration page, if you are taken to the below pop-up page, please proceed by taking the following steps:
- This admin password adds an extra layer of security. Note this password will be used to access the MiniHub configuration page moving forward and is not the password used to connect to the mini-hub network itself. That will remain 'Pathspot'.
- Our recommendation is to make it 'Pathspot1!'. Please let your CSM what the password is so our team can store it if ever needed again.

_____________________________________________________________
LoRaWAN Temperature Sensor:
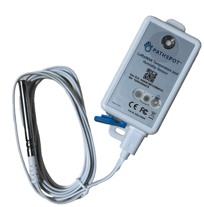
Note: Your sensor includes a USB-C probe designed for specialty use only. To activate this probe, please contact PathSpot Support at support@pathspottech.com .
If you do not need the probe, simply discard it and ensure the blue connection cover is securely closed.
_____________________________________________________________
Pairing Sensors to Gateway
Ensure the gateway light is solid green before attempting to connect the sensors. This indicates an active Wi-Fi connection, which is required in order to pair the sensors to the gateway.
On the LoRaWAN sensor(s), press and hold the button on the front of the sensor (circled above) until the light flashes green and then flashes red once.
Contact support@pathspottech.com if no lights appear._____________________________________________________________
Mounting the sensors on your units:
- Best Placement: Install the sensor inside the unit near doors, as this area experiences the most temperature variation.
- Preferred Installation Method: Use the provided zip ties for the simplest installation and easy replacement.
- Alternative Installation: If zip ties are not an option, use the provided adhesive (Magnets available upon request). Before applying, thoroughly clean the surface with a degreaser or your preferred cleaning product, then dry completely. Press and hold the sensor firmly in place for 30 seconds to ensure a secure bond.
(Optional) Using the USB-C Probe:
- If you plan to use the probe, please notify the PathSpot team. Otherwise, discard it.
- To use the probe, connect it to the sensor via the USB-C port at the bottom.
- Secure the probe cable with a zip tie or bread tie to keep it tidy and prevent cross-contamination.
Scan this QR Code for additional tips!

_____________________________________________________________
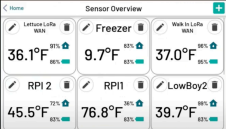
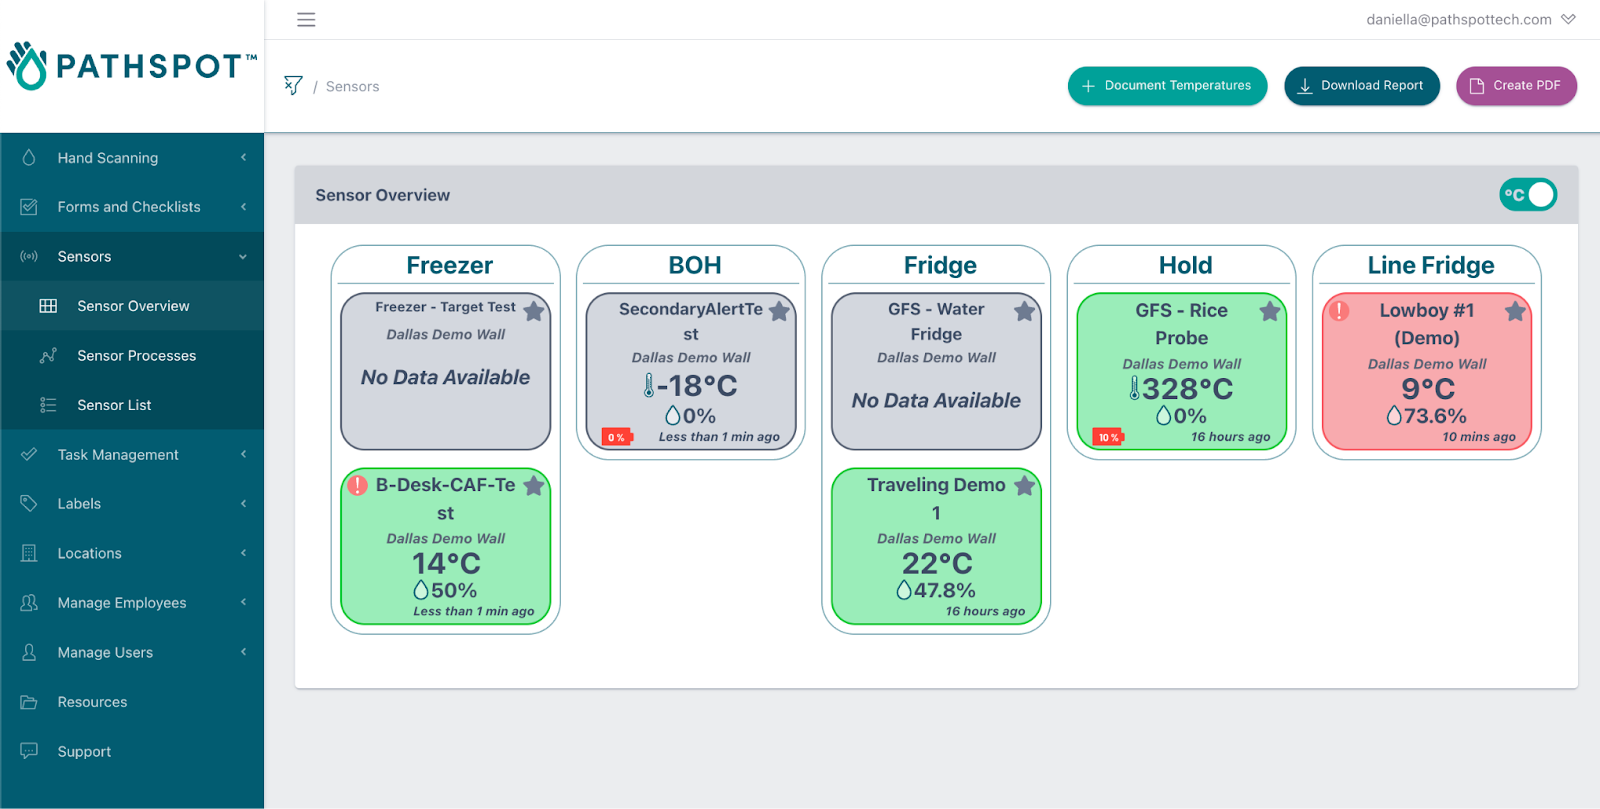
Confirm Sensor Pairing:
Login to the PathSpot Dashboard (pathspot.app) and verify sensor connection on the Sensor Overview page. Sensors send a temperature reading every 20 min.
- Grey Tile: Sensor is pending connection or it's been 3 days or more since the last reading.
- If this is the case, long press the sensor button until the light flashes green and then flashes red once.
- If the sensor light doesn't turn on, contact support@pathspottech.com as a battery replacement might be needed.
- Green Tile: Sensor is online and within set temp limits.
- If limits have not yet been set please reference our alert configuration article.
- Red Tile: Sensor is online and currently out of range.
> If a PathSpot HandScanner has also been installed, on the HandScanner screen, tap on “Sensor Overview”. Your connected sensors will display a temperature reading (this can take up to 5-20 minutes after sensor pairing).