
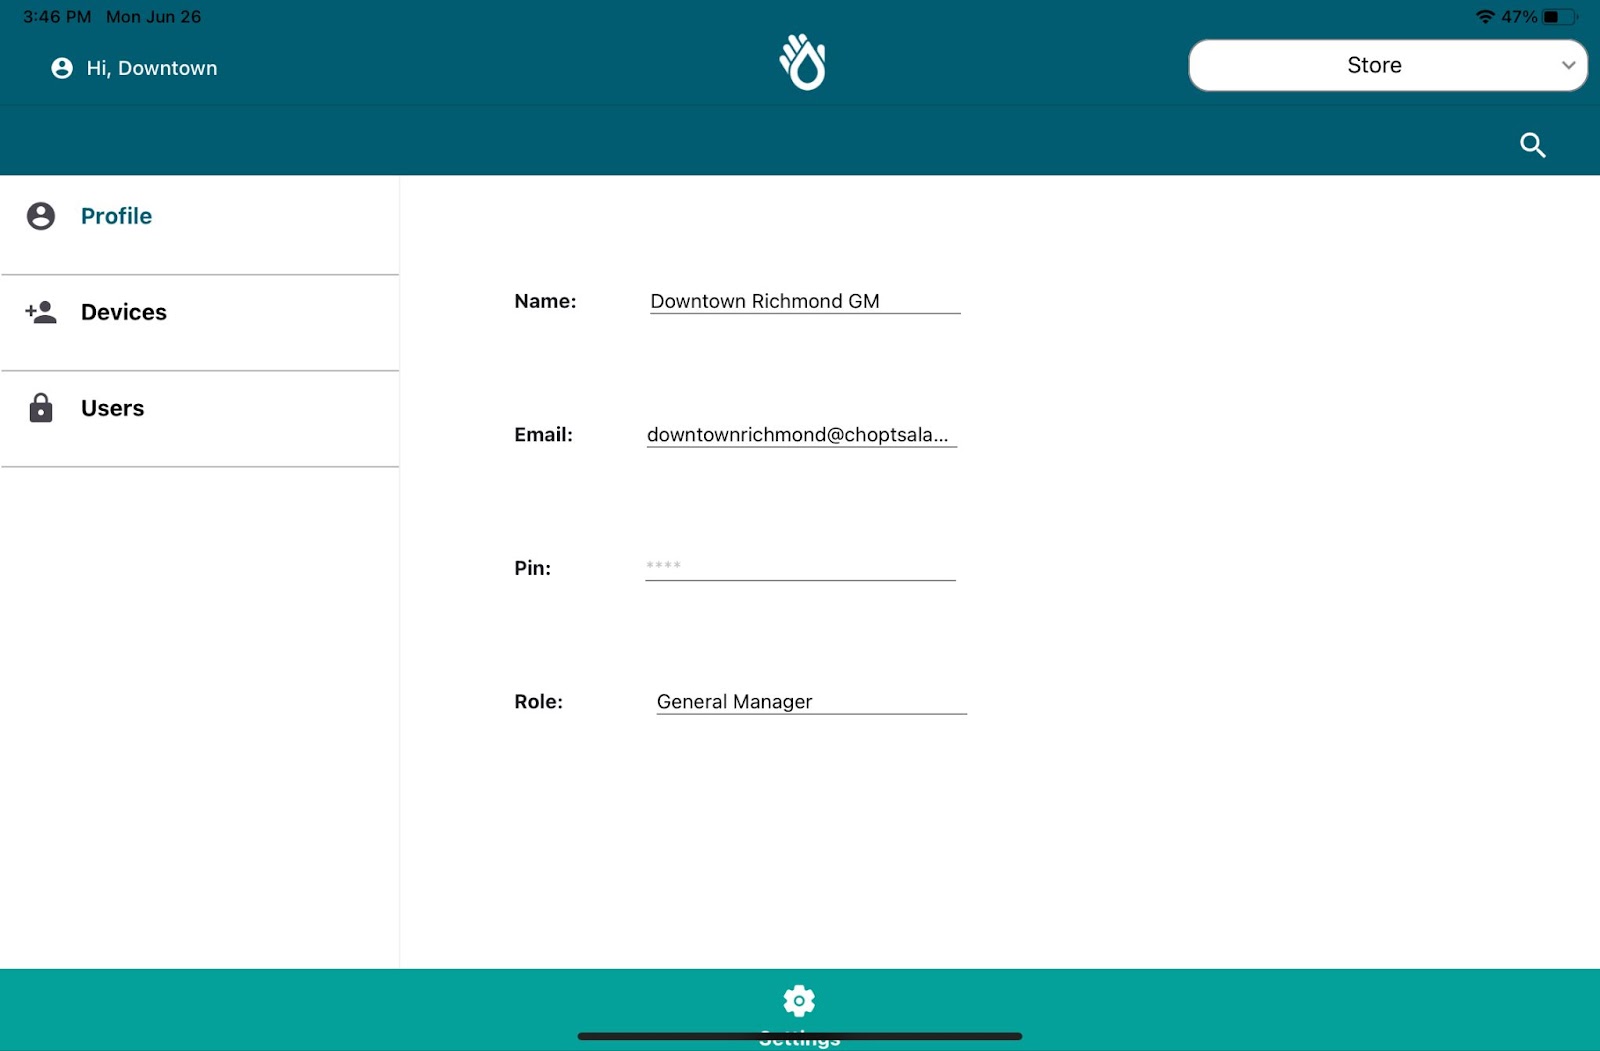
What if I log in and do not see the the PowerTask (or Labeling) tab?
First, look at the top-right corner and make sure your store location is selected. If it isn’t, click the drop-down menu and select your location.
🔎 If you still don’t see the Labeling or Task tabs, please reach out to your manager. They can update your permissions and add you to your store location. You can also email support@pathspottech.com and include an active administer from your property on the thread to ask for assistance
What happens if our devices lose WiFi?/Power?
Most of our Mobile App will continue to function offline, so don’t worry if you lose connectivity.
- ✅ Tasks: Will work offline. But keep in mind, that if multiple people are updating lists while offline, changes will be overwritten by the most recent update when all systems are connected back to the internet. Before the list closes ensure that you are connected to WiFi so all the responses can be uploaded
- 🏷️ Labeling: For temporary power outage, slate all your labels on a queue. When the power goes back on you can print all labels.
- 📝 Notes: Notes only viewable by one user, will be able to make any change offline. But, if you are part of a shared note, your note will turn to read only as soon as it has gone offline. You will only be able to edit a shared note if you have internet access.
How do I switch users?
🔄 Click the username in the top-left corner of the screen. A “Switch User” box will appear.
🔐 Click Switch User to view the list of available users. Select the user you want to log in as, then enter their assigned PIN.
🔹 Step 1: Switch User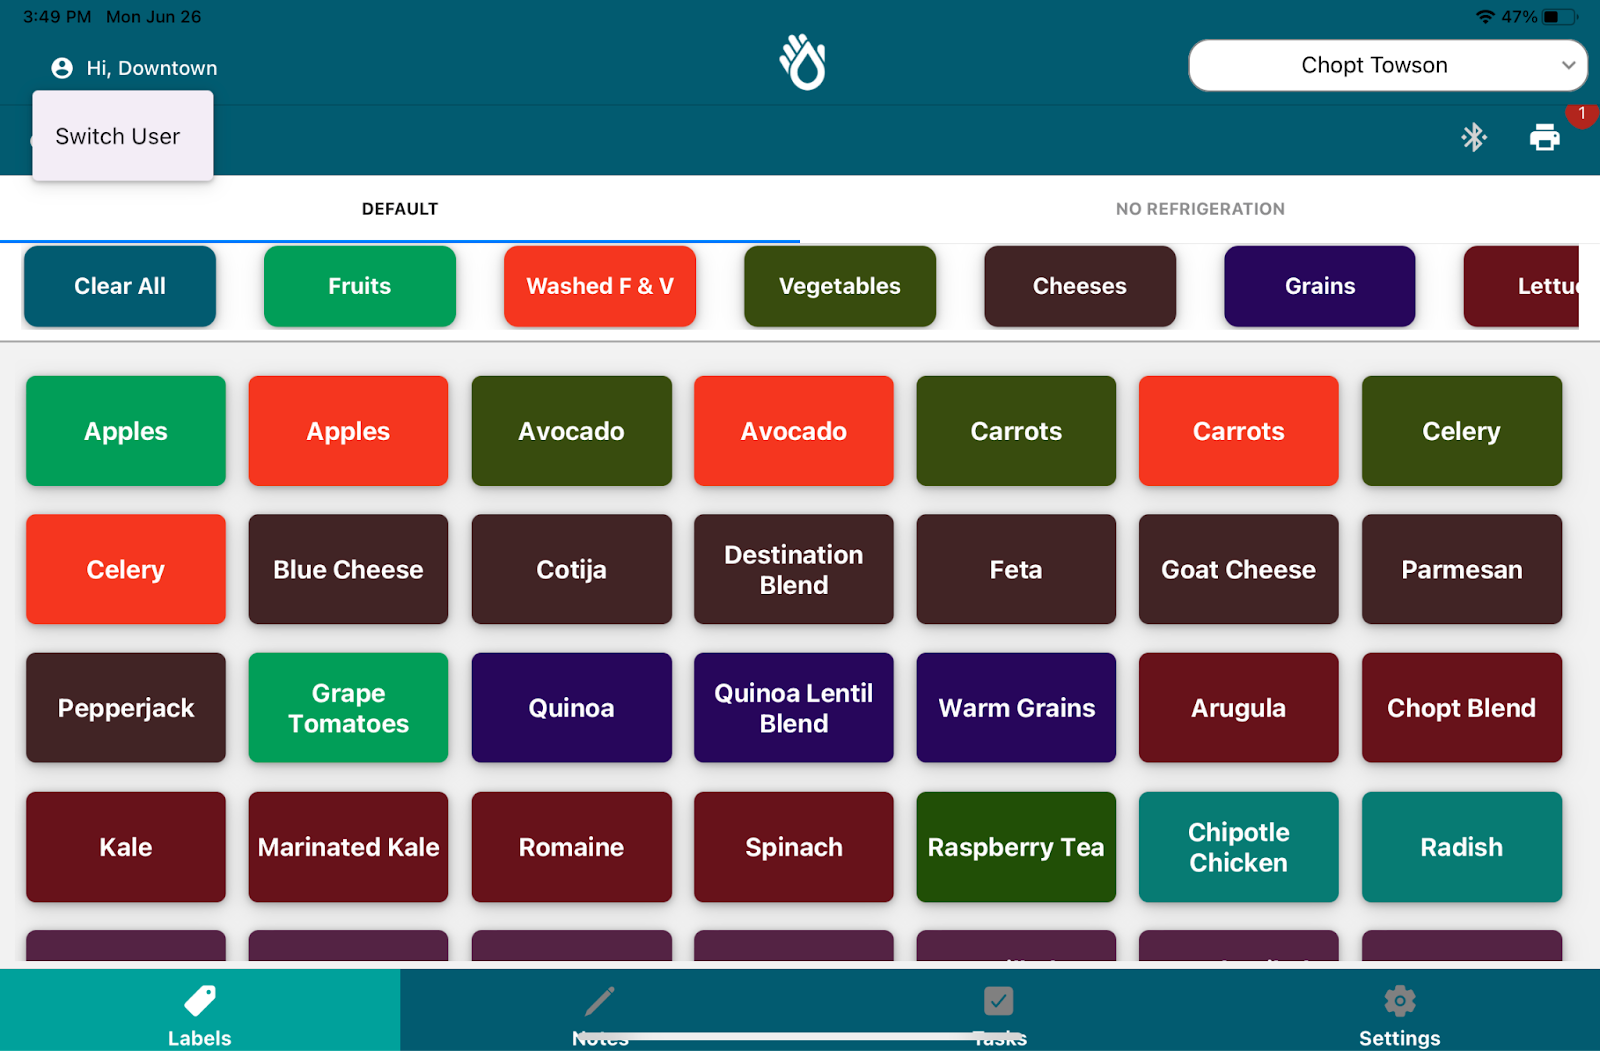
🔹 Step 2 & 3: Select User & Enter Pin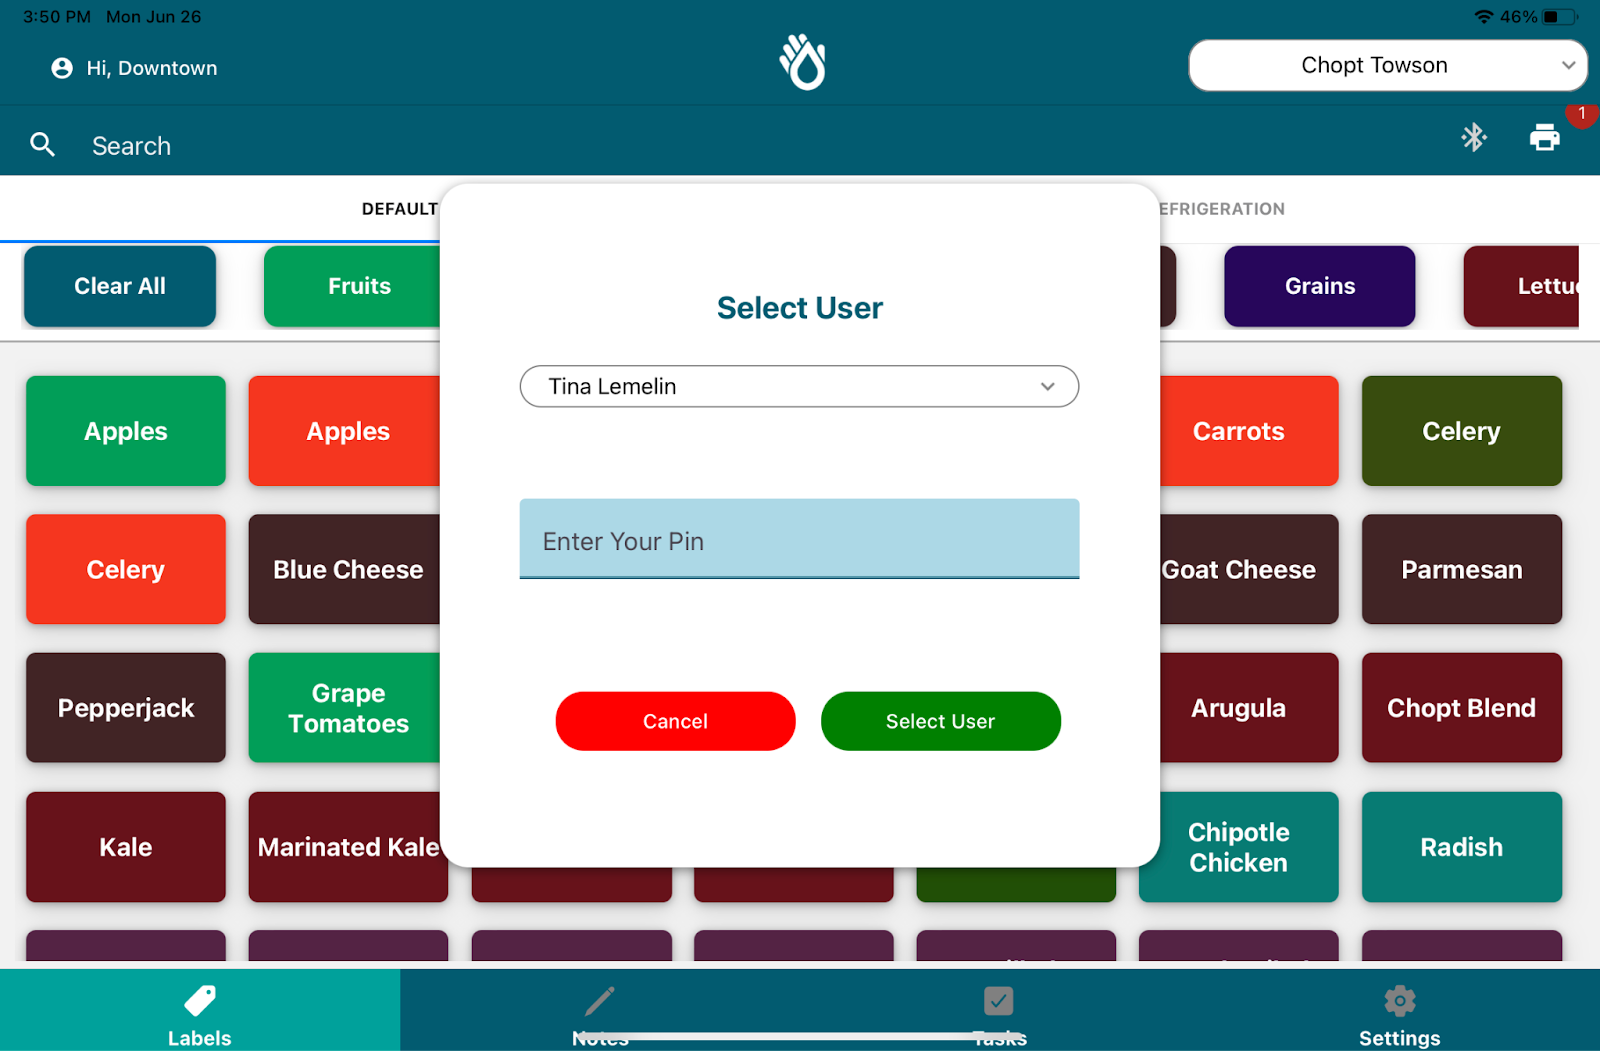
How can you confirm temperatures are taken properly and are in compliance with acceptable ranges?
There are several ways to verify that temperatures are being completed correctly and in compliance with your established temperature ranges:
- ⏱️ Check Task Completion
Confirm that temperature tasks are being completed on time. Don’t forget to check the subtasks! Every action on the app is tagged with a timestamp. For added time verification you can also add an additional time selecting task. For more details on creating tasks click here. - 🚩 Review Flagged/Missed/Late Tasks
When a task list has been flagged, navigate to the task list and review the individual comments and photos associated with the task. Quick tip is click the flagged filter
If enabled, PathSpot can pre- populate corrective actions whenever a temperature falls outside of the acceptable range. These corrective actions can include the action taken, timestamp, and user information, and can also be included in reporting. - 🌡️ Review the Method of Entry
Focus on the Temperature Tasks to verify whether temperatures were recorded using Bluetooth or manual entry.- Temperatures completed automatically through Bluetooth will display a READ button next to the temperature.
- Manually entered temperatures will not display the READ button.
- 📸 Image Verification
Required photos can also be enabled to provide an additional layer of verification. - 📊 Reporting
PathSpot offers a comprehensive catalog of automated and self-service reporting options for every level of your organization. [Learn more here.]
How do I add an employee in the app?
⚙️ Step 1: Navigate to Users
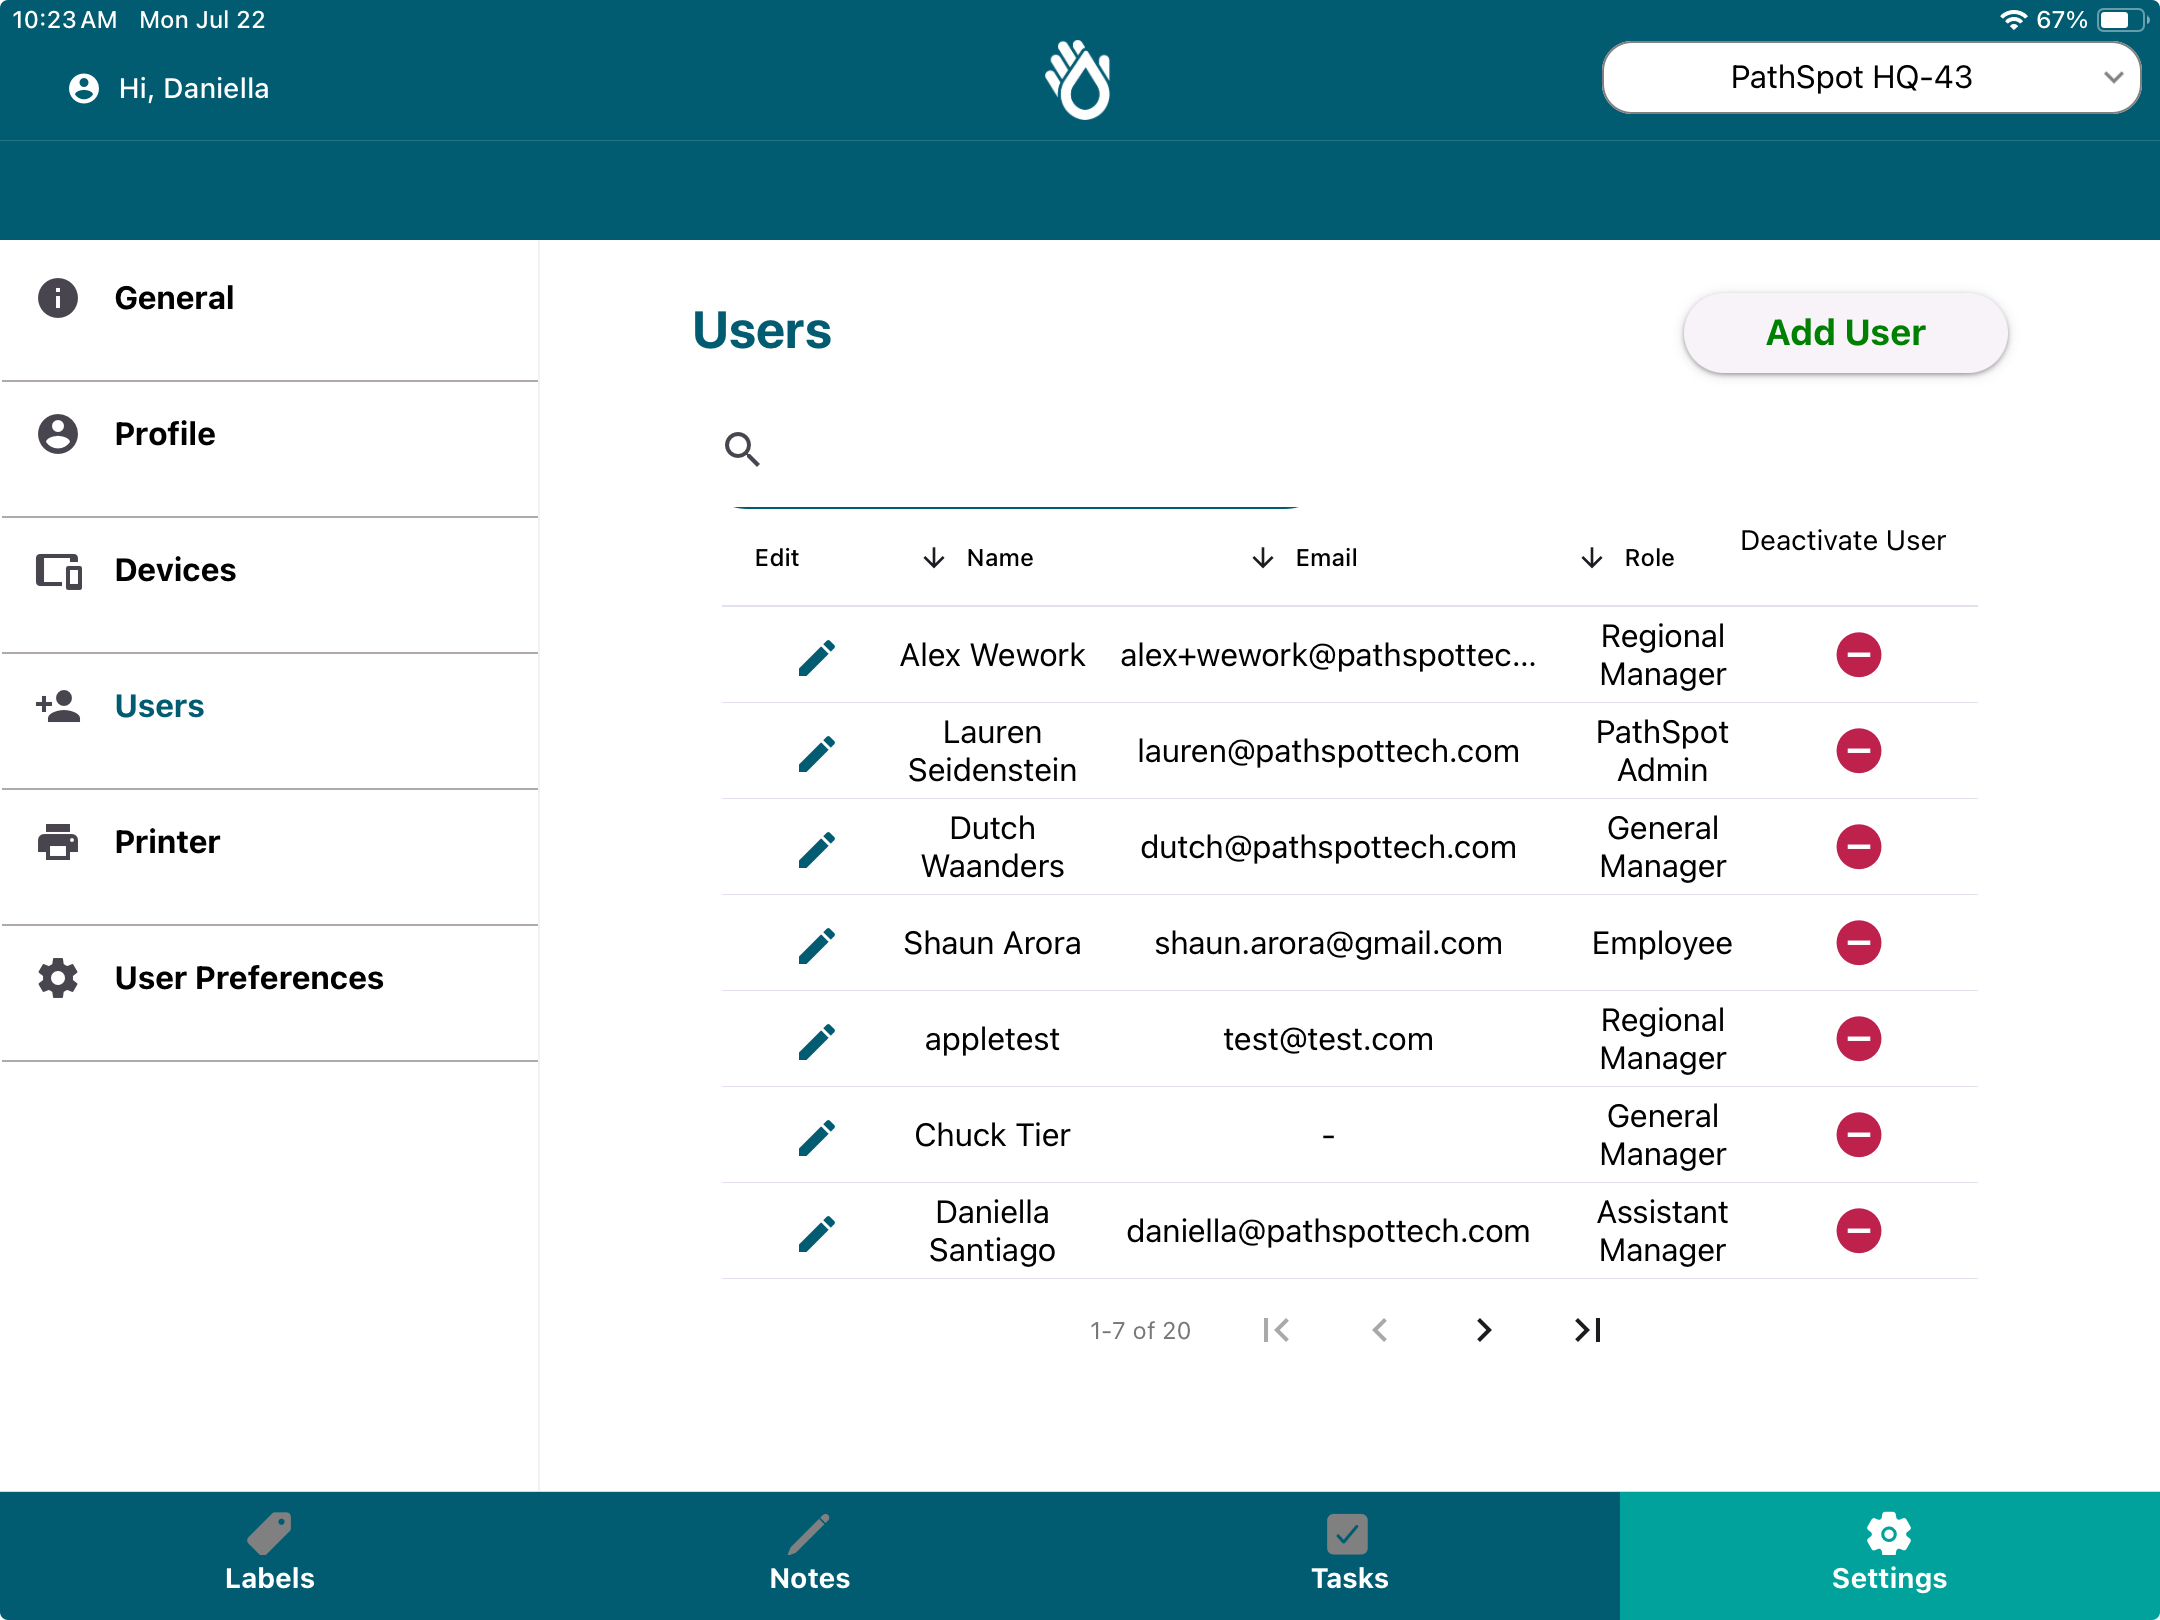
Go to Settings > Users. Here, you will see a list of all active employees at your location.
➕ Step 2: Add a User
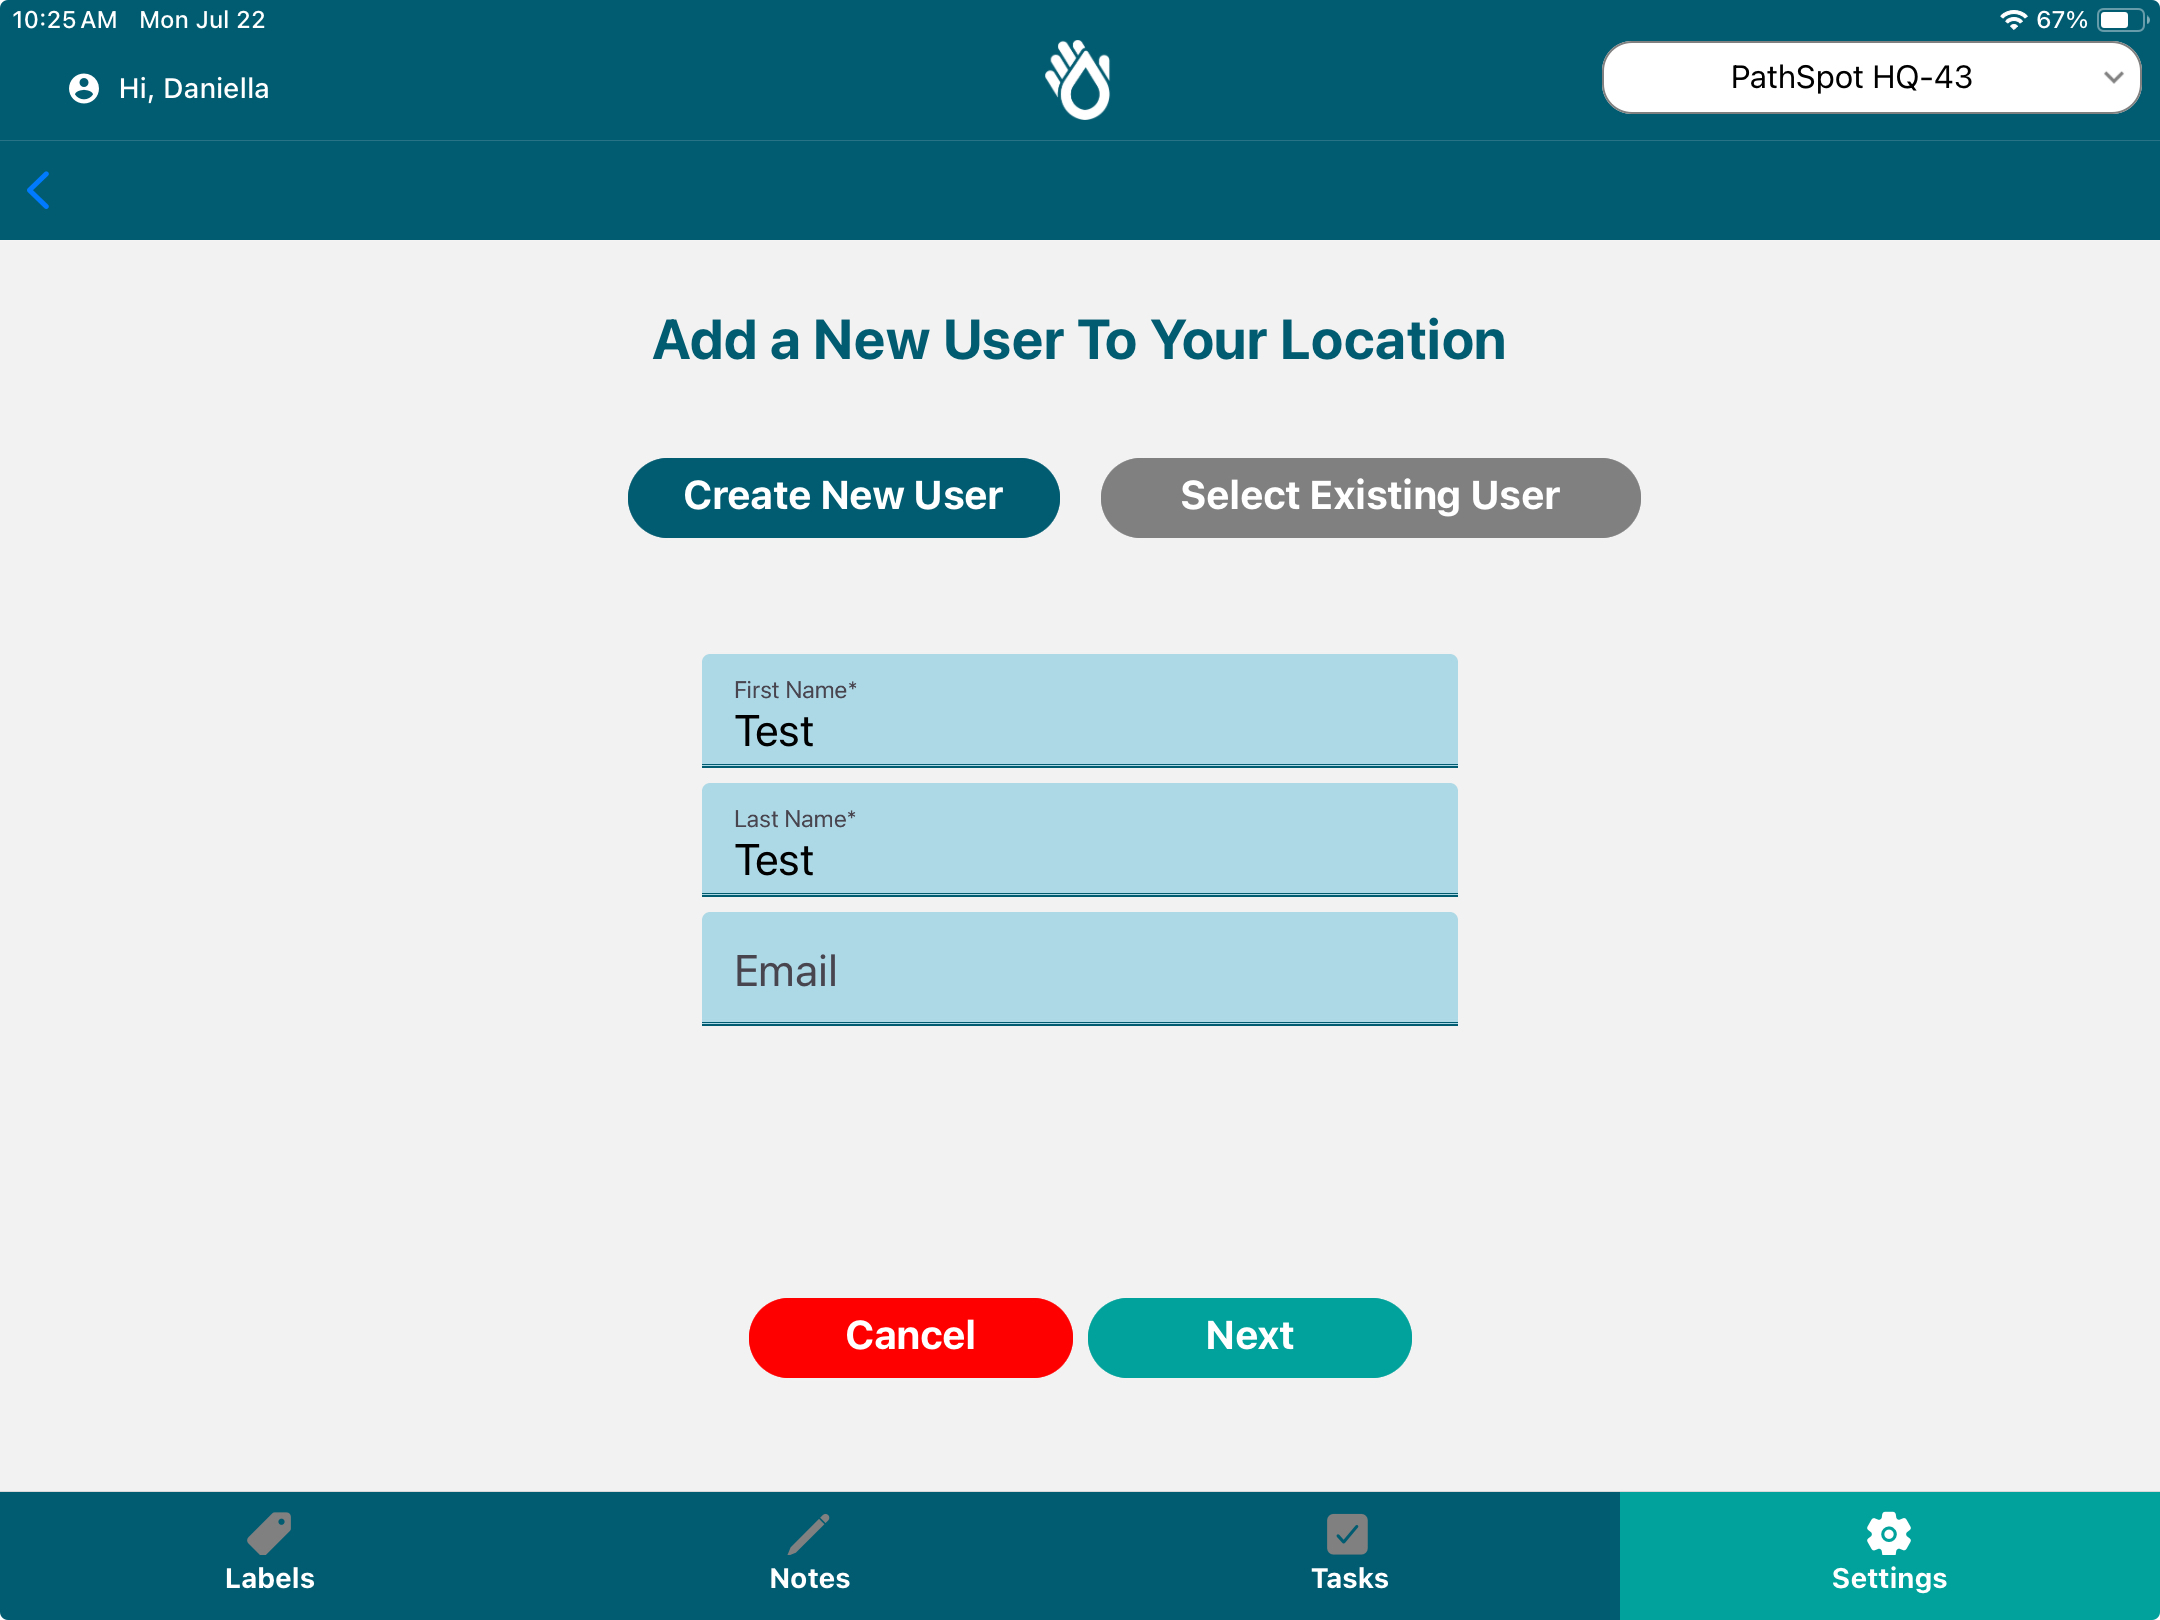
Click Add User in the top-right corner. This will take you to the Create App User page.
👤 Step 3: Choose a User Type
You will have two options:
1. Create a New User
Choose this option for employees who do not need to be created with an email address or who do not need access to the PathSpot Web Dashboard.
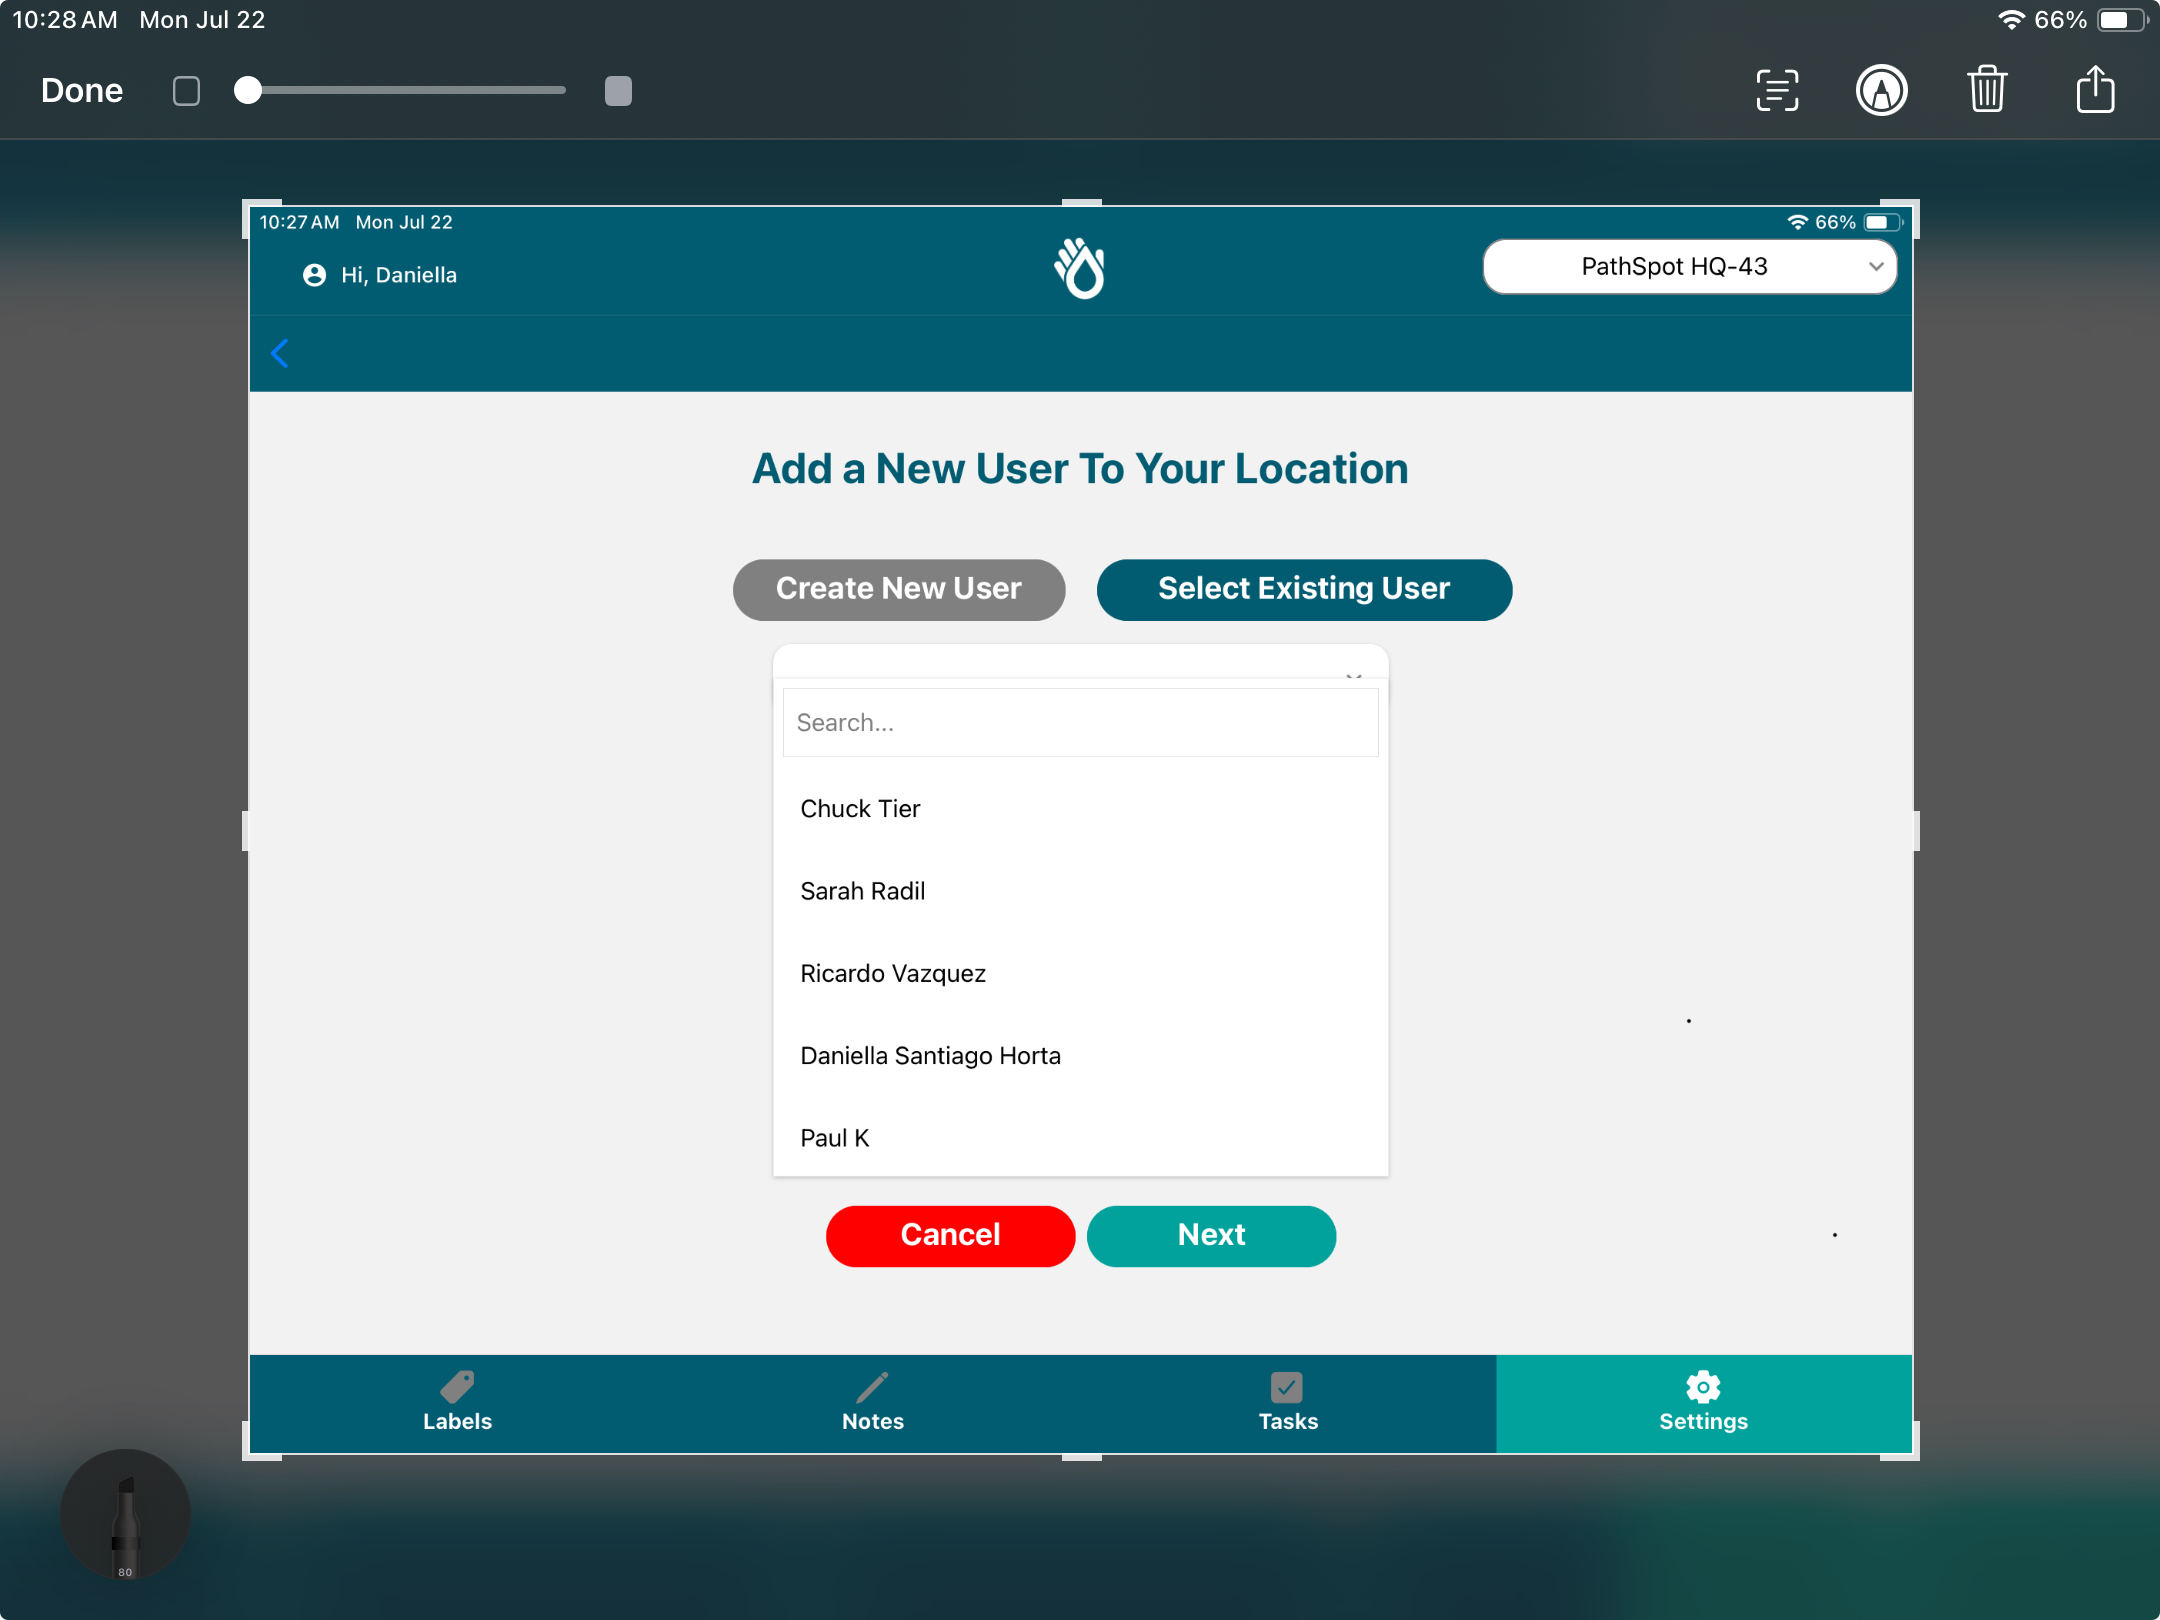
2. Select an Existing User
Choose this option if the employee already has access to the PathSpot WebApp but needs access to the PathSpot App.
🔐 Step 4: Select Permissions
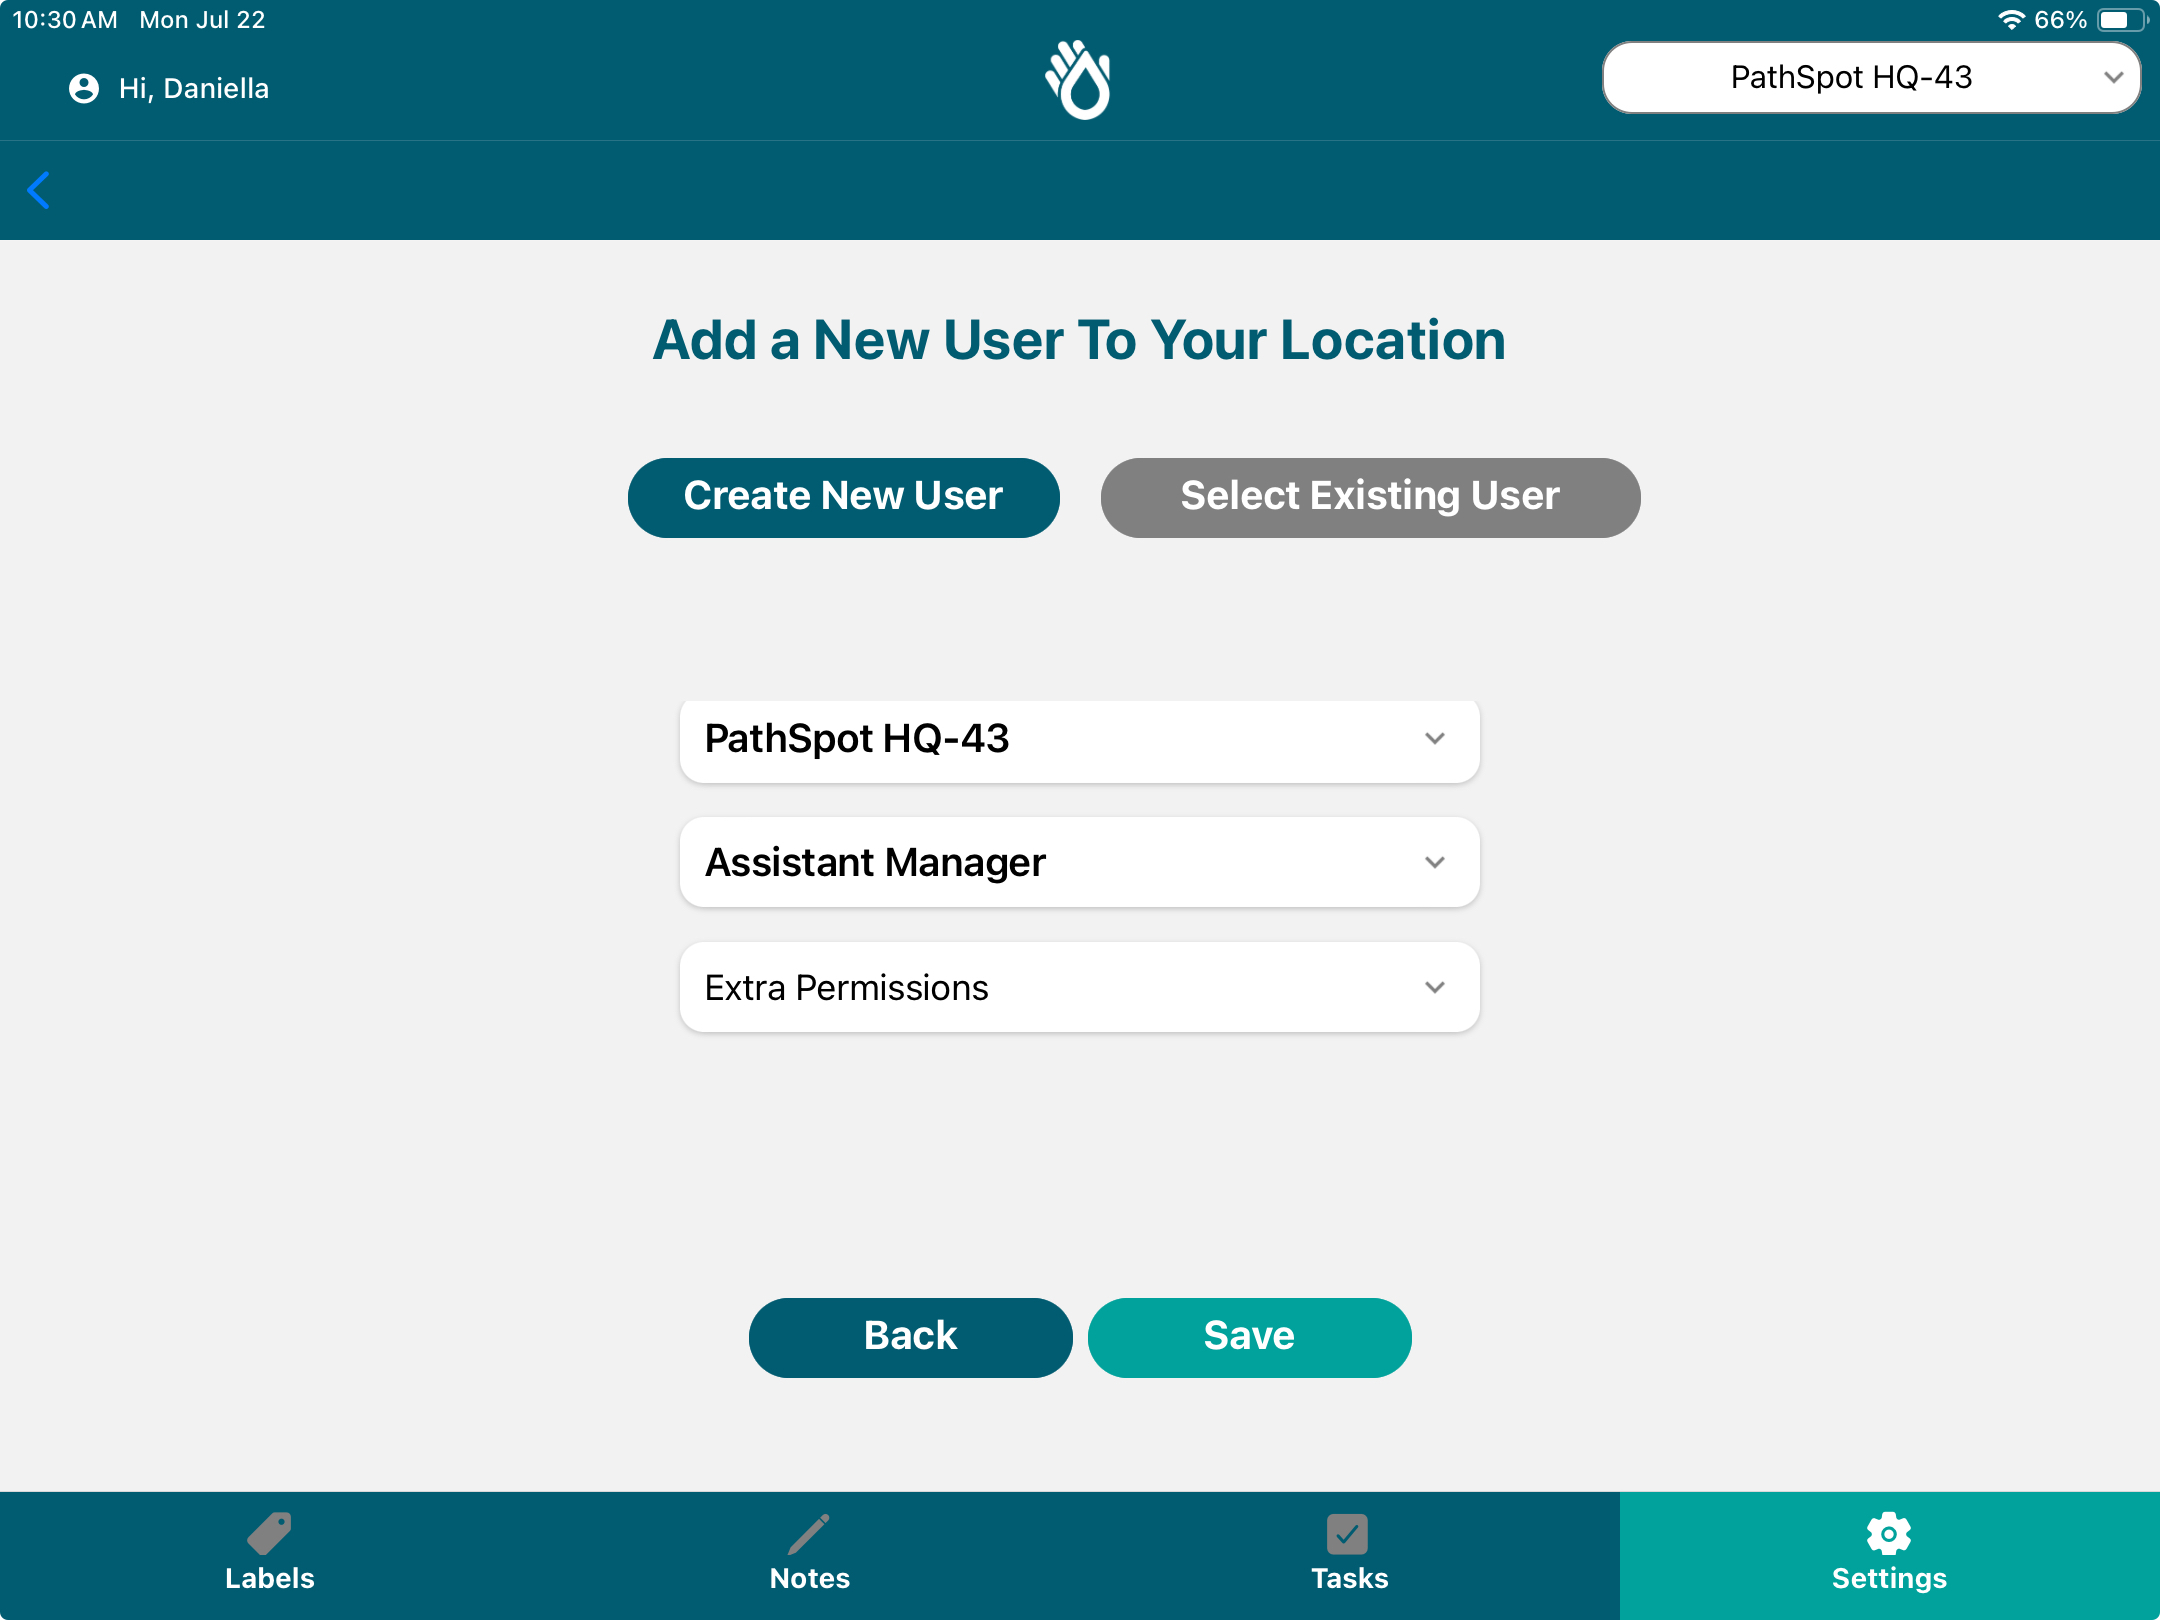
After clicking Next, you will be provided with a list of roles, each with a specific set of permissions. These permissions determine the employee’s access and functionality within the app.
Select the appropriate role/permissions and click Save.
✅ Step 5: Employee Login
The next time the employee logs in at that location, their name will appear in the login drop-down menu. Once they create their PIN/password, they will be ready to use the app.
How do grant mobile permissions to current dashboard only users?
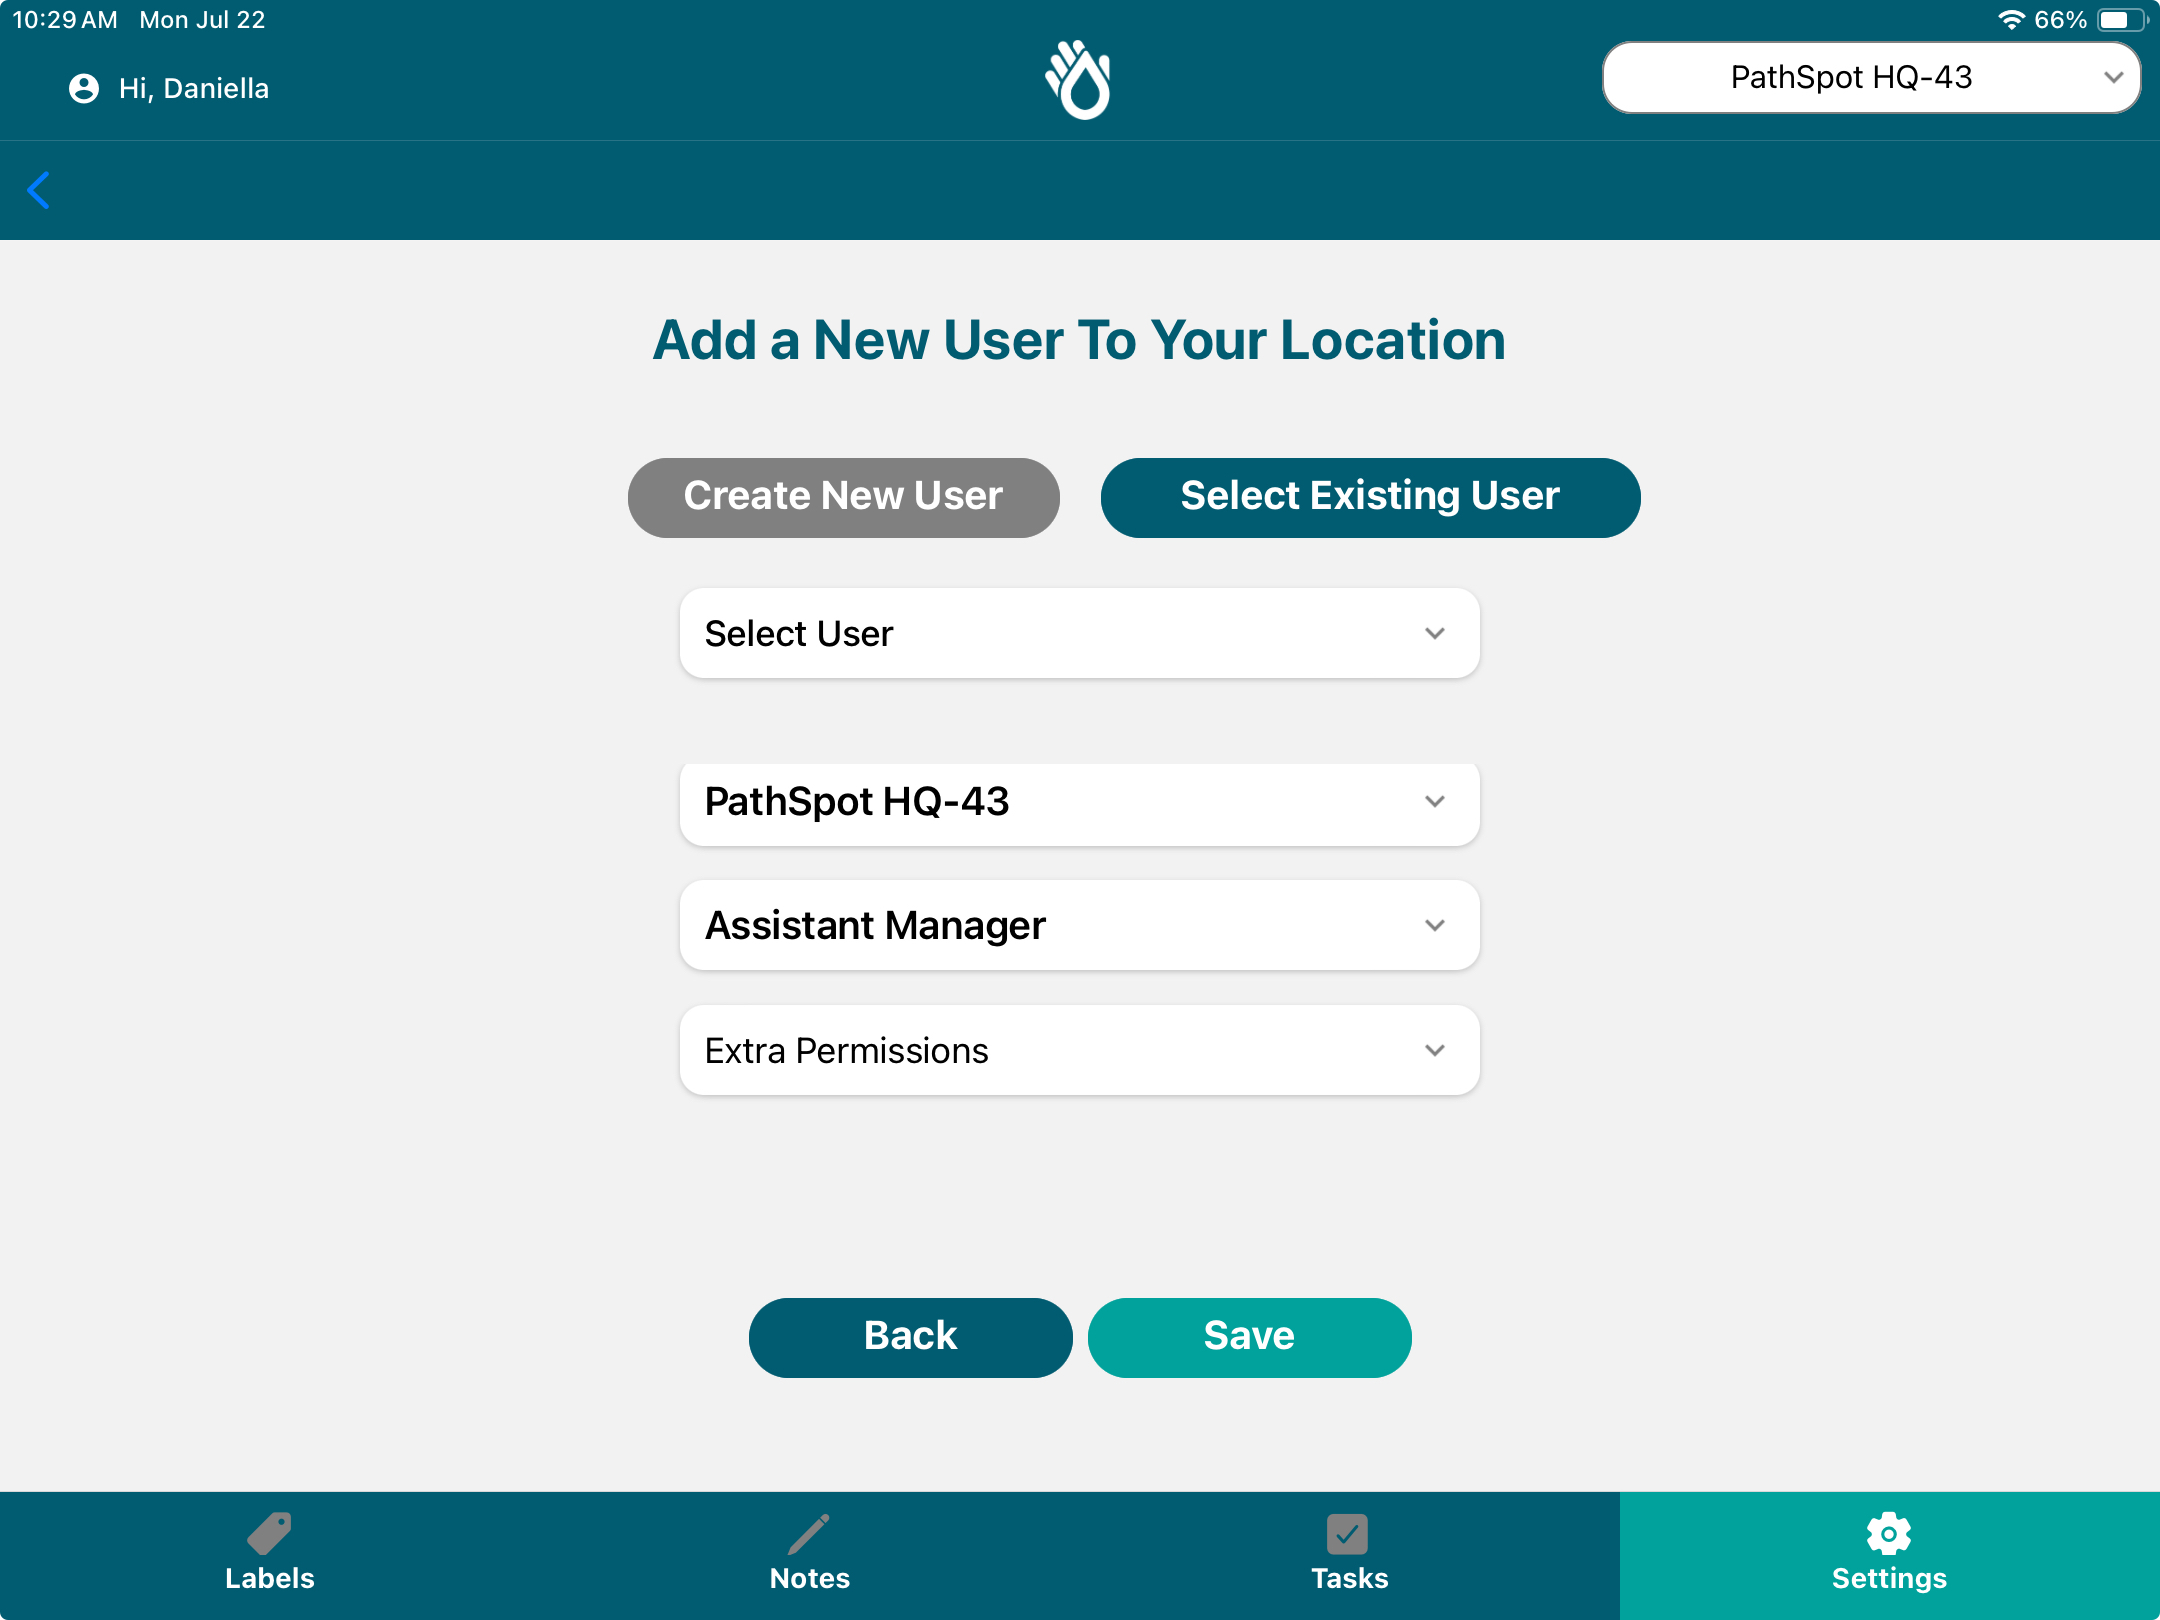
This option follows the same process as Create New Users, but it is intended for users who already have access to the PathSpot WebApp (dashboard) but do not yet have access to the PathSpot App.
🔎 Step 1: Select a User
Use the Select User drop-down menu to search for and choose from a list of existing PathSpot WebApp users.
➡️ Step 2: Complete the Setup
Once you select the user, follow the remaining steps exactly as you would when creating a new user.
How do you Remove or Migrate Employees?
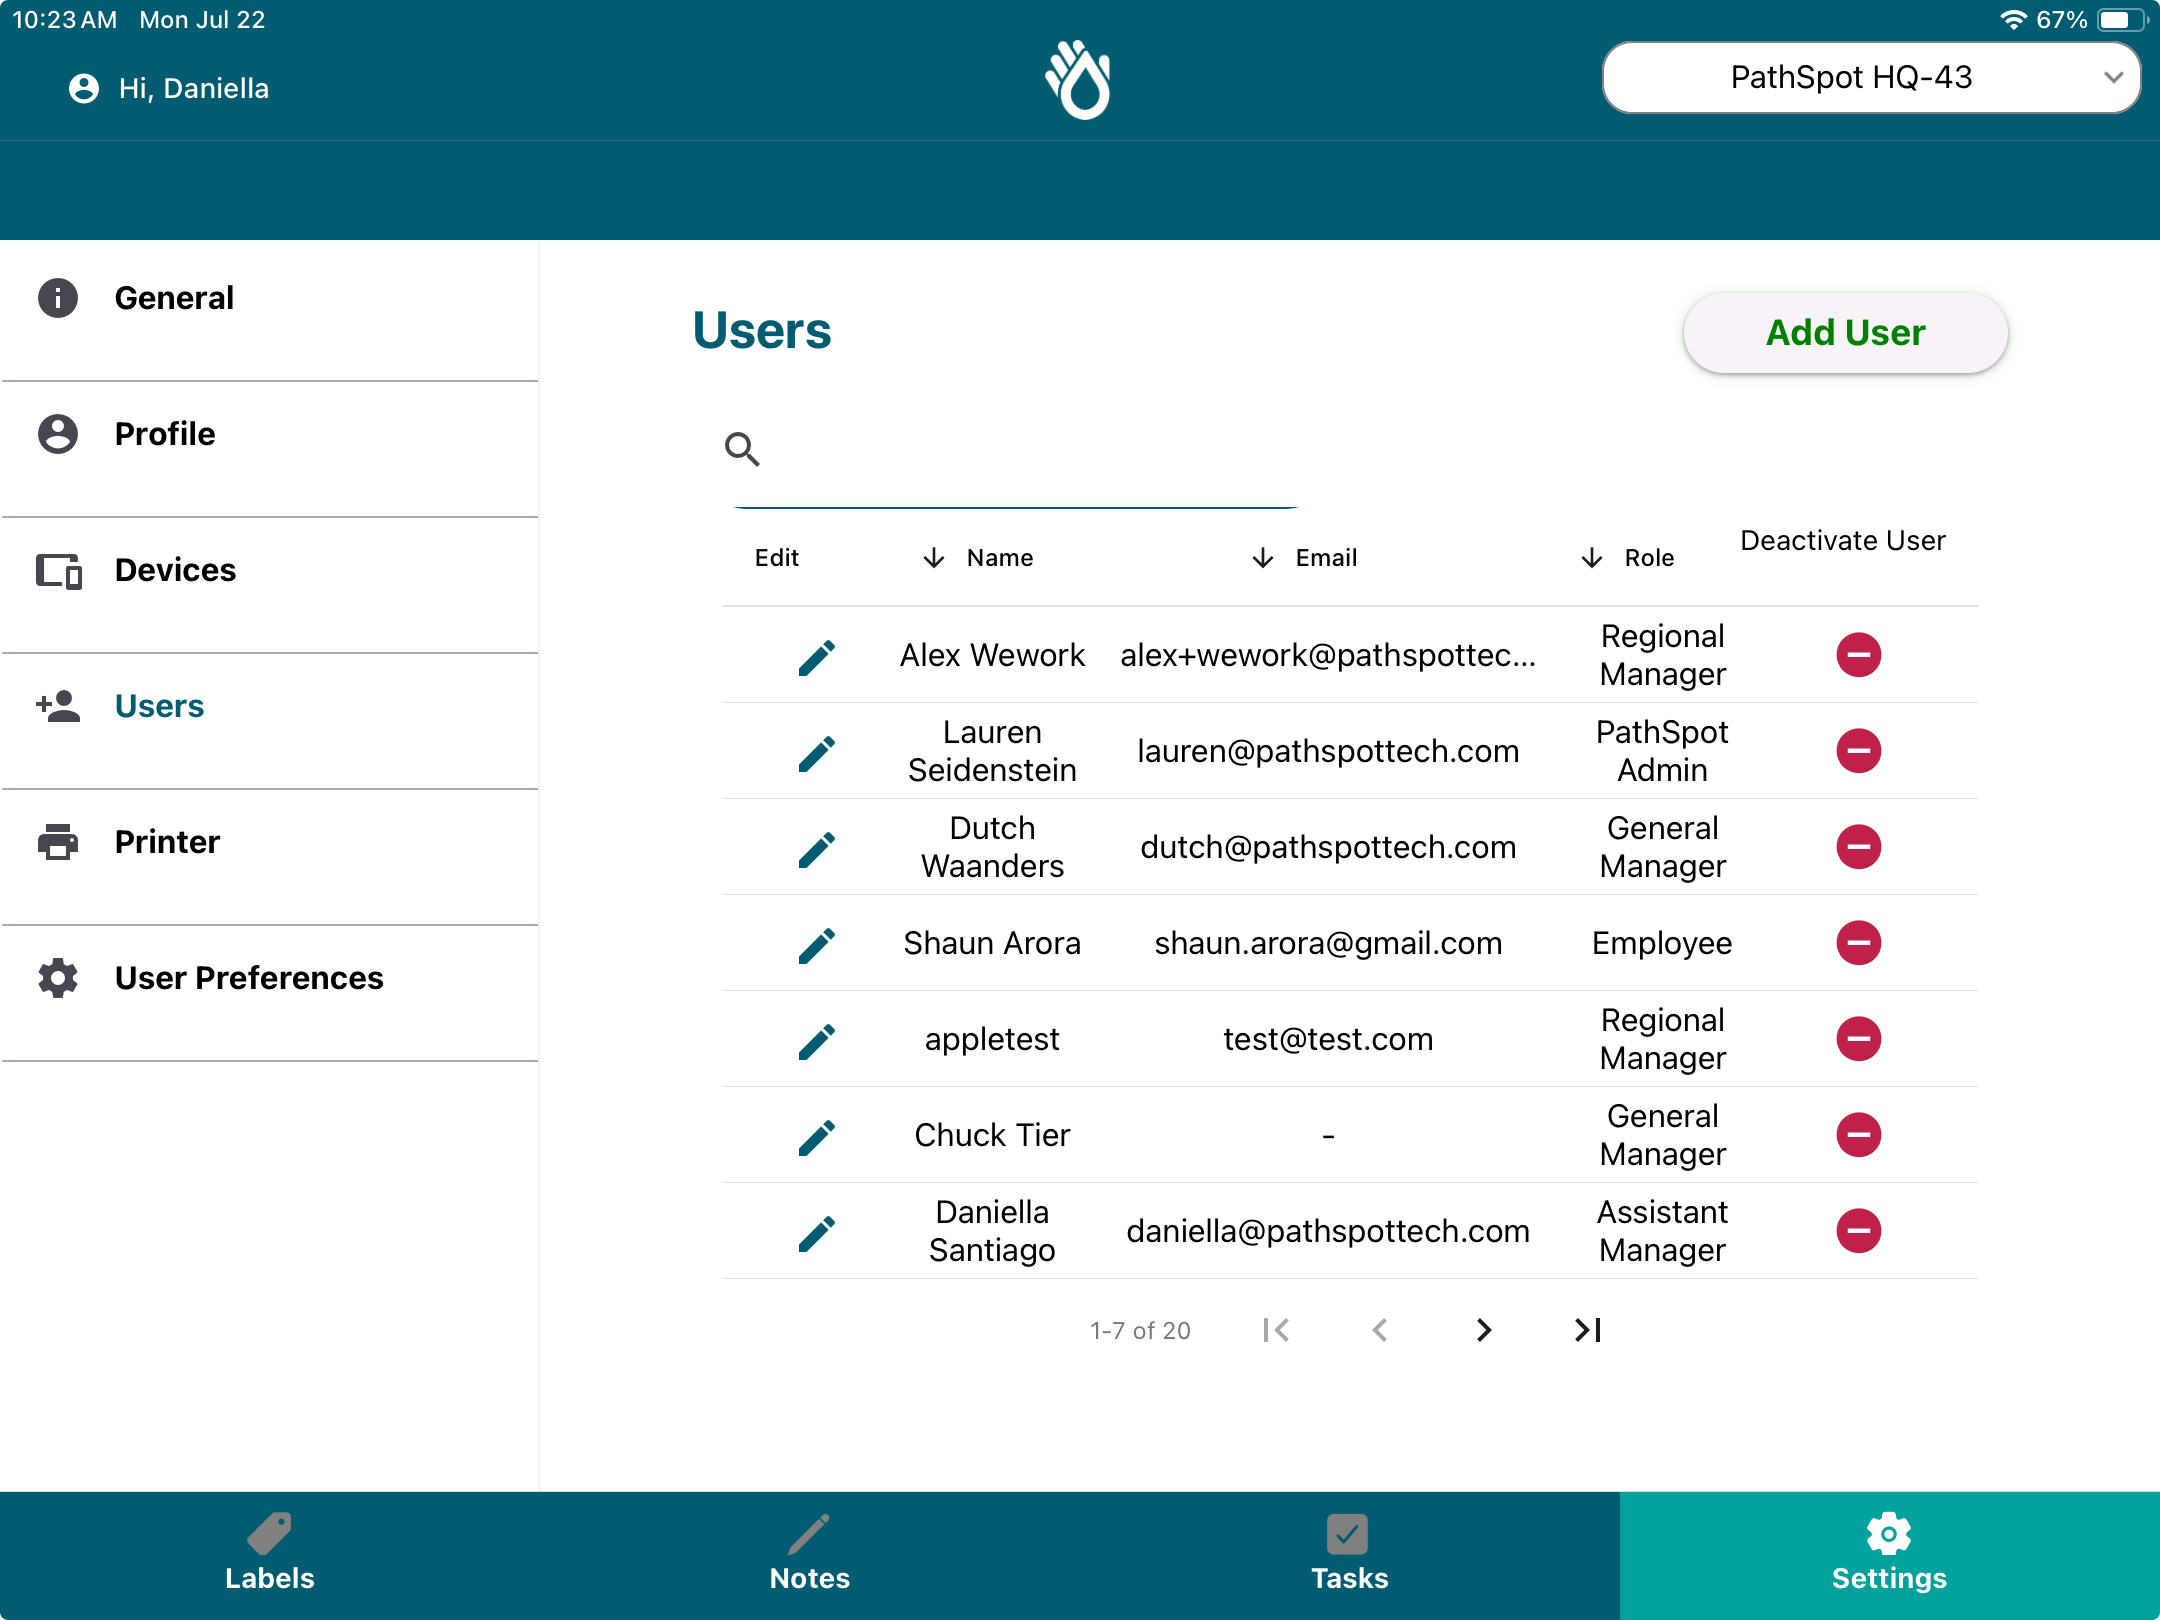
🗑️ Step 1: Remove an Employee
Go to Settings > Users.
👥 Step 2: Find the Employee
On the Active Users page, locate the employee you want to remove.
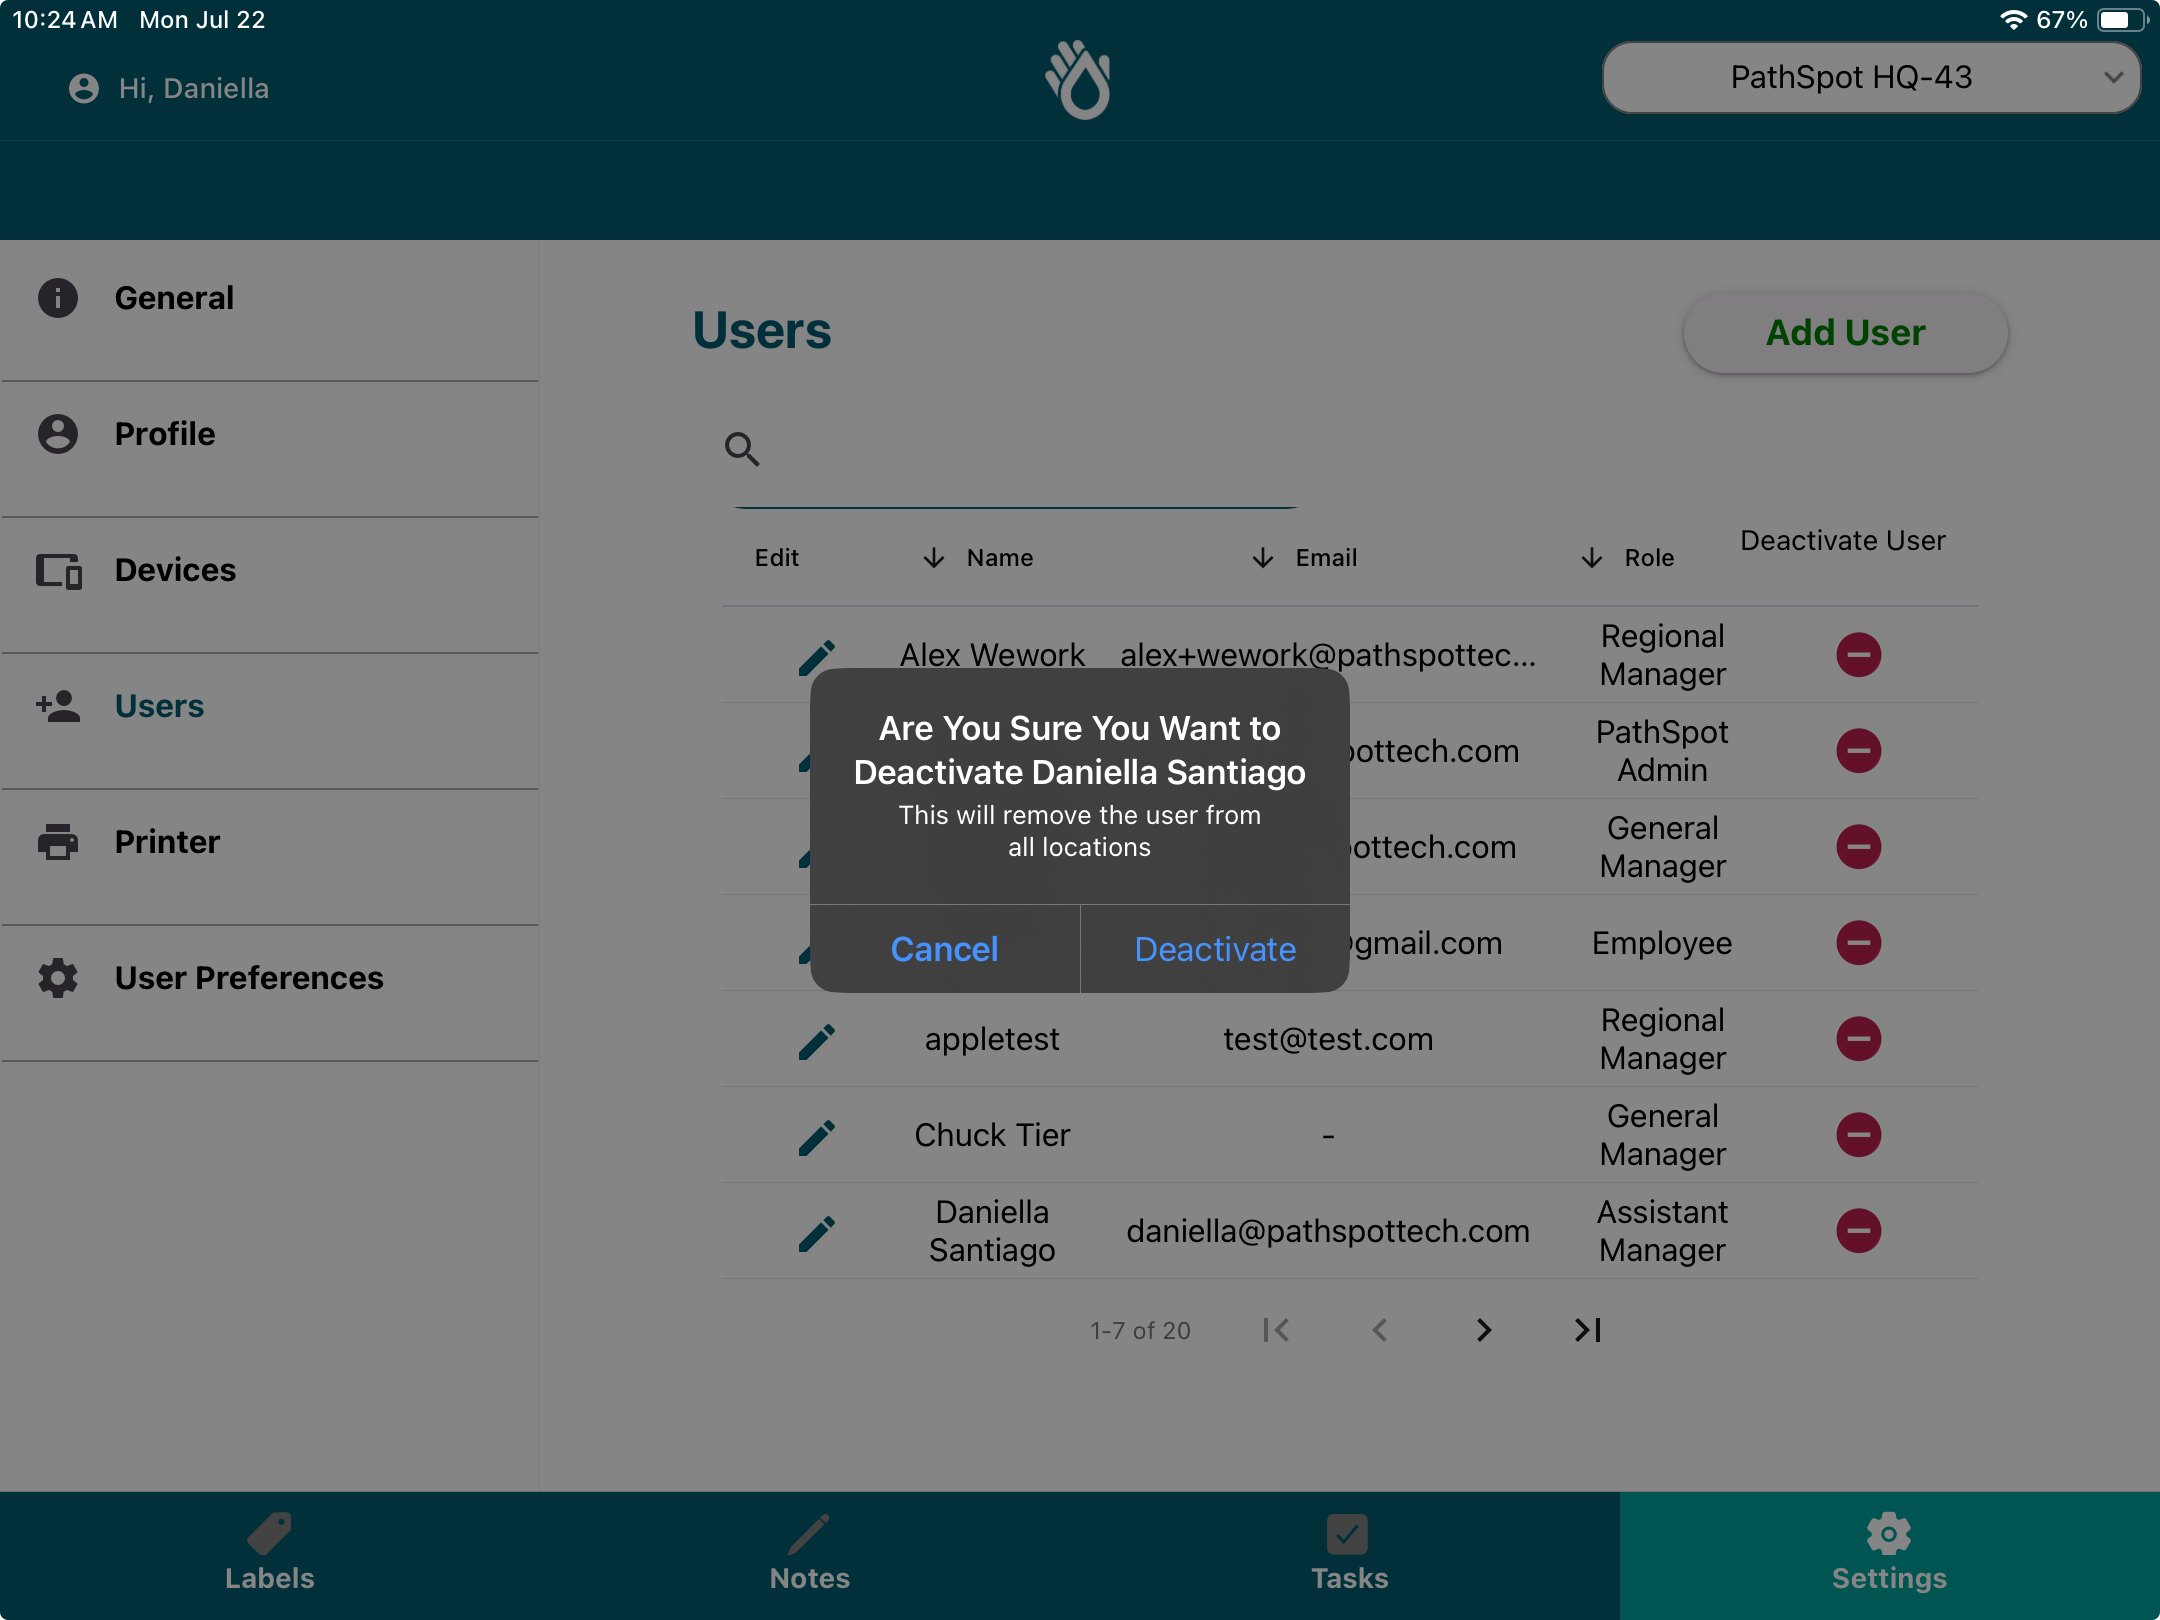
🚫 Step 3: Deactivate the Employee
Click the Deactivate User button to remove the employee from your current location.
📍 Step 4: Switch Locations
If you would like to add the same employee to a different location, use the location toggle in the top-right corner of the screen to select the new store location. With the appropriate permissions you can also execute these tasks on the PathSpot Dashboard (learn more here).
➕ Step 5: Add the Employee
Once you have switched locations, follow the Add User process outlined at the beginning of this article to add the employee to the new location.
How do you Remove or Migrate Employees?
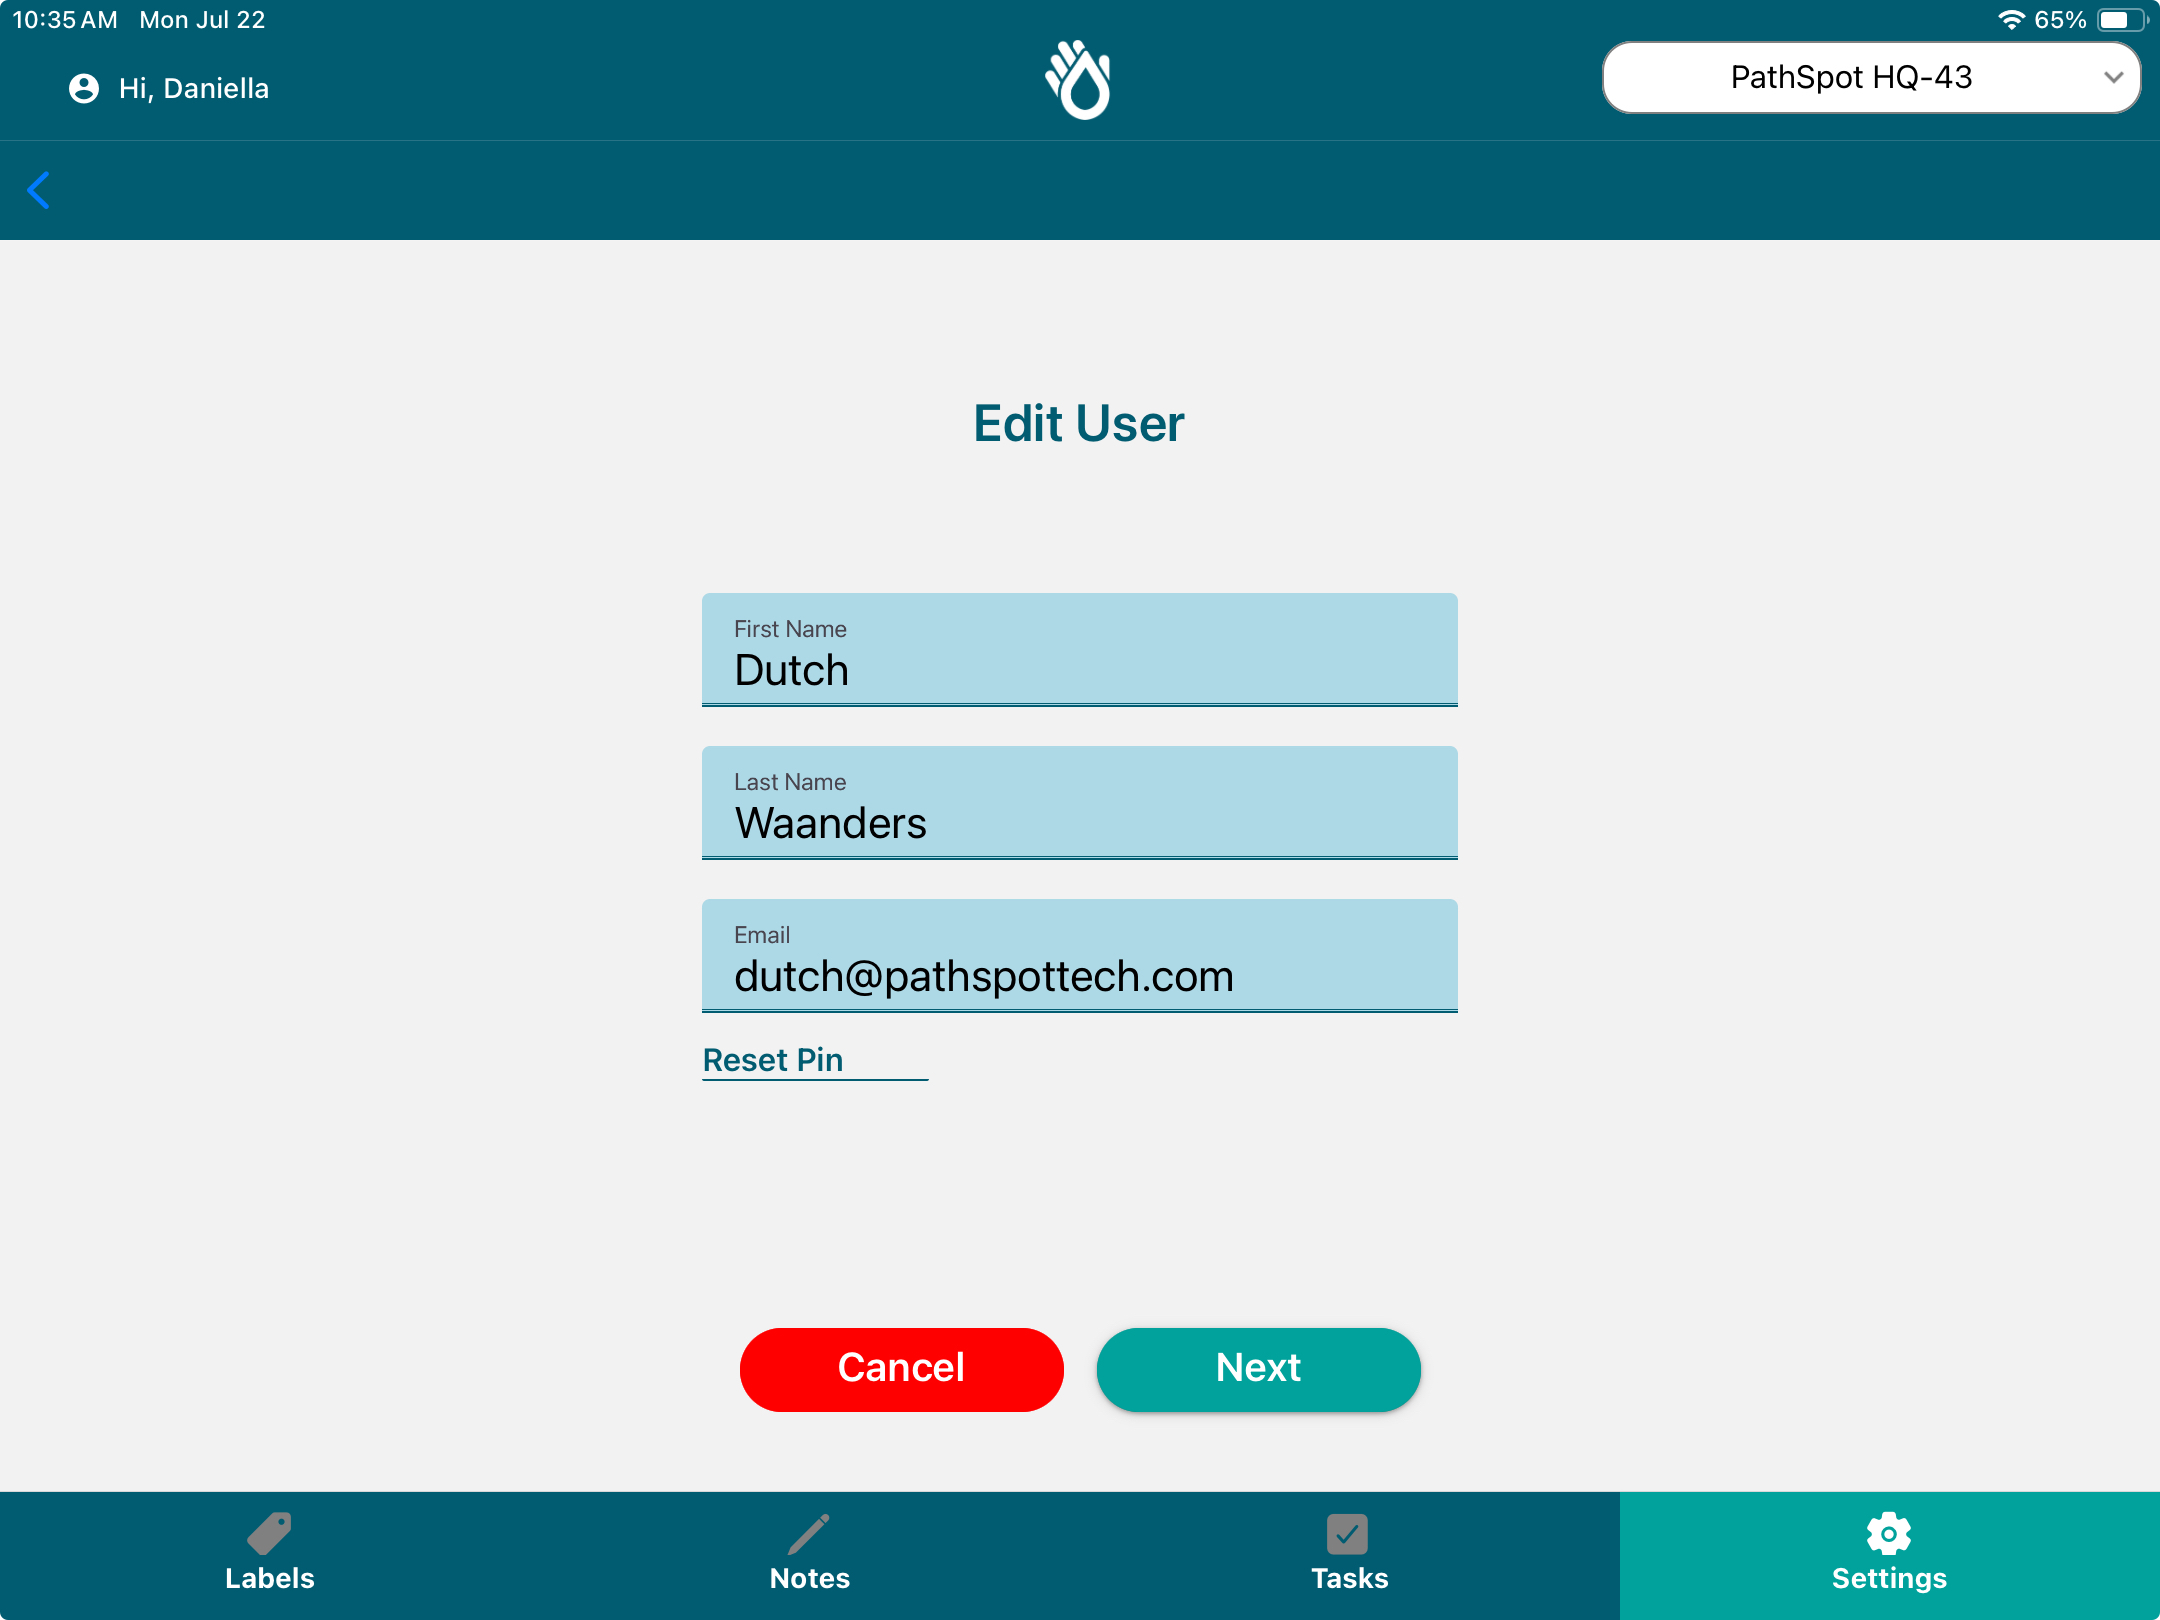
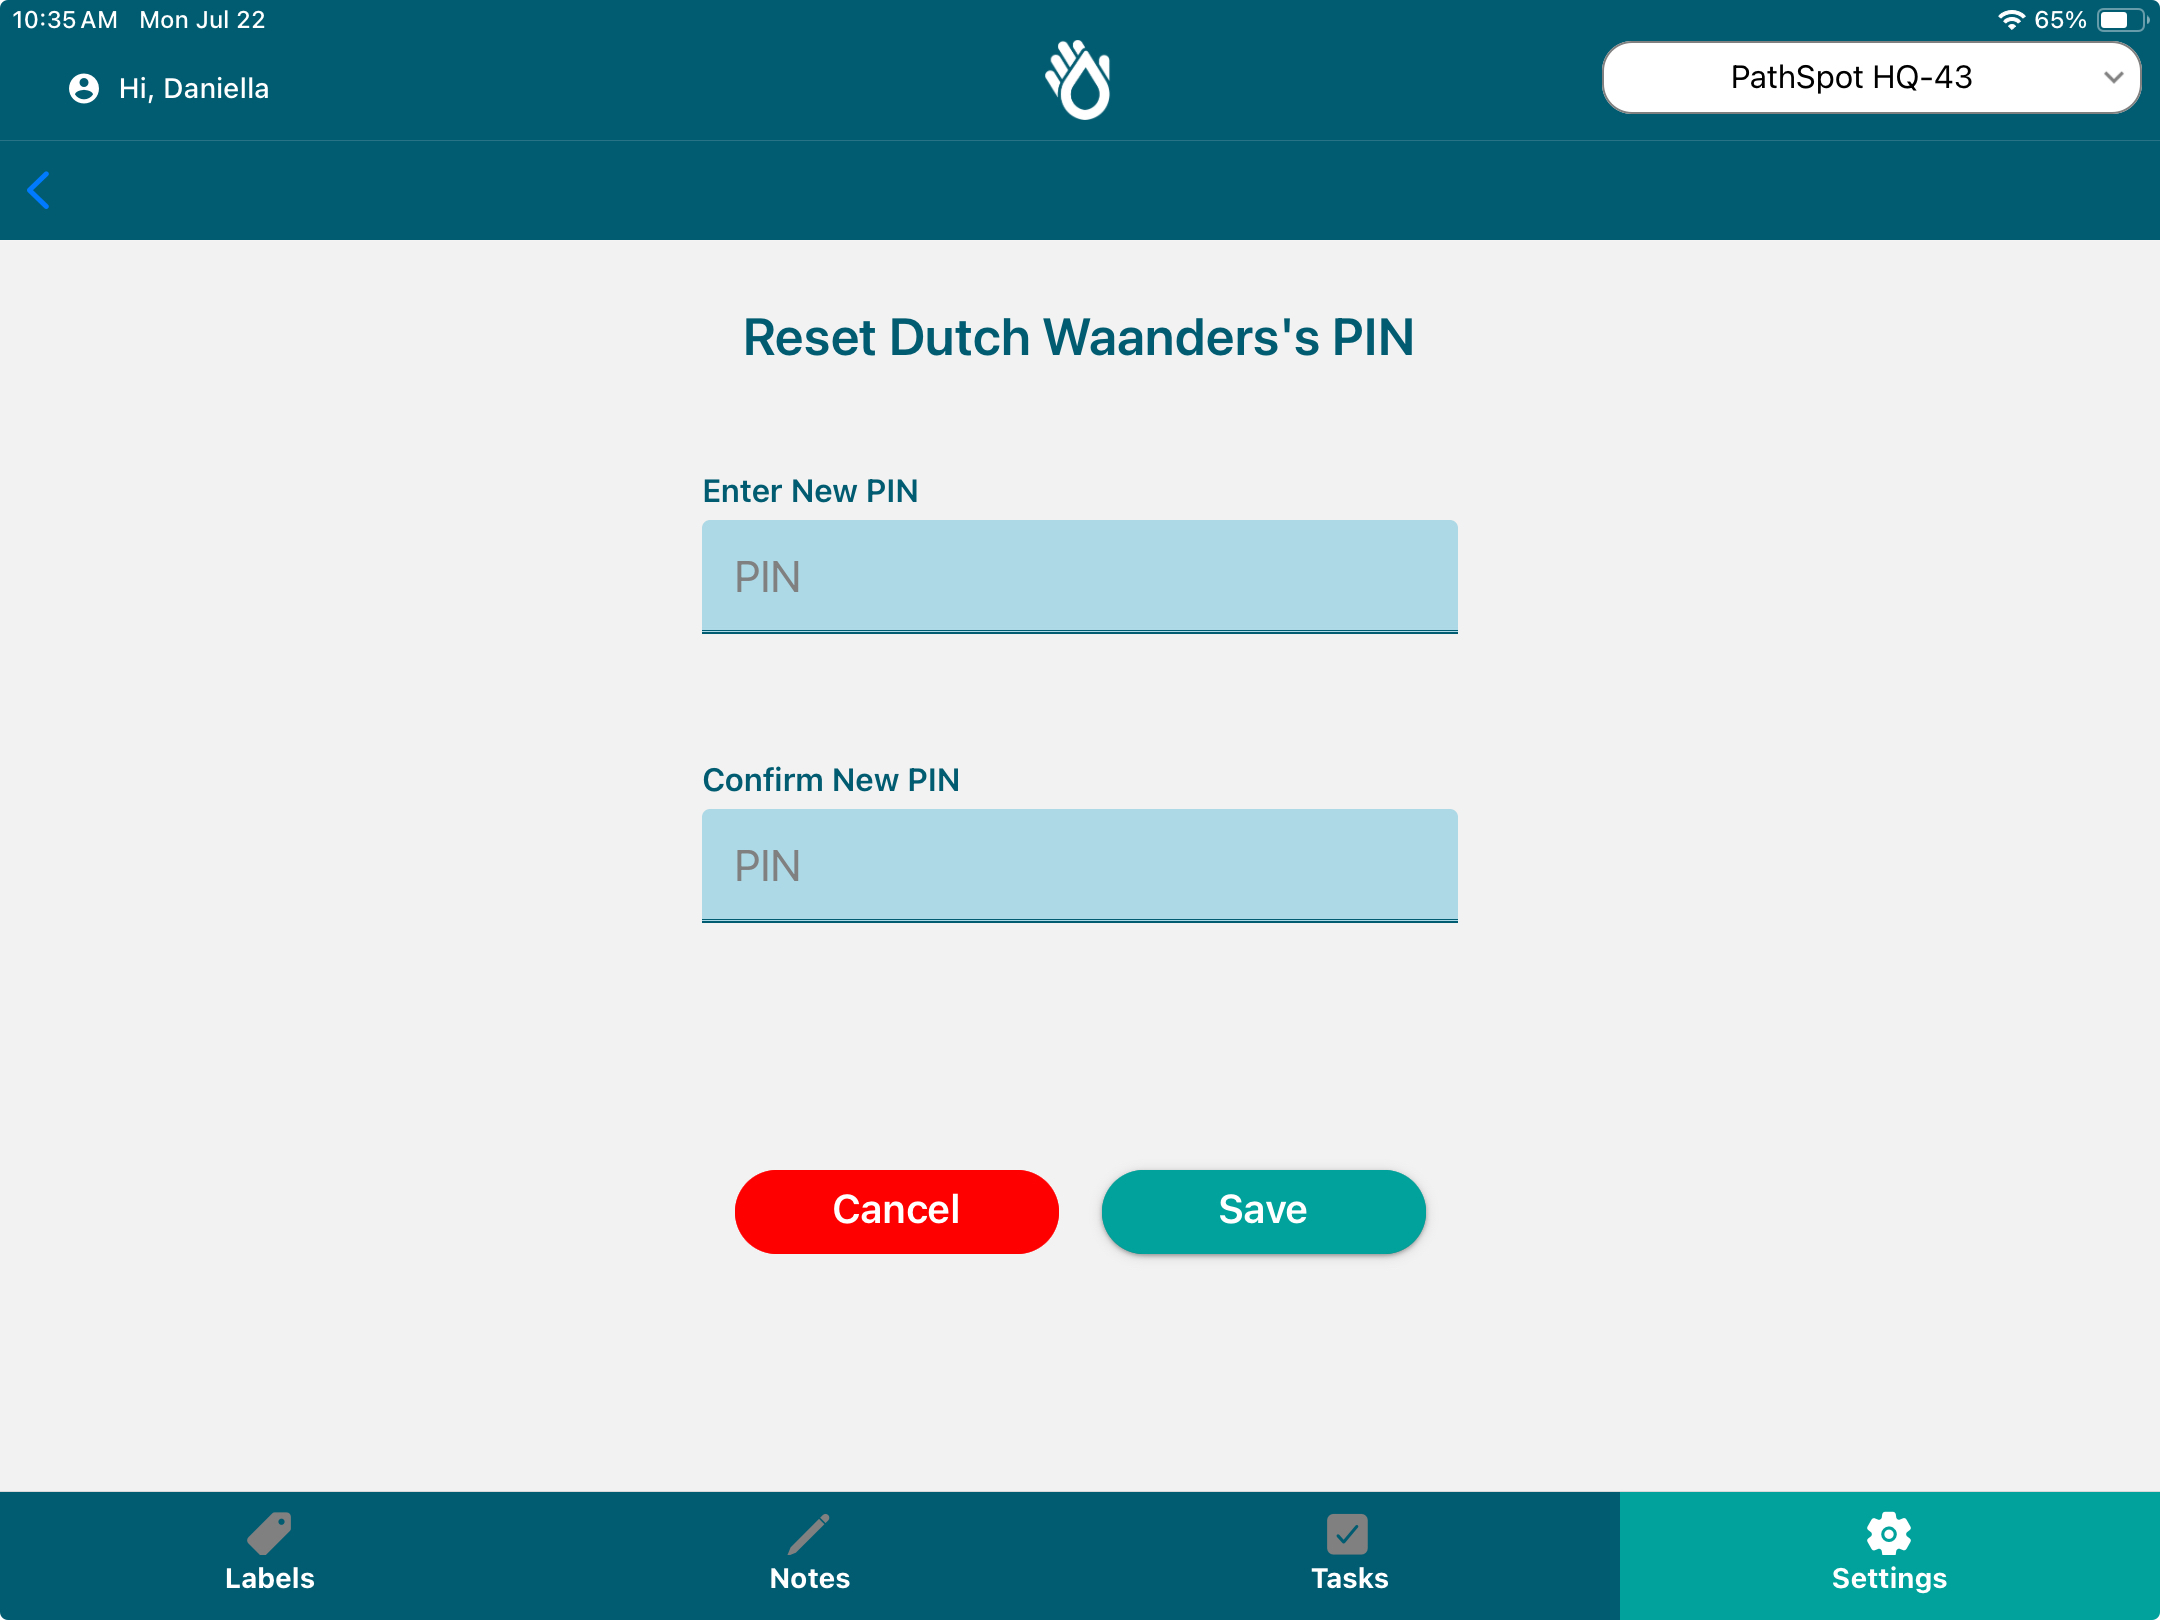
To edit an employee’s name or email or reset their PIN, follow the same steps as the previous functionalities:
⚙️ Step 1: Go to Settings > Users.
👤 Step 2: On the Active Employees page, locate the employee you want to update.
✏️ Step 3: Click the pencil icon in the leftmost column.
📝 Step 4: Make the necessary edits or reset the employee’s PIN.
💾 Step 5: Click Save to apply the changes. (video guidance here)
How do you change the Temperature Unit Celsius & Fahrenheit?
Settings > User Preferences
- Temperature Units: Celsius, Fahrenheit, or Both.
- Primary Display: When Both is selected, the primary display unit is used for temperature input, while the other unit is shown in parentheses.
How do you set your printer model selection + basic troubleshooting?
If you are trying to connect to a printer and it does not appear in the SafetySuite app or fails to connect, certain settings may need to be corrected. Follow the steps below to troubleshoot the connection.
1. Verify the Printer Brand and Connection Type
First, make sure the correct printer brand and connection type are selected in the SafetySuite mobile app.
For example, if you are using a Brother printer connected via Bluetooth, ensure that the Brother printer and the Bluetooth connection option are selected.
To verify this:
- Open the SafetySuite mobile app.
- Navigate to Settings and locate Printer Selection.
- Select the correct printer brand and connection type.
- Save or confirm your selection, if prompted.
Important: The selected printer model and connection type must match the printer you are using.
2. Verify App Permissions and Privacy Settings
Next, confirm that the SafetySuite app has the necessary permissions to discover and connect to the printer. The required permissions may vary depending on your device and operating system.
For iPad (iOS/iPadOS):
- Open the device's Settings and navigate to "Privacy & Security"
- Locate SafetySuite in the app list.
- Toggle Bluetooth On
For Android devices:
- Open Settings on the device.
- Navigate to Apps and select SafetySuite.
- Open Permissions.
- Allow the relevant permissions, such as Nearby devices and Bluetooth, if available and required by your Android version.
- If the app or printer requires location access for Bluetooth discovery on your Android version, ensure that permission is enabled as well.
Permission names and menu locations may vary depending on the device and operating system version.
3. Confirm the Printer Is Connected to the Device
Finally, verify that the printer is connected or paired with the device through the device's system settings.
- Open the device's Settings.
- Navigate to Bluetooth or the applicable connection settings.
- Confirm that Bluetooth is enabled and that the correct printer appears in the list of available or paired devices.
- If the printer is not listed, ensure that it is powered on, within range, and in pairing mode, if required.
- If necessary, disconnect and reconnect the printer, following the manufacturer's instructions.
Note: Some printers connect through Wi-Fi or another connection method rather than Bluetooth. Make sure you follow the connection process appropriate for your printer model.
4. Restart and Test the Connection
Once you have verified the settings and permissions:
- Close and reopen the SafetySuite app.
- Turn the printer off and back on.
- Confirm that the correct printer and connection type are still selected in the app.
- Attempt to connect to the printer again and perform a test print, if available.
If the issue persists, document the printer brand and model, the device being used (iPad or Android), the connection type (Bluetooth or Wi-Fi), and any error message displayed. This information will help identify the cause of the connection issue.